m (Category) |
0001 (Message Wall | contribs) (Just as well don't forget to add underpants irl) |
||
| (8 intermediate revisions by 2 users not shown) | |||
| Line 1: | Line 1: | ||
| + | [[File:22-039_18.jpg|thumb|London]] |
||
| − | Located in a country in Western [[Europe]]. London is the capital of [[England]] and of the United Kingdom. Also home to the renowned British Royal Family. |
||
| + | Located in a country in Western [[Europe]]. London is the capital of [[England]] and of the United Kingdom. |
||
London is present only in [[Shadow Hearts]], and contains just three areas the party can travel to. |
London is present only in [[Shadow Hearts]], and contains just three areas the party can travel to. |
||
| − | [[File:22-039_18.jpg|thumb|London]] |
||
== Old Castle Street == |
== Old Castle Street == |
||
| − | + | Busy London town situated near the River Thames. The area also contains the home of the London Rats. This is the place where Yuri and the party start their travels in Britain. |
|
| − | |||
| − | ===Enemies=== |
||
| + | ===Items=== |
||
| − | *None |
||
| + | ====Shop==== |
||
| − | ===Items, Equipment and Valuables=== |
||
| + | {|width="60%" style="border:solid 2px black; -moz-border-radius:10px; float:centre;" |
||
| − | ====Items==== |
||
| + | |colspan="4" style="text-align:center; color:white; background:DarkSlateGray; -moz-border-radius-topleft: 1em; -moz-border-radius-topright: 1em;"|<big>'''Tight-lipped Merchant'''<big> </big></big> |
||
| − | *[[Lottery Ticket]] [x3] |
||
| − | *[[Mana Extract]] |
||
| − | *[[Thera Extract]] |
||
| − | *[[Soul Benediction]] |
||
| − | *[[Talisman of Purity]] |
||
| − | *[[Seals#Seal of Force|Seal of Force]] |
||
| − | *[[Kirin Scale]] |
||
| − | ====Equipment==== |
||
| − | *[[Demon Earrings]] |
||
| − | *[[Crucifix]] |
||
| − | *[[Warning Device]] |
||
| − | ====Valuables==== |
||
| − | *[[Sun Card]] |
||
| − | ===Shopping=== |
||
| − | ====Tight-lipped Merchant==== |
||
| − | {|border="1" cellpadding="5" |
||
|- |
|- |
||
| + | |style="border:solid 2px black; style="text-align:center; color:white; background:DarkSlateGray"|'''Item''' |
||
| − | ! scope="col" | Item |
||
| + | |style="border:solid 2px black; style="text-align:center; color:white; background:DarkSlateGray"|'''Price''' |
||
| − | ! scope="col" | Price |
||
|- |
|- |
||
| + | |style="border:solid 6px black; style="text-align:center; color:white; background:SlateGray"| [[File:Alicebookslogo.png]] '''[[Ever Bible|<span style="color:white;">Ever Bible</span>]]''' |
||
| − | |[[Alice's Books#Ever-Bible|Ever-Bible]] |
||
| + | |style="color:black; style="text-align:center; background:white"|9800 |
||
| − | |9800 |
||
| + | |style="border:solid 6px black; style="text-align:center; color:white; background:SlateGray"|[[File:Sh1acessorylogo.png]] '''[[Voodoo Doll|<span style="color:white;">Voodoo Doll</span>]]''' |
||
| − | |[[Replacement Man|Voodoo Doll]] |
||
| + | |style="color:black; style="text-align:center; background:white"|5200 |
||
| − | |5200 |
||
|- |
|- |
||
| + | |style="border:solid 6px black; style="text-align:center; color:white; background:SlateGray"| [[File:Zhuzhenstaves.png]] '''[[Oracle Staff|<span style="color:white;">Oracle Staff</span>]]''' |
||
| − | |[[Zhuzhen's Staves#Oracle's Staff|Oracle's Staff]] |
||
| + | |style="color:black; style="text-align:center; background:white"|8600 |
||
| − | |8600 |
||
| + | |style="border:solid 6px black; style="text-align:center; color:white; background:SlateGray"|[[File:Sh1acessorylogo.png]] '''[[Jade Lariat|<span style="color:white;">Jade Lariat</span>]]''' |
||
| − | |[[Jade Lariat]] |
||
| + | |style="color:black; style="text-align:center; background:white"|5050 |
||
| − | |5050 |
||
|- |
|- |
||
| + | |style="border:solid 6px black; style="text-align:center; color:white; background:SlateGray"| [[File:Keithswordlogo.png]] '''[[Silver Crescent Sword|<span style="color:white;">Silver Crescent Sword</span>]]'''{{Foot|"Sword of the Berseker" at a cost of 9900 cash, if playing the Japanese version}} |
||
| − | |[[Keith's Swords#Silver Crescent Sword|SilverCrscntSwd]] |
||
| + | |style="color:black; style="text-align:center; background:white"|8300 |
||
| − | |8300 |
||
| + | |style="border:solid 6px black; style="text-align:center; color:white; background:SlateGray"|[[File:Sh1acessorylogo.png]] '''[[Coral Lariat|<span style="color:white;">Coral Lariat</span>]]''' |
||
| − | |[[Coral Lariat]] |
||
| + | |style="color:black; style="text-align:center; background:white"|5050 |
||
| − | |5050 |
||
|- |
|- |
||
| + | |style="border:solid 6px black; style="text-align:center; color:white; background:SlateGray"| [[File:Sh1armourmalelogo.png|Male only armour]] '''[[Red Leather Jacket|<span style="color:white;">Red Leather Jacket</span>]]''' |
||
| − | |[[Red Leather Jacket|RedLeatherJacket]] |
||
| + | |style="color:black; style="text-align:center; background:white"|8800 |
||
| − | |8800 |
||
| + | |style="border:solid 6px black; style="text-align:center; color:white; background:SlateGray"|[[File:Sh1itemlogo.png]] '''[[Thera Seed|<span style="color:white;">Thera Seed</span>]]''' |
||
| − | |[[Thera Seed]] |
||
| + | |style="color:black; style="text-align:center; background:white"|120 |
||
| − | |120 |
||
|- |
|- |
||
| + | |style="border:solid 6px black; style="text-align:center; color:white; background:SlateGray"| [[File:Sh1armourfemalelogo.png|Female only armour]] '''[[Jasper Cape|<span style="color:white;">Jasper Cape</span>]]''' |
||
| − | |[[Jasper Cape]] |
||
| + | |style="color:black; style="text-align:center; background:white"|9200 |
||
| − | |9200 |
||
| + | |style="border:solid 6px black; style="text-align:center; color:white; background:SlateGray"|[[File:Sh1itemlogo.png]] '''[[Thera Root|<span style="color:white;">Thera Root</span>]]''' |
||
| − | |[[Thera Root]] |
||
| + | |style="color:black; style="text-align:center; background:white"|300 |
||
| − | |300 |
||
|- |
|- |
||
| + | |style="border:solid 6px black; style="text-align:center; color:white; background:SlateGray"| [[File:Sh1acessorylogo.png]][[File:Maleonly.png|Male Only]] '''[[Headgear|<span style="color:white;">Headgear</span>]]''' |
||
| − | |[[Headgear]] |
||
| + | |style="color:black; style="text-align:center; background:white"|5400 |
||
| − | |5400 |
||
| + | |style="border:solid 6px black; style="text-align:center; color:white; background:SlateGray"|[[File:Sh1itemlogo.png]] '''[[Mana Seed|<span style="color:white;">Mana Seed</span>]]''' |
||
| − | |[[Mana Seed]] |
||
| + | |style="color:black; style="text-align:center; background:white"|300 |
||
| − | |300 |
||
|- |
|- |
||
| + | |style="border:solid 6px black; style="text-align:center; color:white; background:SlateGray"| [[File:Sh1acessorylogo.png]][[File:Femaleonly.png|Female Only]] '''[[Circlet|<span style="color:white;">Circlet</span>]]''' |
||
| − | |[[Circlet]] |
||
| + | |style="color:black; style="text-align:center; background:white"|5800 |
||
| − | |5800 |
||
| + | |style="border:solid 6px black; style="text-align:center; color:white; background:SlateGray"|[[File:Sh1itemlogo.png]] '''[[Mana Root|<span style="color:white;">Mana Root</span>]]''' |
||
| − | |[[Mana Root]] |
||
| + | |style="color:black; style="text-align:center; background:white"|500 |
||
| − | |500 |
||
|- |
|- |
||
| + | |style="border:solid 6px black; style="text-align:center; color:white; background:SlateGray"| [[File:Sh1acessorylogo.png]][[File:Femaleonly.png|Female Only]] '''[[Charming Pareo|<span style="color:white;">Charming Pareo</span>]]''' |
||
| − | |[[Charming Pareo]] |
||
| + | |style="color:black; style="text-align:center; background:white"|5500 |
||
| − | |5500 |
||
| + | |style="border:solid 6px black; style="text-align:center; color:white; background:SlateGray"|[[File:Sh1itemlogo.png]] '''[[Pure Leaf|<span style="color:white;">Pure Leaf</span>]]''' |
||
| − | |[[Pure Leaf]] |
||
| + | |style="color:black; style="text-align:center; background:white"|230 |
||
| − | |230 |
||
|- |
|- |
||
| + | |style="border:solid 6px black; style="text-align:center; color:white; background:SlateGray"| [[File:Sh1acessorylogo.png]][[File:Maleonly.png|Male Only]] '''[[Loincloth|<span style="color:white;">Loincloth</span>]]''' |
||
| − | |[[Loin Guard]] |
||
| + | |style="color:black; style="text-align:center; background:white"|5200 |
||
| − | |5200 |
||
| + | |style="border:solid 6px black; style="text-align:center; color:white; background:SlateGray"|[[File:Sh1itemlogo.png]] '''[[Pure Seed|<span style="color:white;">Pure Seed</span>]]''' |
||
| − | |[[Pure Seed]] |
||
| + | |style="color:black; style="text-align:center; background:white"|510 |
||
| − | |510 |
||
|- |
|- |
||
| + | |style="border:solid 6px black; style="text-align:center; color:white; background:SlateGray"|[[File:Sh1acessorylogo.png]] '''[[Shell Bracelet|<span style="color:white;">Shell Bracelet</span>]]''' |
||
| − | |[[Shell Bracelet]] |
||
| + | |style="color:black; style="text-align:center; background:white"|2770 |
||
| − | |2770 |
||
| + | |style="border:solid 6px black; style="text-align:center; color:white; background:SlateGray"|[[File:Sh1itemlogo.png]] '''[[Talisman of Mercy|<span style="color:white;">Talisman of Mercy</span>]]''' |
||
| − | |[[Talisman of Mercy|Talisman Of Mercy]] |
||
| + | |style="color:black; style="text-align:center; background:white"|820 |
||
| − | |820 |
||
|- |
|- |
||
| + | |style="border:solid 6px black; style="text-align:center; color:white; background:SlateGray"|[[File:Sh1acessorylogo.png]] '''[[Bone Bracelet|<span style="color:white;">Bone Bracelet</span>]]''' |
||
| − | |[[Bone Bracelet]] |
||
| + | |style="color:black; style="text-align:center; background:white"|2960 |
||
| − | |2960 |
||
| + | |style="border:solid 6px black; style="text-align:center; color:white; background:SlateGray"|[[File:Sh1itemlogo.png]] '''[[Talisman of Wisdom|<span style="color:white;">Talisman of Wisdom</span>]]''' |
||
| − | |[[Talisman Of Wisdom]] |
||
| + | |style="color:black; style="text-align:center; background:white"|1280 |
||
| − | |1280 |
||
|- |
|- |
||
| + | |style="border:solid 6px black; style="text-align:center; color:white; background:SlateGray"|[[File:Sh1acessorylogo.png]] '''[[Rosewood Bracelet|<span style="color:white;">Rosewood Bracelet</span>]]''' |
||
| − | |[[Rosewood Bracelet]] |
||
| + | |style="color:black; style="text-align:center; background:white"|3000 |
||
| − | |3000 |
||
| + | |style="border:solid 6px black; style="text-align:center; color:white; background:SlateGray"|[[File:Sh1itemlogo.png]] '''[[Talisman of Purity|<span style="color:white;">Talisman of Purity</span>]]''' |
||
| − | |[[Talisman of Purity|Talisman Of Purity]] |
||
| + | |style="color:black; style="text-align:center; background:white"|1760 |
||
| − | |1760 |
||
|- |
|- |
||
| + | |style="border:solid 6px black; style="text-align:center; color:white; background:SlateGray"|[[File:Sh1acessorylogo.png]] '''[[Bell Bracelet|<span style="color:white;">Bell Bracelet</span>]]''' |
||
| − | |[[Bell Bracelet]] |
||
| + | |style="color:black; style="text-align:center; background:white"|3120 |
||
| − | |3120 |
||
| + | |style="border:solid 6px black; style="text-align:center; color:white; background:SlateGray"|[[File:Sh1itemlogo.png]] '''[[Soul Benediction|<span style="color:white;">Soul Benediction</span>]]''' |
||
| − | |[[Soul Benediction]] |
||
| + | |style="color:black; style="text-align:center; background:white"|500 |
||
| − | |5000 |
||
|- |
|- |
||
| + | |style="border:solid 6px black; style="text-align:center; color:white; background:SlateGray"|[[File:Sh1acessorylogo.png]] '''[[Mirror Bracelet|<span style="color:white;">Mirror Bracelet</span>]]''' |
||
| − | |[[Mirror Bracelet]] |
||
| + | |style="color:black; style="text-align:center; background:white"|3240 |
||
| − | |3240 |
||
| + | |style="border:solid 6px black; style="text-align:center; color:white; background:SlateGray"|[[File:Sh1itemlogo.png]] '''[[Bronze Arrowhead|<span style="color:white;">Bronze Arrowhead</span>]]''' |
||
| − | |[[Bronze Arrowhead]] |
||
| + | |style="color:black; style="text-align:center; background:white"|100 |
||
| − | |100 |
||
|- |
|- |
||
| + | |style="border:solid 6px black; style="text-align:center; color:white; background:SlateGray"|[[File:Sh1acessorylogo.png]] '''[[Cosmic Bracelet|<span style="color:white;">Cosmic Bracelet</span>]]''' |
||
| − | |[[Cosmic Bracelet]] |
||
| + | |style="color:black; style="text-align:center; background:white"|11500 |
||
| − | |11,500 |
||
| + | |style="border:solid 6px black; style="text-align:center; color:white; background:SlateGray"|[[File:Sh1itemlogo.png]] '''[[Bronze Dagger|<span style="color:white;">Bronze Dagger</span>]]''' |
||
| − | |[[Bronze Dagger]] |
||
| + | |style="color:black; style="text-align:center; background:white"|200 |
||
| − | |200 |
||
|- |
|- |
||
| + | |style="border:solid 6px black; style="text-align:center; color:white; background:SlateGray"|[[File:Sh1acessorylogo.png]] '''[[Spikes|<span style="color:white;">Spikes</span>]] ''' |
||
| − | |[[Spikes]] |
||
| + | |style="color:black; style="text-align:center; background:white"|2810 |
||
| − | |2810 |
||
| + | |style="border:solid 6px black; style="text-align:center; color:white; background:SlateGray"|[[File:Sh1itemlogo.png]] '''[[Silver Hourglass|<span style="color:white;">Silver Hourglass</span>]]''' |
||
| − | |[[Silver Hourglass]] |
||
| + | |style="color:black; style="text-align:center; background:white"|100 |
||
| − | |100 |
||
|- |
|- |
||
| + | |style="border:solid 6px black; style="text-align:center; color:white; background:SlateGray"|[[File:Sh1acessorylogo.png]] '''[[Pocket Watch|<span style="color:white;">Pocket Watch</span>]]''' |
||
| − | |[[Pocket Watch]] |
||
| + | |style="color:black; style="text-align:center; background:white"|5200 |
||
| − | |5200 |
||
| + | |style="border:solid 6px black; style="text-align:center; color:white; background:SlateGray"|[[File:Sh1itemlogo.png]] '''[[Gold Hourglass|<span style="color:white;">Gold Hourglass</span>]]''' |
||
| − | |[[Gold Hourglass]] |
||
| + | |style="color:black; style="text-align:center; background:white"|200 |
||
| − | |200 |
||
|- |
|- |
||
| + | |style="border:solid 6px black; style="text-align:center; color:white; background:SlateGray"|[[File:Sh1acessorylogo.png]] '''[[Will Power|<span style="color:white;">Will Power</span>]]''' |
||
| − | |[[Will Power]] |
||
| + | |style="color:black; style="text-align:center; background:white"|6000 |
||
| − | |6000 |
||
| + | |style="border:solid 6px black; style="text-align:center; color:white; background:SlateGray"|[[File:Sh1itemlogo.png]] '''[[Tent|<span style="color:white;">Tent</span>]]''' |
||
| − | |[[Tent]] |
||
| + | |style="color:black; style="text-align:center; background:white"|480 |
||
| − | |480 |
||
|- |
|- |
||
| + | |style="border:solid 6px black; style="text-align:center; color:white; background:SlateGray"|[[File:Sh1acessorylogo.png]] '''[[Leonardo's Bear|<span style="color:white;">Leonardo's Bear</span>]]''' |
||
| − | |[[Leonardo's Bear]] |
||
| + | |style="color:black; style="text-align:center; background:white"|3330 |
||
| − | |3330 |
||
|} |
|} |
||
| + | |||
| + | |||
| + | |||
| + | {|width="60%" style="border:solid 2px black; -moz-border-radius:10px; float:centre;" |
||
| + | |colspan="4" style="text-align:center; color:white; background:DarkSlateGray; -moz-border-radius-topleft: 1em; -moz-border-radius-topright: 1em;"|<big>'''Pedometer Step Exchange'''<big> </big></big> |
||
| + | |- |
||
| + | |style="border:solid 2px black; style="text-align:center; color:white; background:DarkSlateGray"|'''Item''' |
||
| + | |style="border:solid 2px black; style="text-align:center; color:white; background:DarkSlateGray"|'''No. of Steps''' |
||
| + | |- |
||
| + | |style="border:solid 6px black; style="text-align:center; color:white; background:SlateGray"|[[File:Sh1itemlogo.png]] '''[[Thera Extract|<span style="color:white;">Thera Extract</span>]]''' |
||
| + | |style="color:black; style="text-align:center; background:white"|100 |
||
| + | |- |
||
| + | |style="border:solid 6px black; style="text-align:center; color:white; background:SlateGray"|[[File:Sh1acessorylogo.png]] '''[[Voodoo Doll|<span style="color:white;">Voodoo Doll</span>]]''' |
||
| + | |style="color:black; style="text-align:center; background:white"|300 |
||
| + | |- |
||
| + | |style="border:solid 6px black; style="text-align:center; color:white; background:SlateGray"|[[File:Sh1acessorylogo.png]] '''[[Weird Bottle|<span style="color:white;">Weird Bottle</span>]]''' |
||
| + | |style="color:black; style="text-align:center; background:white"|800 |
||
| + | |- |
||
| + | |style="border:solid 6px black; style="text-align:center; color:white; background:SlateGray"|[[File:Sh1acessorylogo.png]] '''[[Iron Clogs|<span style="color:white;">Iron Clogs</span>]]''' |
||
| + | |style="color:black; style="text-align:center; background:white"|1500 |
||
| + | |- |
||
| + | |style="border:solid 6px black; style="text-align:center; color:white; background:SlateGray"|[[File:Sh1acessorylogo.png]] '''[[Flash Badge|<span style="color:white;">Flash Badge</span>]]''' |
||
| + | |style="color:black; style="text-align:center; background:white"|2500 |
||
| + | |- |
||
| + | |style="border:solid 6px black; style="text-align:center; color:white; background:SlateGray"|[[File:Sh1itemlogo.png]] '''[[Moon Swallow|<span style="color:white;">Moon Swallow</span>]]''' |
||
| + | |style="color:black; style="text-align:center; background:white"|3500 |
||
| + | |- |
||
| + | |style="border:solid 6px black; style="text-align:center; color:white; background:SlateGray"|[[File:Sh1itemlogo.png]] '''[[Star Swallow|<span style="color:white;">Star Swallow</span>]]''' |
||
| + | |style="color:black; style="text-align:center; background:white"|5000 |
||
| + | |- |
||
| + | |style="border:solid 6px black; style="text-align:center; color:white; background:SlateGray"|[[File:Sh1itemlogo.png]] '''[[Monkey Paw|<span style="color:white;">Monkey Paw</span>]]''' |
||
| + | |style="color:black; style="text-align:center; background:white"|6500 |
||
| + | |- |
||
| + | |style="border:solid 6px black; style="text-align:center; color:white; background:SlateGray"|[[File:Sh1itemlogo.png]] '''[[Silver Hand|<span style="color:white;">Silver Hand</span>]]''' |
||
| + | |style="color:black; style="text-align:center; background:white"|7000 |
||
| + | |- |
||
| + | |style="border:solid 6px black; style="text-align:center; color:white; background:SlateGray"|[[File:Sh1acessorylogo.png]] '''[[Belt of Power|<span style="color:white;">Belt of Power</span>]]''' |
||
| + | |style="color:black; style="text-align:center; background:white"|8000 |
||
| + | |- |
||
| + | |style="border:solid 6px black; style="text-align:center; color:white; background:SlateGray"|[[File:Sh1armourfemalelogo.png|Female only armour]][[File:Exclaimationicon.png|One-time purchase, Margarete exclusive ultimate armour]] '''[[Leather Suit|<span style="color:white;">Leather Suit</span>]]''' |
||
| + | |style="color:black; style="text-align:center; background:white"|10000 |
||
| + | |} |
||
| + | |||
| + | ====Ground==== |
||
| + | *[[File:Halleyslingshotlogo.png]] [[Oak Slingshot]] - Search behind house on left at Old Castle Street entrance. |
||
| + | *[[File:Sh1itemlogo.png]] [[Mana Extract]] - Behind the counter in the pub. |
||
| + | *[[File:Sh1itemlogo.png]] [[Thera Extract]] - Left of the entrance to the London Rats' hideout. |
||
| + | *[[File:Sh1itemlogo.png]] [[Lottery Ticket]] - Inside Old Carl's house next to the hideout. |
||
| + | *[[File:Sh1itemlogo.png]] [[Seal of Force]] - Inside Old Carl's house next to the hideout. |
||
| + | *[[File:Sh1itemlogo.png]] [[Kirin Scale]] - Inside Old Carl's house next to the hideout. |
||
| + | ====NPC Interaction==== |
||
| + | *[[File:Sh1keyitem.png]] [[Sun Card]] - Speak to Penniless Mike. |
||
===Lottery Members=== |
===Lottery Members=== |
||
| − | Lottery Member No |
+ | Lottery Member No. 5, Drunken Orro |
*Red: [[Priest Earrings]] |
*Red: [[Priest Earrings]] |
||
*Yellow: [[Seals#Seal of Speed|Seal of Speed]] |
*Yellow: [[Seals#Seal of Speed|Seal of Speed]] |
||
| Line 137: | Line 172: | ||
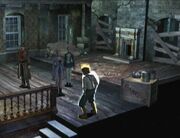
== London Rat's Hideout== |
== London Rat's Hideout== |
||
| + | [[File:115-039_104.jpg|thumb]] |
||
| + | Home to a small group of orphans who call themselves the London Rats, with [[Halley Brankett]] as their leader. |
||
| + | After completing the Orphanage, [[Sharon]] will give you access to Pit Fights, roughly the same as to what Zhen offered in Shanghai. |
||
| + | After the events of [[Calios Mental Hospital]], she will only summon a single random monster. Only after the [[Neameto Float]] has risen are her fights fully unlocked. |
||
| − | Home to a small group of orphans who call themselves the London Rats, with [[Halley Brankett]] as their leader. |
||
| + | ===Enemies Encountered=== |
||
| − | After completing the Orphanage, Shannon will give you access to Pit Fights, roughly the same as to what Zhen offered in Shanghai. |
||
| + | '''Note:''' Pit Fight enemy order is randomised. |
||
| + | {|width="70%" style="border:solid 2px black; -moz-border-radius:10px; float:centre;" |
||
| + | |colspan="4" style="text-align:center; color:white; background:black; -moz-border-radius-topleft: 1em; -moz-border-radius-topright: 1em;"|<big>'''Pit Fight'''<big> </big></big> |
||
| + | |- |
||
| + | |style="border:solid 2px black; style="text-align:center; color:white; background:black"|'''Name''' |
||
| + | |style="border:solid 2px black; style="text-align:center; color:white; background:black"|'''Notes''' |
||
| + | |- |
||
| + | |style="border:solid 6px black; style="text-align:center; color:white; background:black"|'''[[Speckled Creeper]]''' |
||
| + | |style="color:black; style="text-align:center; background:white"|- |
||
| + | |- |
||
| + | |style="border:solid 6px black; style="text-align:center; color:white; background:black"|'''[[Happy Creeper]]''' |
||
| + | |style="color:black; style="text-align:center; background:white"|- |
||
| + | |- |
||
| + | |style="border:solid 6px black; style="text-align:center; color:white; background:black"|'''[[Dark Judge]]''' |
||
| + | |style="color:black; style="text-align:center; background:white"|- |
||
| + | |- |
||
| + | |style="border:solid 6px black; style="text-align:center; color:white; background:black"|'''[[Garm]]''' |
||
| + | |style="color:black; style="text-align:center; background:white"|- |
||
| + | |- |
||
| + | |style="border:solid 6px black; style="text-align:center; color:white; background:black"|'''[[Tindalos]]''' |
||
| + | |style="color:black; style="text-align:center; background:white"|- |
||
| + | |- |
||
| + | |style="border:solid 6px black; style="text-align:center; color:white; background:black"|'''[[Camazotz]]''' |
||
| + | |style="color:black; style="text-align:center; background:white"|- |
||
| + | |- |
||
| + | |style="border:solid 6px black; style="text-align:center; color:white; background:black"|'''[[Night Stalker]]''' |
||
| + | |style="color:black; style="text-align:center; background:white"|- |
||
| + | |- |
||
| + | |style="border:solid 6px black; style="text-align:center; color:white; background:black"|'''[[Mammon]]''' |
||
| + | |style="color:black; style="text-align:center; background:white"|- |
||
| + | |- |
||
| + | |style="border:solid 6px black; style="text-align:center; color:white; background:black"|'''[[Meat Eater]]''' |
||
| + | |style="color:black; style="text-align:center; background:white"|- |
||
| + | |- |
||
| + | |style="border:solid 6px black; style="text-align:center; color:white; background:black"|'''[[Doom]]''' |
||
| + | |style="color:black; style="text-align:center; background:white"|- |
||
| + | |- |
||
| + | |style="border:solid 6px black; style="text-align:center; color:white; background:black"|'''[[Buggs]]''' |
||
| + | |style="color:black; style="text-align:center; background:white"|- |
||
| + | |- |
||
| + | |style="border:solid 6px black; style="text-align:center; color:white; background:black"|'''[[Rausan (Boss)|Rausan]]''' |
||
| + | |style="color:black; style="text-align:center; background:white"|- |
||
| + | |- |
||
| + | |style="border:solid 6px black; style="text-align:center; color:white; background:black"|'''[[Full Armor Wind Sheer]]''' |
||
| + | |style="color:black; style="text-align:center; background:white"|- |
||
| + | |- |
||
| + | |style="border:solid 6px black; style="text-align:center; color:white; background:black"|'''[[Perfect Wind Sheer]]''' |
||
| + | |style="color:black; style="text-align:center; background:white"|- |
||
| + | |} |
||
| + | ===Items=== |
||
| − | <p style="text-align:right;">[[File:115-039_104.jpg|thumb|330px]]</p> |
||
| − | === |
+ | ====Ground==== |
| + | *[[File:Sh1acessorylogo.png]] [[Demon Earrings]] - Left of the ladder inside the hideout. |
||
| − | *[[Perfect Wind Sheer]] |
||
| + | *[[File:Sh1itemlogo.png]] [[Lottery Ticket]] - Righthand corner of the room. |
||
| − | *[[Full Armor Wind Sheer]] |
||
| + | *[[File:Sh1itemlogo.png]] [[Soul Benediction]] - Main level of the house, next to the crates next to the stairs. |
||
| − | *[[Mammon]] |
||
| + | *[[File:Sh1itemlogo.png]] [[Talisman of Purity]] - Left of the fireplace. |
||
| − | *[[Rausan (boss)]] |
||
| + | *[[File:Sh1acessorylogo.png]] [[Warning Device]] - Right of the fireplace. |
||
| − | *[[Dark Judge]] |
||
| + | ====NPC Interaction==== |
||
| − | *[[Happy Creeper]] |
||
| + | *[[File:Sh1acessorylogo.png]] [[Crucifix]] - Automatically given by [[Joshua]]. |
||
| − | *[[Speckled Creeper]] |
||
| + | *[[File:Sh1keyitem.png]] [[Oath Grail]] - Speak to Joshua after the [[Neameto Float]] has risen. |
||
| − | *[[Meat Eater]] |
||
| + | *[[File:Sh1acessorylogo.png]] [[Black Silk Underpants]] - '''New Game+ Only''' Speak to Knowledgeable Carl after completing the Monster Library 100%. |
||
| − | *[[Penalty]] |
||
| + | ====Pit Fight Rewards==== |
||
| − | *[[Tindalos]] |
||
| + | *[[Yuri]] - [[File:Sh1itemlogo.png]] [[Seventh Key]]. |
||
| − | *[[Night Stalker]] |
||
| + | *[[Alice]] - [[File:Sh1acessorylogo.png]] [[Crucifix]] |
||
| − | *[[Buggs]] |
||
| + | *[[Zhuzhen]] - [[File:Sh1itemlogo.png]] [[Silver Hand]] |
||
| − | *[[Doom]] |
||
| + | *[[Margarete]] - [[File:Sh1itemlogo.png]] [[Tissues]] |
||
| − | *[[Camazotz]] |
||
| + | *[[Keith]] - [[File:Sh1acessorylogo.png]] [[Belt of Thor]] |
||
| − | *[[Night Stalker]] |
||
| + | *[[Halley]] - [[File:Sh1armourmalelogo.png]][[File:Exclaimationicon.png|Halley exclusive ultimate armour]] [[Metal Jacket]] |
||
| − | *[[Garm]] |
||
| + | If the player completes the Pit Fights with all party members, they will gain an additional prize; |
||
| − | ===Items, Equipment and Vauables=== |
||
| + | *All Party Members - [[File:Sh1acessorylogo.png]] [[Crystal Ring]] |
||
| − | ====Items:==== |
||
| − | *[[Lottery Ticket]] |
||
| − | *[[Kirin Scale]] |
||
| − | *[[Talisman of Purity|TalismanOfPurity]] |
||
| − | *[[Demon Earrings]] |
||
| − | *[[Warning Device]] |
||
| − | *[[Soul Benediction]] |
||
| − | *[[Seventh Key]] - Pitfight Reward |
||
| − | *[[Silver Hand]] - Pitfight Reward |
||
| − | *[[Tissues]] - Pitfight Reward |
||
| − | ====Equipment==== |
||
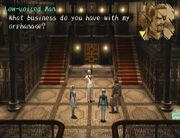
| + | ==Orphanage== |
||
| − | *[[Seventh Key]] - Pitfight Reward |
||
| + | [[File:97-039_87.jpg|thumb|The Orphanage]] |
||
| − | *[[Crucifix]] (x2) - 1 gift, 1 pitfight reward. |
||
| + | Formerly a mansion which belonged to Cardinal [[Albert Simon]], whom at the time went by the false name of Roger Bacon. Eventually it was sold to a new owner named [[Jack]], who turned it in to an Orphanage. |
||
| − | *[[Metal Jacket ]] - Pitfight Reward |
||
| + | |||
| − | *[[Crystal Ring]] - Pitfight Reward |
||
| + | ===Enemies Encountered=== |
||
| − | *[[Belt of Thor]] - Pitfight Reward |
||
| + | {|width="70%" style="border:solid 2px black; -moz-border-radius:10px; float:centre;" |
||
| − | ====Valuables==== |
||
| + | |colspan="4" style="text-align:center; color:white; background:black; -moz-border-radius-topleft: 1em; -moz-border-radius-topright: 1em;"|<big>'''Enemies Encountered'''<big> </big></big> |
||
| − | *[[Oath Grail]]<span style="line-height:20px;"> </span><span style="line-height:20px;">- Given by</span><span style="line-height:20px;"> </span>[[Joshua]] |
||
| + | |- |
||
| − | ===Shopping=== |
||
| + | |style="border:solid 2px black; style="text-align:center; color:white; background:black"|'''Name''' |
||
| − | N/A |
||
| + | |style="border:solid 2px black; style="text-align:center; color:white; background:black"|'''Notes''' |
||
| − | ===Lottery Members=== |
||
| + | |- |
||
| − | *None |
||
| + | |style="border:solid 6px black; style="text-align:center; color:white; background:black"|'''[[Banshee]]''' |
||
| + | |style="color:black; style="text-align:center; background:white"|- |
||
| + | |- |
||
| + | |style="border:solid 6px black; style="text-align:center; color:white; background:black"|'''[[Larmgelg]]''' |
||
| + | |style="color:black; style="text-align:center; background:white"|- |
||
| + | |- |
||
| + | |style="border:solid 6px black; style="text-align:center; color:white; background:black"|'''[[Gremlin]]''' |
||
| + | |style="color:black; style="text-align:center; background:white"|- |
||
| + | |} |
||
| + | {|width="70%" style="border:solid 2px black; -moz-border-radius:10px; float:centre;" |
||
| + | |colspan="4" style="text-align:center; color:white; background:black; -moz-border-radius-topleft: 1em; -moz-border-radius-topright: 1em;"|<big>'''Bosses'''<big> </big></big> |
||
| + | |- |
||
| + | |style="border:solid 2px black; style="text-align:center; color:white; background:black"|'''Name''' |
||
| + | |style="border:solid 2px black; style="text-align:center; color:white; background:black"|'''Notes''' |
||
| + | |- |
||
| + | |style="border:solid 6px black; style="text-align:center; color:white; background:black"|'''[[Night Stalker]]''' |
||
| + | |style="color:black; style="text-align:center; background:white"|Mini-boss |
||
| + | |- |
||
| + | |style="border:solid 6px black; style="text-align:center; color:white; background:black"|'''[[Jack (Boss)|Dr Jack]]''' |
||
| + | |style="color:black; style="text-align:center; background:white"|- |
||
| + | |- |
||
| + | |style="border:solid 6px black; style="text-align:center; color:white; background:black"|'''[[Mammon]]''' |
||
| + | |style="color:black; style="text-align:center; background:white"|- |
||
| + | |} |
||
| + | |||
| + | ===Items=== |
||
| + | ====Treasure Chests==== |
||
| + | *[[File:Sh1acessorylogo.png]] [[Zodiac Bracelet]] - Left balcony on the second floor. |
||
| + | ====Ground==== |
||
| + | *[[File:Sh1itemlogo.png]] [[Seal of Luck]] - Search the Kid's Room. |
||
| + | *[[File:Sh1itemlogo.png]] [[Pure Extract]] - Search the Kid's Room. |
||
| + | *[[File:Sh1itemlogo.png]] [[Monkey Paw]] - Search the Kid's Room. |
||
| + | *[[File:Sh1keyitem.png]] [[Guest's Diary]] - Examine the desk in the Guestroom. |
||
| + | *[[File:Sh1itemlogo.png]] [[Lottery Ticket]] - Search the fireplace in the Guestroom. |
||
| + | *[[File:Sh1acessorylogo.png]] [[Monk Earrings]] - Search the fireplace in Jack's study. |
||
| + | *[[File:Sh1keyitem.png]] [[Jack's Diary Pages|Jack's Diary]] - Search the locked drawer in Jack's Study. |
||
| + | ====NPC Interaction==== |
||
| + | *[[File:Sh1keyitem.png]] [[Guestroom Key]] - Automatically given by [[Joshua]]. |
||
| + | *[[File:Sh1keyitem.png]] [[Émigré Manuscript (Key Item)|Émigré Manuscript]] - Win at hide-and-seek with Insolent Jean, and speak to Pot-lover Macken, who is sitting inside the cauldron. |
||
| + | ====Enemy Drop==== |
||
| + | *[[File:Sh1keyitem.png]] [[Kid's Room Key]] - Dropped automatically by [[Night Stalker]]. |
||
| − | == Orphanage == |
||
| − | ===[[File:97-039_87.jpg|thumb|The Orphanage]] |
||
| − | <span style="font-size:13px;">Formerly a mansion which belonged to Cardinal Albert Simon, whom at the time went by the false name of Roger Bacon. Eventually it was sold to a new owner Jack, who turned it in to an Orphanage.</span>=== |
||
| − | ===Enemies:=== |
||
| − | *[[Banshee]] |
||
| − | * [[Larmgelg]] |
||
| − | * [[Jack]] [Boss] |
||
| − | * [[Mammon]] [Boss] |
||
| − | === Items, Equipment and Valuables=== |
||
| − | ====Items==== |
||
| − | *[[Seals#Seal of Luck|Seal of Luck]] |
||
| − | *[[Pure Extract|Pure Extract ]] |
||
| − | *[[Monkey Paw]] |
||
| − | *[[Eye of Ouroboros]] |
||
| − | *[[Lottery Ticket]] |
||
| − | *[[Seals#Seal of Speed|Seal of Speed]] |
||
| − | ====Equipment==== |
||
| − | *[[Zodiac Bracelet]] |
||
| − | *[[Monk Earrings]] |
||
| − | *[[Margarete's Guns#Draze|Draze]] |
||
| − | *[[Demon Earrings]] |
||
| − | ====Valuables==== |
||
| − | *[[Kid's Room Key]] |
||
| − | *[[Guestroom Key]] |
||
| − | *[[Émigré Manuscript]] |
||
| − | ===Shopping=== |
||
| − | N/A |
||
===Lottery Members=== |
===Lottery Members=== |
||
| − | + | Lottery Member No. 3, Pot-lover Macken |
|
*Red: [[Crucifix]] |
*Red: [[Crucifix]] |
||
*Yellow: [[Seals#Seal of Wisdom|Seal of Wisdom]] |
*Yellow: [[Seals#Seal of Wisdom|Seal of Wisdom]] |
||
| Line 221: | Line 312: | ||
*Green: [[Pure Root]] |
*Green: [[Pure Root]] |
||
*White: [[Tissues]] |
*White: [[Tissues]] |
||
| + | |||
==Soundtrack== |
==Soundtrack== |
||
===Old Castle Street=== |
===Old Castle Street=== |
||
Revision as of 16:56, 24 November 2018

London
Located in a country in Western Europe. London is the capital of England and of the United Kingdom.
London is present only in Shadow Hearts, and contains just three areas the party can travel to.
Old Castle Street
Busy London town situated near the River Thames. The area also contains the home of the London Rats. This is the place where Yuri and the party start their travels in Britain.
Items
Shop
| Tight-lipped Merchant | |||
| Item | Price | Item | Price |
| 9800 | 5200 | ||
| 8600 | 5050 | ||
| 8300 | 5050 | ||
| 8800 | 120 | ||
| 9200 | 300 | ||
| 5400 | 300 | ||
| 5800 | 500 | ||
| 5500 | 230 | ||
| 5200 | 510 | ||
| 2770 | 820 | ||
| 2960 | 1280 | ||
| 3000 | 1760 | ||
| 3120 | 500 | ||
| 3240 | 100 | ||
| 11500 | 200 | ||
| 2810 | 100 | ||
| 5200 | 200 | ||
| 6000 | 480 | ||
| 3330 | |||
| Pedometer Step Exchange | |||
| Item | No. of Steps | ||
| 100 | |||
| 300 | |||
| 800 | |||
| 1500 | |||
| 2500 | |||
| 3500 | |||
| 5000 | |||
| 6500 | |||
| 7000 | |||
| 8000 | |||
| 10000 | |||
Ground
 Oak Slingshot - Search behind house on left at Old Castle Street entrance.
- Mana Extract - Behind the counter in the pub.
- Thera Extract - Left of the entrance to the London Rats' hideout.
- Lottery Ticket - Inside Old Carl's house next to the hideout.
- Seal of Force - Inside Old Carl's house next to the hideout.
- Kirin Scale - Inside Old Carl's house next to the hideout.
NPC Interaction
- Sun Card - Speak to Penniless Mike.
Lottery Members
Lottery Member No. 5, Drunken Orro
- Red: Priest Earrings
- Yellow: Seal of Speed
- Blule: Thera Extract
- Green: Thera Root
- White: Tissues
London Rat's Hideout

Home to a small group of orphans who call themselves the London Rats, with Halley Brankett as their leader.
After completing the Orphanage, Sharon will give you access to Pit Fights, roughly the same as to what Zhen offered in Shanghai.
After the events of Calios Mental Hospital, she will only summon a single random monster. Only after the Neameto Float has risen are her fights fully unlocked.
Enemies Encountered
Note: Pit Fight enemy order is randomised.
| Pit Fight | |||
| Name | Notes | ||
| Speckled Creeper | - | ||
| Happy Creeper | - | ||
| Dark Judge | - | ||
| Garm | - | ||
| Tindalos | - | ||
| Camazotz | - | ||
| Night Stalker | - | ||
| Mammon | - | ||
| Meat Eater | - | ||
| Doom | - | ||
| Buggs | - | ||
| Rausan | - | ||
| Full Armor Wind Sheer | - | ||
| Perfect Wind Sheer | - | ||
Items
Ground
- Demon Earrings - Left of the ladder inside the hideout.
- Lottery Ticket - Righthand corner of the room.
- Soul Benediction - Main level of the house, next to the crates next to the stairs.
- Talisman of Purity - Left of the fireplace.
- Warning Device - Right of the fireplace.
NPC Interaction
- Crucifix - Automatically given by Joshua.
- Oath Grail - Speak to Joshua after the Neameto Float has risen.
- Black Silk Underpants - New Game+ Only Speak to Knowledgeable Carl after completing the Monster Library 100%.
Pit Fight Rewards
- Yuri - Seventh Key.
- Alice - Crucifix
- Zhuzhen - Silver Hand
- Margarete - Tissues
- Keith - Belt of Thor
- Halley - Metal Jacket
If the player completes the Pit Fights with all party members, they will gain an additional prize;
- All Party Members - Crystal Ring
Orphanage

The Orphanage
Formerly a mansion which belonged to Cardinal Albert Simon, whom at the time went by the false name of Roger Bacon. Eventually it was sold to a new owner named Jack, who turned it in to an Orphanage.
Enemies Encountered
| Enemies Encountered | |||
| Name | Notes | ||
| Banshee | - | ||
| Larmgelg | - | ||
| Gremlin | - | ||
| Bosses | |||
| Name | Notes | ||
| Night Stalker | Mini-boss | ||
| Dr Jack | - | ||
| Mammon | - | ||
Items
Treasure Chests
- Zodiac Bracelet - Left balcony on the second floor.
Ground
- Seal of Luck - Search the Kid's Room.
- Pure Extract - Search the Kid's Room.
- Monkey Paw - Search the Kid's Room.
- Guest's Diary - Examine the desk in the Guestroom.
- Lottery Ticket - Search the fireplace in the Guestroom.
- Monk Earrings - Search the fireplace in Jack's study.
- Jack's Diary - Search the locked drawer in Jack's Study.
NPC Interaction
- Guestroom Key - Automatically given by Joshua.
- Émigré Manuscript - Win at hide-and-seek with Insolent Jean, and speak to Pot-lover Macken, who is sitting inside the cauldron.
Enemy Drop
- Kid's Room Key - Dropped automatically by Night Stalker.
Lottery Members
Lottery Member No. 3, Pot-lover Macken
- Red: Crucifix
- Yellow: Seal of Wisdom
- Blue: Pure Extract
- Green: Pure Root
- White: Tissues
Soundtrack
Old Castle Street
- "Vitamin Metropolis" - Shadow Hearts OST
London Rats Hideout
- "Babysitter is Old Nurse" - Shadow Hearts OST
Orphanage
- "But-Dad-Dead-Bed" - Shadow Hearts OST
- "Vitamin Metropolis" - Shadow Hearts OST
Trivia

Promotional image of Koudelka found in Shadow Hearts
- It should be noted that The London Rats are somewhat based off of characters from Oliver Twist.
- A small easter egg of Koudelka can be found in the Pub; it is a picture of her that released to promote the Koudelka game.