0001 (Message Wall | contribs) (→Cards) Tag: Source edit |
0001 (Message Wall | contribs) (→Cards) Tag: Source edit |
||
| (2 intermediate revisions by the same user not shown) | |||
| Line 21: | Line 21: | ||
|- |
|- |
||
|style="border:solid 2px black; style="color:black; style="text-align:center; background:#318CE7"|<span style="color:white;">'''001'''</span> |
|style="border:solid 2px black; style="color:black; style="text-align:center; background:#318CE7"|<span style="color:white;">'''001'''</span> |
||
| − | |style="border:solid 2px black; style="color:black; style="text-align:center; background:White"|Thug |
+ | |style="border:solid 2px black; style="color:black; style="text-align:center; background:White"|<span style="color:black;">Thug |
| − | |style="border:solid 2px black; style="color:black; style="text-align:center; background:White"|1 |
+ | |style="border:solid 2px black; style="color:black; style="text-align:center; background:White"|<span style="color:black;">1 |
| − | |style="border:solid 2px black; style="color:black; style="text-align:center; background:White"|Chelsea (limited), Pit Fight 1.1, 1.2, 2.4 |
+ | |style="border:solid 2px black; style="color:black; style="text-align:center; background:White"|<span style="color:black;">Chelsea (limited), Pit Fight 1.1, 1.2, 2.4 |
| − | |style="border:solid 2px black; style="color:black; style="text-align:center; background:White"|[[File:shftnw_snaps_001.jpg|50px]] |
+ | |style="border:solid 2px black; style="color:black; style="text-align:center; background:White"|<span style="color:black;">[[File:shftnw_snaps_001.jpg|50px]] |
|- |
|- |
||
|style="border:solid 2px black; style="color:black; style="text-align:center; background:#318CE7"|<span style="color:white;">'''002'''</span> |
|style="border:solid 2px black; style="color:black; style="text-align:center; background:#318CE7"|<span style="color:white;">'''002'''</span> |
||
| − | |style="border:solid 2px black; style="color:black; style="text-align:center; background:White"|Fat Thug |
+ | |style="border:solid 2px black; style="color:black; style="text-align:center; background:White"|<span style="color:black;">Fat Thug |
| − | |style="border:solid 2px black; style="color:black; style="text-align:center; background:White"|1 |
+ | |style="border:solid 2px black; style="color:black; style="text-align:center; background:White"|<span style="color:black;">1 |
| − | |style="border:solid 2px black; style="color:black; style="text-align:center; background:White"|Chelsea (limited), Pit Fight 1.1, 1.2 |
+ | |style="border:solid 2px black; style="color:black; style="text-align:center; background:White"|<span style="color:black;">Chelsea (limited), Pit Fight 1.1, 1.2 |
| − | |style="border:solid 2px black; style="color:black; style="text-align:center; background:White"|[[File:shftnw_snaps_002.jpg|50px]] |
+ | |style="border:solid 2px black; style="color:black; style="text-align:center; background:White"|<span style="color:black;">[[File:shftnw_snaps_002.jpg|50px]] |
|- |
|- |
||
|style="border:solid 2px black; style="color:black; style="text-align:center; background:#318CE7"|<span style="color:white;">'''003'''</span> |
|style="border:solid 2px black; style="color:black; style="text-align:center; background:#318CE7"|<span style="color:white;">'''003'''</span> |
||
| − | |style="border:solid 2px black; style="color:black; style="text-align:center; background:White"|Deep One |
+ | |style="border:solid 2px black; style="color:black; style="text-align:center; background:White"|<span style="color:black;">Deep One |
| − | |style="border:solid 2px black; style="color:black; style="text-align:center; background:White"|0 |
+ | |style="border:solid 2px black; style="color:black; style="text-align:center; background:White"|<span style="color:black;">0 |
| − | |style="border:solid 2px black; style="color:black; style="text-align:center; background:White"|Pissarro Trade #7 |
+ | |style="border:solid 2px black; style="color:black; style="text-align:center; background:White"|<span style="color:black;">Pissarro Trade #7 |
| − | |style="border:solid 2px black; style="color:black; style="text-align:center; background:White"|[[File:shftnw_snaps_003.jpg|50px]] |
+ | |style="border:solid 2px black; style="color:black; style="text-align:center; background:White"|<span style="color:black;">[[File:shftnw_snaps_003.jpg|50px]] |
|- |
|- |
||
|style="border:solid 2px black; style="color:black; style="text-align:center; background:#318CE7"|<span style="color:white;">'''004'''</span> |
|style="border:solid 2px black; style="color:black; style="text-align:center; background:#318CE7"|<span style="color:white;">'''004'''</span> |
||
| − | |style="border:solid 2px black; style="color:black; style="text-align:center; background:White"|Sergei |
+ | |style="border:solid 2px black; style="color:black; style="text-align:center; background:White"|<span style="color:black;">Sergei |
| − | |style="border:solid 2px black; style="color:black; style="text-align:center; background:White"|4 |
+ | |style="border:solid 2px black; style="color:black; style="text-align:center; background:White"|<span style="color:black;">4 |
| − | |style="border:solid 2px black; style="color:black; style="text-align:center; background:White"|Arkham University, Pit Fight 1.1 |
+ | |style="border:solid 2px black; style="color:black; style="text-align:center; background:White"|<span style="color:black;">Arkham University, Pit Fight 1.1 |
| − | |style="border:solid 2px black; style="color:black; style="text-align:center; background:White"|[[File:Shftnw_snaps_004.jpg|50px]] |
+ | |style="border:solid 2px black; style="color:black; style="text-align:center; background:White"|<span style="color:black;">[[File:Shftnw_snaps_004.jpg|50px]] |
|- |
|- |
||
|style="border:solid 2px black; style="color:black; style="text-align:center; background:#318CE7"|<span style="color:white;">'''005'''</span> |
|style="border:solid 2px black; style="color:black; style="text-align:center; background:#318CE7"|<span style="color:white;">'''005'''</span> |
||
| − | |style="border:solid 2px black; style="color:black; style="text-align:center; background:White"|Gagu |
+ | |style="border:solid 2px black; style="color:black; style="text-align:center; background:White"|<span style="color:black;">Gagu |
| − | |style="border:solid 2px black; style="color:black; style="text-align:center; background:White"|4 |
+ | |style="border:solid 2px black; style="color:black; style="text-align:center; background:White"|<span style="color:black;">4 |
| − | |style="border:solid 2px black; style="color:black; style="text-align:center; background:White"|Arkham University, Pit Fight 1.1 |
+ | |style="border:solid 2px black; style="color:black; style="text-align:center; background:White"|<span style="color:black;">Arkham University, Pit Fight 1.1 |
| − | |style="border:solid 2px black; style="color:black; style="text-align:center; background:White"|[[File:shftnw_snaps_005.jpg|50px]] |
+ | |style="border:solid 2px black; style="color:black; style="text-align:center; background:White"|<span style="color:black;">[[File:shftnw_snaps_005.jpg|50px]] |
|- |
|- |
||
|style="border:solid 2px black; style="color:black; style="text-align:center; background:#318CE7"|<span style="color:white;">'''006'''</span> |
|style="border:solid 2px black; style="color:black; style="text-align:center; background:#318CE7"|<span style="color:white;">'''006'''</span> |
||
| − | |style="border:solid 2px black; style="color:black; style="text-align:center; background:White"|Ignornak |
+ | |style="border:solid 2px black; style="color:black; style="text-align:center; background:White"|<span style="color:black;">Ignornak |
| − | |style="border:solid 2px black; style="color:black; style="text-align:center; background:White"|1 |
+ | |style="border:solid 2px black; style="color:black; style="text-align:center; background:White"|<span style="color:black;">1 |
| − | |style="border:solid 2px black; style="color:black; style="text-align:center; background:White"|Arkham University (Boss), Pit Fight 1.3 |
+ | |style="border:solid 2px black; style="color:black; style="text-align:center; background:White"|<span style="color:black;">Arkham University (Boss), Pit Fight 1.3 |
| − | |style="border:solid 2px black; style="color:black; style="text-align:center; background:White"|[[File:shftnw_snaps_006.jpg|50px]] |
+ | |style="border:solid 2px black; style="color:black; style="text-align:center; background:White"|<span style="color:black;">[[File:shftnw_snaps_006.jpg|50px]] |
|- |
|- |
||
|style="border:solid 2px black; style="color:black; style="text-align:center; background:#318CE7"|<span style="color:white;">'''007'''</span> |
|style="border:solid 2px black; style="color:black; style="text-align:center; background:#318CE7"|<span style="color:white;">'''007'''</span> |
||
| − | |style="border:solid 2px black; style="color:black; style="text-align:center; background:White"|Tonakh |
+ | |style="border:solid 2px black; style="color:black; style="text-align:center; background:White"|<span style="color:black;">Tonakh |
| − | |style="border:solid 2px black; style="color:black; style="text-align:center; background:White"|4 |
+ | |style="border:solid 2px black; style="color:black; style="text-align:center; background:White"|<span style="color:black;">4 |
| − | |style="border:solid 2px black; style="color:black; style="text-align:center; background:White"|Grand Canyon, Pit Fight 1.3 |
+ | |style="border:solid 2px black; style="color:black; style="text-align:center; background:White"|<span style="color:black;">Grand Canyon, Pit Fight 1.3 |
| − | |style="border:solid 2px black; style="color:black; style="text-align:center; background:White"|[[File:shftnw_snaps_007.jpg|50px]] |
+ | |style="border:solid 2px black; style="color:black; style="text-align:center; background:White"|<span style="color:black;">[[File:shftnw_snaps_007.jpg|50px]] |
|- |
|- |
||
|style="border:solid 2px black; style="color:black; style="text-align:center; background:#318CE7"|<span style="color:white;">'''008'''</span> |
|style="border:solid 2px black; style="color:black; style="text-align:center; background:#318CE7"|<span style="color:white;">'''008'''</span> |
||
| − | |style="border:solid 2px black; style="color:black; style="text-align:center; background:White"|Maii |
+ | |style="border:solid 2px black; style="color:black; style="text-align:center; background:White"|<span style="color:black;">Maii |
| − | |style="border:solid 2px black; style="color:black; style="text-align:center; background:White"|2 |
+ | |style="border:solid 2px black; style="color:black; style="text-align:center; background:White"|<span style="color:black;">2 |
| − | |style="border:solid 2px black; style="color:black; style="text-align:center; background:White"|Grand Canyon, Pit Fight 1.1, 1.3 |
+ | |style="border:solid 2px black; style="color:black; style="text-align:center; background:White"|<span style="color:black;">Grand Canyon, Pit Fight 1.1, 1.3 |
| − | |style="border:solid 2px black; style="color:black; style="text-align:center; background:White"|[[File:shftnw_snaps_008.jpg|50px]] |
+ | |style="border:solid 2px black; style="color:black; style="text-align:center; background:White"|<span style="color:black;">[[File:shftnw_snaps_008.jpg|50px]] |
|- |
|- |
||
|style="border:solid 2px black; style="color:black; style="text-align:center; background:#318CE7"|<span style="color:white;">'''009'''</span> |
|style="border:solid 2px black; style="color:black; style="text-align:center; background:#318CE7"|<span style="color:white;">'''009'''</span> |
||
| − | |style="border:solid 2px black; style="color:black; style="text-align:center; background:White"|Argen Tabisu |
+ | |style="border:solid 2px black; style="color:black; style="text-align:center; background:White"|<span style="color:black;">Argen Tabisu |
| − | |style="border:solid 2px black; style="color:black; style="text-align:center; background:White"|2 |
+ | |style="border:solid 2px black; style="color:black; style="text-align:center; background:White"|<span style="color:black;">2 |
| − | |style="border:solid 2px black; style="color:black; style="text-align:center; background:White"|Grand Canyon, Pit Fight 1.1, 1.3 |
+ | |style="border:solid 2px black; style="color:black; style="text-align:center; background:White"|<span style="color:black;">Grand Canyon, Pit Fight 1.1, 1.3 |
| − | |style="border:solid 2px black; style="color:black; style="text-align:center; background:White"|[[File:Shftnw_snaps_009.jpg|50px]] |
+ | |style="border:solid 2px black; style="color:black; style="text-align:center; background:White"|<span style="color:black;">[[File:Shftnw_snaps_009.jpg|50px]] |
|- |
|- |
||
|style="border:solid 2px black; style="color:black; style="text-align:center; background:#318CE7"|<span style="color:white;">'''010'''</span> |
|style="border:solid 2px black; style="color:black; style="text-align:center; background:#318CE7"|<span style="color:white;">'''010'''</span> |
||
| − | |style="border:solid 2px black; style="color:black; style="text-align:center; background:White"|Tatan'ka |
+ | |style="border:solid 2px black; style="color:black; style="text-align:center; background:White"|<span style="color:black;">Tatan'ka |
| − | |style="border:solid 2px black; style="color:black; style="text-align:center; background:White"|0 |
+ | |style="border:solid 2px black; style="color:black; style="text-align:center; background:White"|<span style="color:black;">0 |
| − | |style="border:solid 2px black; style="color:black; style="text-align:center; background:White"|Mary Trade #7 |
+ | |style="border:solid 2px black; style="color:black; style="text-align:center; background:White"|<span style="color:black;">Mary Trade #7 |
| − | |style="border:solid 2px black; style="color:black; style="text-align:center; background:White"|[[File:Shftnw_snaps_010.jpg|50px]] |
+ | |style="border:solid 2px black; style="color:black; style="text-align:center; background:White"|<span style="color:black;">[[File:Shftnw_snaps_010.jpg|50px]] |
|- |
|- |
||
|style="border:solid 2px black; style="color:black; style="text-align:center; background:#318CE7"|<span style="color:white;">'''011'''</span> |
|style="border:solid 2px black; style="color:black; style="text-align:center; background:#318CE7"|<span style="color:white;">'''011'''</span> |
||
| − | |style="border:solid 2px black; style="color:black; style="text-align:center; background:White"|Petty Mafioso |
+ | |style="border:solid 2px black; style="color:black; style="text-align:center; background:White"|<span style="color:black;">Petty Mafioso |
| − | |style="border:solid 2px black; style="color:black; style="text-align:center; background:White"|3 |
+ | |style="border:solid 2px black; style="color:black; style="text-align:center; background:White"|<span style="color:black;">3 |
| − | |style="border:solid 2px black; style="color:black; style="text-align:center; background:White"|Chicago (limited), Pit Fight 1.2 |
+ | |style="border:solid 2px black; style="color:black; style="text-align:center; background:White"|<span style="color:black;">Chicago (limited), Pit Fight 1.2 |
| − | |style="border:solid 2px black; style="color:black; style="text-align:center; background:White"|[[File:Shftnw_snaps_011.jpg|50px]] |
+ | |style="border:solid 2px black; style="color:black; style="text-align:center; background:White"|<span style="color:black;">[[File:Shftnw_snaps_011.jpg|50px]] |
|- |
|- |
||
|style="border:solid 2px black; style="color:black; style="text-align:center; background:#318CE7"|<span style="color:white;">'''012'''</span> |
|style="border:solid 2px black; style="color:black; style="text-align:center; background:#318CE7"|<span style="color:white;">'''012'''</span> |
||
| − | |style="border:solid 2px black; style="color:black; style="text-align:center; background:White"|Mafia Hoodlum |
+ | |style="border:solid 2px black; style="color:black; style="text-align:center; background:White"|<span style="color:black;">Mafia Hoodlum |
| − | |style="border:solid 2px black; style="color:black; style="text-align:center; background:White"|1 |
+ | |style="border:solid 2px black; style="color:black; style="text-align:center; background:White"|<span style="color:black;">1 |
| − | |style="border:solid 2px black; style="color:black; style="text-align:center; background:White"|Chicago (limited), Pit Fight 1.2 |
+ | |style="border:solid 2px black; style="color:black; style="text-align:center; background:White"|<span style="color:black;">Chicago (limited), Pit Fight 1.2 |
| − | |style="border:solid 2px black; style="color:black; style="text-align:center; background:White"|[[File:Shftnw_snaps_012.jpg|50px]] |
+ | |style="border:solid 2px black; style="color:black; style="text-align:center; background:White"|<span style="color:black;">[[File:Shftnw_snaps_012.jpg|50px]] |
|- |
|- |
||
|style="border:solid 2px black; style="color:black; style="text-align:center; background:#318CE7"|<span style="color:white;">'''013'''</span> |
|style="border:solid 2px black; style="color:black; style="text-align:center; background:#318CE7"|<span style="color:white;">'''013'''</span> |
||
| − | |style="border:solid 2px black; style="color:black; style="text-align:center; background:White"|Prison Guard |
+ | |style="border:solid 2px black; style="color:black; style="text-align:center; background:White"|<span style="color:black;">Prison Guard |
| − | |style="border:solid 2px black; style="color:black; style="text-align:center; background:White"|4 |
+ | |style="border:solid 2px black; style="color:black; style="text-align:center; background:White"|<span style="color:black;">4 |
| − | |style="border:solid 2px black; style="color:black; style="text-align:center; background:White"|Alcatraz (limited), Pit Fight 1.2 |
+ | |style="border:solid 2px black; style="color:black; style="text-align:center; background:White"|<span style="color:black;">Alcatraz (limited), Pit Fight 1.2 |
| − | |style="border:solid 2px black; style="color:black; style="text-align:center; background:White"|[[File:Shftnw_snaps_013.jpg|50px]] |
+ | |style="border:solid 2px black; style="color:black; style="text-align:center; background:White"|<span style="color:black;">[[File:Shftnw_snaps_013.jpg|50px]] |
|- |
|- |
||
|style="border:solid 2px black; style="color:black; style="text-align:center; background:#318CE7"|<span style="color:white;">'''014'''</span> |
|style="border:solid 2px black; style="color:black; style="text-align:center; background:#318CE7"|<span style="color:white;">'''014'''</span> |
||
| − | |style="border:solid 2px black; style="color:black; style="text-align:center; background:White"|Chon Chon |
+ | |style="border:solid 2px black; style="color:black; style="text-align:center; background:White"|<span style="color:black;">Chon Chon |
| − | |style="border:solid 2px black; style="color:black; style="text-align:center; background:White"|1 |
+ | |style="border:solid 2px black; style="color:black; style="text-align:center; background:White"|<span style="color:black;">1 |
| − | |style="border:solid 2px black; style="color:black; style="text-align:center; background:White"|Alcatraz (limited), Pit Fight 1.1 |
+ | |style="border:solid 2px black; style="color:black; style="text-align:center; background:White"|<span style="color:black;">Alcatraz (limited), Pit Fight 1.1 |
| − | |style="border:solid 2px black; style="color:black; style="text-align:center; background:White"|[[File:Shftnw_snaps_014.jpg|50px]] |
+ | |style="border:solid 2px black; style="color:black; style="text-align:center; background:White"|<span style="color:black;">[[File:Shftnw_snaps_014.jpg|50px]] |
|- |
|- |
||
|style="border:solid 2px black; style="color:black; style="text-align:center; background:#318CE7"|<span style="color:white;">'''015'''</span> |
|style="border:solid 2px black; style="color:black; style="text-align:center; background:#318CE7"|<span style="color:white;">'''015'''</span> |
||
| − | |style="border:solid 2px black; style="color:black; style="text-align:center; background:White"|Womp |
+ | |style="border:solid 2px black; style="color:black; style="text-align:center; background:White"|<span style="color:black;">Womp |
| − | |style="border:solid 2px black; style="color:black; style="text-align:center; background:White"|6 |
+ | |style="border:solid 2px black; style="color:black; style="text-align:center; background:White"|<span style="color:black;">6 |
| − | |style="border:solid 2px black; style="color:black; style="text-align:center; background:White"|Alcatraz (limited), Pit Fight 1.1 |
+ | |style="border:solid 2px black; style="color:black; style="text-align:center; background:White"|<span style="color:black;">Alcatraz (limited), Pit Fight 1.1 |
| − | |style="border:solid 2px black; style="color:black; style="text-align:center; background:White"|[[File:Shftnw_snaps_015.jpg|50px]] |
+ | |style="border:solid 2px black; style="color:black; style="text-align:center; background:White"|<span style="color:black;">[[File:Shftnw_snaps_015.jpg|50px]] |
|- |
|- |
||
|style="border:solid 2px black; style="color:black; style="text-align:center; background:#318CE7"|<span style="color:white;">'''016'''</span> |
|style="border:solid 2px black; style="color:black; style="text-align:center; background:#318CE7"|<span style="color:white;">'''016'''</span> |
||
| − | |style="border:solid 2px black; style="color:black; style="text-align:center; background:White"|Byarki |
+ | |style="border:solid 2px black; style="color:black; style="text-align:center; background:White"|<span style="color:black;">Byarki |
| − | |style="border:solid 2px black; style="color:black; style="text-align:center; background:White"|1 |
+ | |style="border:solid 2px black; style="color:black; style="text-align:center; background:White"|<span style="color:black;">1 |
| − | |style="border:solid 2px black; style="color:black; style="text-align:center; background:White"|Alcatraz (limited), Pit Fight 1.1 |
+ | |style="border:solid 2px black; style="color:black; style="text-align:center; background:White"|<span style="color:black;">Alcatraz (limited), Pit Fight 1.1 |
| − | |style="border:solid 2px black; style="color:black; style="text-align:center; background:White"|[[File:Shftnw_snaps_016.jpg|50px]] |
+ | |style="border:solid 2px black; style="color:black; style="text-align:center; background:White"|<span style="color:black;">[[File:Shftnw_snaps_016.jpg|50px]] |
|- |
|- |
||
|style="border:solid 2px black; style="color:black; style="text-align:center; background:#318CE7"|<span style="color:white;">'''017'''</span> |
|style="border:solid 2px black; style="color:black; style="text-align:center; background:#318CE7"|<span style="color:white;">'''017'''</span> |
||
| − | |style="border:solid 2px black; style="color:black; style="text-align:center; background:White"|Ronwei |
+ | |style="border:solid 2px black; style="color:black; style="text-align:center; background:White"|<span style="color:black;">Ronwei |
| − | |style="border:solid 2px black; style="color:black; style="text-align:center; background:White"|1 |
+ | |style="border:solid 2px black; style="color:black; style="text-align:center; background:White"|<span style="color:black;">1 |
| − | |style="border:solid 2px black; style="color:black; style="text-align:center; background:White"|Alcatraz (Boss), Pit Fight 4.1 |
+ | |style="border:solid 2px black; style="color:black; style="text-align:center; background:White"|<span style="color:black;">Alcatraz (Boss), Pit Fight 4.1 |
| − | |style="border:solid 2px black; style="color:black; style="text-align:center; background:White"|[[File:Shftnw_snaps_017.jpg|50px]] |
+ | |style="border:solid 2px black; style="color:black; style="text-align:center; background:White"|<span style="color:black;">[[File:Shftnw_snaps_017.jpg|50px]] |
|- |
|- |
||
|style="border:solid 2px black; style="color:black; style="text-align:center; background:#318CE7"|<span style="color:white;">'''018'''</span> |
|style="border:solid 2px black; style="color:black; style="text-align:center; background:#318CE7"|<span style="color:white;">'''018'''</span> |
||
| − | |style="border:solid 2px black; style="color:black; style="text-align:center; background:White"|Sirius |
+ | |style="border:solid 2px black; style="color:black; style="text-align:center; background:White"|<span style="color:black;">Sirius |
| − | |style="border:solid 2px black; style="color:black; style="text-align:center; background:White"|2 |
+ | |style="border:solid 2px black; style="color:black; style="text-align:center; background:White"|<span style="color:black;">2 |
| − | |style="border:solid 2px black; style="color:black; style="text-align:center; background:White"|Roswell |
+ | |style="border:solid 2px black; style="color:black; style="text-align:center; background:White"|<span style="color:black;">Roswell |
| − | |style="border:solid 2px black; style="color:black; style="text-align:center; background:White"|[[File:Shftnw_snaps_018.jpg|50px]] |
+ | |style="border:solid 2px black; style="color:black; style="text-align:center; background:White"|<span style="color:black;">[[File:Shftnw_snaps_018.jpg|50px]] |
|- |
|- |
||
|style="border:solid 2px black; style="color:black; style="text-align:center; background:#318CE7"|<span style="color:white;">'''019'''</span> |
|style="border:solid 2px black; style="color:black; style="text-align:center; background:#318CE7"|<span style="color:white;">'''019'''</span> |
||
| − | |style="border:solid 2px black; style="color:black; style="text-align:center; background:White"|Betelguise |
+ | |style="border:solid 2px black; style="color:black; style="text-align:center; background:White"|<span style="color:black;">Betelguise |
| − | |style="border:solid 2px black; style="color:black; style="text-align:center; background:White"|2 |
+ | |style="border:solid 2px black; style="color:black; style="text-align:center; background:White"|<span style="color:black;">2 |
| − | |style="border:solid 2px black; style="color:black; style="text-align:center; background:White"|Roswell, Pit Fight 1.1, 1.3 |
+ | |style="border:solid 2px black; style="color:black; style="text-align:center; background:White"|<span style="color:black;">Roswell, Pit Fight 1.1, 1.3 |
| − | |style="border:solid 2px black; style="color:black; style="text-align:center; background:White"|[[File:Shftnw_snaps_019.jpg|50px]] |
+ | |style="border:solid 2px black; style="color:black; style="text-align:center; background:White"|<span style="color:black;">[[File:Shftnw_snaps_019.jpg|50px]] |
|- |
|- |
||
|style="border:solid 2px black; style="color:black; style="text-align:center; background:#318CE7"|<span style="color:white;">'''020'''</span> |
|style="border:solid 2px black; style="color:black; style="text-align:center; background:#318CE7"|<span style="color:white;">'''020'''</span> |
||
| − | |style="border:solid 2px black; style="color:black; style="text-align:center; background:White"|Acteon |
+ | |style="border:solid 2px black; style="color:black; style="text-align:center; background:White"|<span style="color:black;">Acteon |
| − | |style="border:solid 2px black; style="color:black; style="text-align:center; background:White"|2 |
+ | |style="border:solid 2px black; style="color:black; style="text-align:center; background:White"|<span style="color:black;">2 |
| − | |style="border:solid 2px black; style="color:black; style="text-align:center; background:White"|Roswell, Pit Fight 1.1, 1.3 |
+ | |style="border:solid 2px black; style="color:black; style="text-align:center; background:White"|<span style="color:black;">Roswell, Pit Fight 1.1, 1.3 |
| − | |style="border:solid 2px black; style="color:black; style="text-align:center; background:White"|[[File:Shftnw_snaps_020.jpg|50px]] |
+ | |style="border:solid 2px black; style="color:black; style="text-align:center; background:White"|<span style="color:black;">[[File:Shftnw_snaps_020.jpg|50px]] |
|- |
|- |
||
|style="border:solid 2px black; style="color:black; style="text-align:center; background:#318CE7"|<span style="color:white;">'''021'''</span> |
|style="border:solid 2px black; style="color:black; style="text-align:center; background:#318CE7"|<span style="color:white;">'''021'''</span> |
||
| − | |style="border:solid 2px black; style="color:black; style="text-align:center; background:White"|Procyon |
+ | |style="border:solid 2px black; style="color:black; style="text-align:center; background:White"|<span style="color:black;">Procyon |
| − | |style="border:solid 2px black; style="color:black; style="text-align:center; background:White"|1 |
+ | |style="border:solid 2px black; style="color:black; style="text-align:center; background:White"|<span style="color:black;">1 |
| − | |style="border:solid 2px black; style="color:black; style="text-align:center; background:White"|Roswell (Boss), Masatoshi Trade #3 |
+ | |style="border:solid 2px black; style="color:black; style="text-align:center; background:White"|<span style="color:black;">Roswell (Boss), Masatoshi Trade #3 |
| − | |style="border:solid 2px black; style="color:black; style="text-align:center; background:White"|[[File:shftnw_snaps_021.jpg|Procyon|50px]] |
+ | |style="border:solid 2px black; style="color:black; style="text-align:center; background:White"|<span style="color:black;">[[File:shftnw_snaps_021.jpg|Procyon|50px]] |
|- |
|- |
||
|style="border:solid 2px black; style="color:black; style="text-align:center; background:#318CE7"|<span style="color:white;">'''022'''</span> |
|style="border:solid 2px black; style="color:black; style="text-align:center; background:#318CE7"|<span style="color:white;">'''022'''</span> |
||
| − | |style="border:solid 2px black; style="color:black; style="text-align:center; background:White"|Bablovia |
+ | |style="border:solid 2px black; style="color:black; style="text-align:center; background:White"|<span style="color:black;">Bablovia |
| − | |style="border:solid 2px black; style="color:black; style="text-align:center; background:White"|4 |
+ | |style="border:solid 2px black; style="color:black; style="text-align:center; background:White"|<span style="color:black;">4 |
| − | |style="border:solid 2px black; style="color:black; style="text-align:center; background:White"|Caribbean |
+ | |style="border:solid 2px black; style="color:black; style="text-align:center; background:White"|<span style="color:black;">Caribbean |
| − | |style="border:solid 2px black; style="color:black; style="text-align:center; background:White"|[[File:shftnw_snaps_022.jpg|Bablovia|50px]] |
+ | |style="border:solid 2px black; style="color:black; style="text-align:center; background:White"|<span style="color:black;">[[File:shftnw_snaps_022.jpg|Bablovia|50px]] |
|- |
|- |
||
|style="border:solid 2px black; style="color:black; style="text-align:center; background:#318CE7"|<span style="color:white;">'''023'''</span> |
|style="border:solid 2px black; style="color:black; style="text-align:center; background:#318CE7"|<span style="color:white;">'''023'''</span> |
||
| − | |style="border:solid 2px black; style="color:black; style="text-align:center; background:White"|Heinz |
+ | |style="border:solid 2px black; style="color:black; style="text-align:center; background:White"|<span style="color:black;">Heinz |
| − | |style="border:solid 2px black; style="color:black; style="text-align:center; background:White"|6 |
+ | |style="border:solid 2px black; style="color:black; style="text-align:center; background:White"|<span style="color:black;">6 |
| − | |style="border:solid 2px black; style="color:black; style="text-align:center; background:White"|Caribbean |
+ | |style="border:solid 2px black; style="color:black; style="text-align:center; background:White"|<span style="color:black;">Caribbean |
| − | |style="border:solid 2px black; style="color:black; style="text-align:center; background:White"|[[File:shftnw_snaps_023.jpg|Heinz|50px]] |
+ | |style="border:solid 2px black; style="color:black; style="text-align:center; background:White"|<span style="color:black;">[[File:shftnw_snaps_023.jpg|Heinz|50px]] |
|- |
|- |
||
|style="border:solid 2px black; style="color:black; style="text-align:center; background:#318CE7"|<span style="color:white;">'''024'''</span> |
|style="border:solid 2px black; style="color:black; style="text-align:center; background:#318CE7"|<span style="color:white;">'''024'''</span> |
||
| − | |style="border:solid 2px black; style="color:black; style="text-align:center; background:White"|Okeron |
+ | |style="border:solid 2px black; style="color:black; style="text-align:center; background:White"|<span style="color:black;">Okeron |
| − | |style="border:solid 2px black; style="color:black; style="text-align:center; background:White"|3 |
+ | |style="border:solid 2px black; style="color:black; style="text-align:center; background:White"|<span style="color:black;">3 |
| − | |style="border:solid 2px black; style="color:black; style="text-align:center; background:White"|Caribbean, Pit Fight 2.1 |
+ | |style="border:solid 2px black; style="color:black; style="text-align:center; background:White"|<span style="color:black;">Caribbean, Pit Fight 2.1 |
| − | |style="border:solid 2px black; style="color:black; style="text-align:center; background:White"|[[File:shftnw_snaps_024.jpg|Okeron|50px]] |
+ | |style="border:solid 2px black; style="color:black; style="text-align:center; background:White"|<span style="color:black;">[[File:shftnw_snaps_024.jpg|Okeron|50px]] |
|- |
|- |
||
|style="border:solid 2px black; style="color:black; style="text-align:center; background:#318CE7"|<span style="color:white;">'''025'''</span> |
|style="border:solid 2px black; style="color:black; style="text-align:center; background:#318CE7"|<span style="color:white;">'''025'''</span> |
||
| − | |style="border:solid 2px black; style="color:black; style="text-align:center; background:White"|La Sirene |
+ | |style="border:solid 2px black; style="color:black; style="text-align:center; background:White"|<span style="color:black;">La Sirene |
| − | |style="border:solid 2px black; style="color:black; style="text-align:center; background:White"|0 |
+ | |style="border:solid 2px black; style="color:black; style="text-align:center; background:White"|<span style="color:black;">0 |
| − | |style="border:solid 2px black; style="color:black; style="text-align:center; background:White"|Mary Trade #7 |
+ | |style="border:solid 2px black; style="color:black; style="text-align:center; background:White"|<span style="color:black;">Mary Trade #7 |
| − | |style="border:solid 2px black; style="color:black; style="text-align:center; background:White"|[[File:shftnw_snaps_025.jpg|La Sirene|50px]] |
+ | |style="border:solid 2px black; style="color:black; style="text-align:center; background:White"|<span style="color:black;">[[File:shftnw_snaps_025.jpg|La Sirene|50px]] |
|- |
|- |
||
|style="border:solid 2px black; style="color:black; style="text-align:center; background:#318CE7"|<span style="color:white;">'''026'''</span> |
|style="border:solid 2px black; style="color:black; style="text-align:center; background:#318CE7"|<span style="color:white;">'''026'''</span> |
||
| − | |style="border:solid 2px black; style="color:black; style="text-align:center; background:White"|Petty Gangster |
+ | |style="border:solid 2px black; style="color:black; style="text-align:center; background:White"|<span style="color:black;">Petty Gangster |
| − | |style="border:solid 2px black; style="color:black; style="text-align:center; background:White"|3 |
+ | |style="border:solid 2px black; style="color:black; style="text-align:center; background:White"|<span style="color:black;">3 |
| − | |style="border:solid 2px black; style="color:black; style="text-align:center; background:White"|Las Vegas (limited), Pit Fight 2.2 |
+ | |style="border:solid 2px black; style="color:black; style="text-align:center; background:White"|<span style="color:black;">Las Vegas (limited), Pit Fight 2.2 |
| − | |style="border:solid 2px black; style="color:black; style="text-align:center; background:White"|[[File:shftnw_snaps_026.jpg|Petty Gangster|50px]] |
+ | |style="border:solid 2px black; style="color:black; style="text-align:center; background:White"|<span style="color:black;">[[File:shftnw_snaps_026.jpg|Petty Gangster|50px]] |
|- |
|- |
||
|style="border:solid 2px black; style="color:black; style="text-align:center; background:#318CE7"|<span style="color:white;">'''027'''</span> |
|style="border:solid 2px black; style="color:black; style="text-align:center; background:#318CE7"|<span style="color:white;">'''027'''</span> |
||
| − | |style="border:solid 2px black; style="color:black; style="text-align:center; background:White"|Gangster Hoodlum |
+ | |style="border:solid 2px black; style="color:black; style="text-align:center; background:White"|<span style="color:black;">Gangster Hoodlum |
| − | |style="border:solid 2px black; style="color:black; style="text-align:center; background:White"|2 |
+ | |style="border:solid 2px black; style="color:black; style="text-align:center; background:White"|<span style="color:black;">2 |
| − | |style="border:solid 2px black; style="color:black; style="text-align:center; background:White"|Las Vegas (limited), Pit Fight 2.2 |
+ | |style="border:solid 2px black; style="color:black; style="text-align:center; background:White"|<span style="color:black;">Las Vegas (limited), Pit Fight 2.2 |
| − | |style="border:solid 2px black; style="color:black; style="text-align:center; background:White"|[[File:shftnw_snaps_027.jpg|Gangster Hoodlum|50px]] |
+ | |style="border:solid 2px black; style="color:black; style="text-align:center; background:White"|<span style="color:black;">[[File:shftnw_snaps_027.jpg|Gangster Hoodlum|50px]] |
|- |
|- |
||
|style="border:solid 2px black; style="color:black; style="text-align:center; background:#318CE7"|<span style="color:white;">'''028'''</span> |
|style="border:solid 2px black; style="color:black; style="text-align:center; background:#318CE7"|<span style="color:white;">'''028'''</span> |
||
| − | |style="border:solid 2px black; style="color:black; style="text-align:center; background:White"|Butcher |
+ | |style="border:solid 2px black; style="color:black; style="text-align:center; background:White"|<span style="color:black;">Butcher |
| − | |style="border:solid 2px black; style="color:black; style="text-align:center; background:White"|1 |
+ | |style="border:solid 2px black; style="color:black; style="text-align:center; background:White"|<span style="color:black;">1 |
| − | |style="border:solid 2px black; style="color:black; style="text-align:center; background:White"|Las Vegas (limited), Pit Fight 2.2, 2.3 |
+ | |style="border:solid 2px black; style="color:black; style="text-align:center; background:White"|<span style="color:black;">Las Vegas (limited), Pit Fight 2.2, 2.3 |
| − | |style="border:solid 2px black; style="color:black; style="text-align:center; background:White"|[[File:shftnw_snaps_028.jpg|Butcher|50px]] |
+ | |style="border:solid 2px black; style="color:black; style="text-align:center; background:White"|<span style="color:black;">[[File:shftnw_snaps_028.jpg|Butcher|50px]] |
|- |
|- |
||
|style="border:solid 2px black; style="color:black; style="text-align:center; background:#318CE7"|<span style="color:white;">'''029'''</span> |
|style="border:solid 2px black; style="color:black; style="text-align:center; background:#318CE7"|<span style="color:white;">'''029'''</span> |
||
| − | |style="border:solid 2px black; style="color:black; style="text-align:center; background:White"|Ghoul |
+ | |style="border:solid 2px black; style="color:black; style="text-align:center; background:White"|<span style="color:black;">Ghoul |
| − | |style="border:solid 2px black; style="color:black; style="text-align:center; background:White"|1 |
+ | |style="border:solid 2px black; style="color:black; style="text-align:center; background:White"|<span style="color:black;">1 |
| − | |style="border:solid 2px black; style="color:black; style="text-align:center; background:White"|Las Vegas (limited), Pit Fight 2.2 |
+ | |style="border:solid 2px black; style="color:black; style="text-align:center; background:White"|<span style="color:black;">Las Vegas (limited), Pit Fight 2.2 |
| − | |style="border:solid 2px black; style="color:black; style="text-align:center; background:White"|[[File:shftnw_snaps_029.jpg|Ghoul|50px]] |
+ | |style="border:solid 2px black; style="color:black; style="text-align:center; background:White"|<span style="color:black;">[[File:shftnw_snaps_029.jpg|Ghoul|50px]] |
|- |
|- |
||
|style="border:solid 2px black; style="color:black; style="text-align:center; background:#318CE7"|<span style="color:white;">'''030'''</span> |
|style="border:solid 2px black; style="color:black; style="text-align:center; background:#318CE7"|<span style="color:white;">'''030'''</span> |
||
| − | |style="border:solid 2px black; style="color:black; style="text-align:center; background:White"|Automaton |
+ | |style="border:solid 2px black; style="color:black; style="text-align:center; background:White"|<span style="color:black;">Automaton |
| − | |style="border:solid 2px black; style="color:black; style="text-align:center; background:White"|1 |
+ | |style="border:solid 2px black; style="color:black; style="text-align:center; background:White"|<span style="color:black;">1 |
| − | |style="border:solid 2px black; style="color:black; style="text-align:center; background:White"|Las Vegas (limited), Pit Fight 2.3 |
+ | |style="border:solid 2px black; style="color:black; style="text-align:center; background:White"|<span style="color:black;">Las Vegas (limited), Pit Fight 2.3 |
| − | |style="border:solid 2px black; style="color:black; style="text-align:center; background:White"|[[File:shftnw_snaps_030.jpg|Automaton|50px]] |
+ | |style="border:solid 2px black; style="color:black; style="text-align:center; background:White"|<span style="color:black;">[[File:shftnw_snaps_030.jpg|Automaton|50px]] |
|- |
|- |
||
|style="border:solid 2px black; style="color:black; style="text-align:center; background:#318CE7"|<span style="color:white;">'''031'''</span> |
|style="border:solid 2px black; style="color:black; style="text-align:center; background:#318CE7"|<span style="color:white;">'''031'''</span> |
||
| − | |style="border:solid 2px black; style="color:black; style="text-align:center; background:White"|Malice Edna |
+ | |style="border:solid 2px black; style="color:black; style="text-align:center; background:White"|<span style="color:black;">Malice Edna |
| − | |style="border:solid 2px black; style="color:black; style="text-align:center; background:White"|1 |
+ | |style="border:solid 2px black; style="color:black; style="text-align:center; background:White"|<span style="color:black;">1 |
| − | |style="border:solid 2px black; style="color:black; style="text-align:center; background:White"|Las Vegas (Boss), Pit Fight 2.3 |
+ | |style="border:solid 2px black; style="color:black; style="text-align:center; background:White"|<span style="color:black;">Las Vegas (Boss), Pit Fight 2.3 |
| − | |style="border:solid 2px black; style="color:black; style="text-align:center; background:White"|[[File:shftnw_snaps_031.jpg|Malice Edna|50px]] |
+ | |style="border:solid 2px black; style="color:black; style="text-align:center; background:White"|<span style="color:black;">[[File:shftnw_snaps_031.jpg|Malice Edna|50px]] |
|- |
|- |
||
|style="border:solid 2px black; style="color:black; style="text-align:center; background:#318CE7"|<span style="color:white;">'''032'''</span> |
|style="border:solid 2px black; style="color:black; style="text-align:center; background:#318CE7"|<span style="color:white;">'''032'''</span> |
||
| − | |style="border:solid 2px black; style="color:black; style="text-align:center; background:White"|Eliops |
+ | |style="border:solid 2px black; style="color:black; style="text-align:center; background:White"|<span style="color:black;">Eliops |
| − | |style="border:solid 2px black; style="color:black; style="text-align:center; background:White"|4 |
+ | |style="border:solid 2px black; style="color:black; style="text-align:center; background:White"|<span style="color:black;">4 |
| − | |style="border:solid 2px black; style="color:black; style="text-align:center; background:White"|Chichen Itza, Pit Fight 2.1, 2.3 |
+ | |style="border:solid 2px black; style="color:black; style="text-align:center; background:White"|<span style="color:black;">Chichen Itza, Pit Fight 2.1, 2.3 |
| − | |style="border:solid 2px black; style="color:black; style="text-align:center; background:White"|[[File:shftnw_snaps_032.jpg|Eliops|50px]] |
+ | |style="border:solid 2px black; style="color:black; style="text-align:center; background:White"|<span style="color:black;">[[File:shftnw_snaps_032.jpg|Eliops|50px]] |
|- |
|- |
||
|style="border:solid 2px black; style="color:black; style="text-align:center; background:#318CE7"|<span style="color:white;">'''033'''</span> |
|style="border:solid 2px black; style="color:black; style="text-align:center; background:#318CE7"|<span style="color:white;">'''033'''</span> |
||
| − | |style="border:solid 2px black; style="color:black; style="text-align:center; background:White"|Jig Ruta |
+ | |style="border:solid 2px black; style="color:black; style="text-align:center; background:White"|<span style="color:black;">Jig Ruta |
| − | |style="border:solid 2px black; style="color:black; style="text-align:center; background:White"|3 |
+ | |style="border:solid 2px black; style="color:black; style="text-align:center; background:White"|<span style="color:black;">3 |
| − | |style="border:solid 2px black; style="color:black; style="text-align:center; background:White"|Chichen Itza, Pit Fight 2.1, 2.3 |
+ | |style="border:solid 2px black; style="color:black; style="text-align:center; background:White"|<span style="color:black;">Chichen Itza, Pit Fight 2.1, 2.3 |
| − | |style="border:solid 2px black; style="color:black; style="text-align:center; background:White"|[[File:shftnw_snaps_033.jpg|Jig Ruta|50px]] |
+ | |style="border:solid 2px black; style="color:black; style="text-align:center; background:White"|<span style="color:black;">[[File:shftnw_snaps_033.jpg|Jig Ruta|50px]] |
|- |
|- |
||
|style="border:solid 2px black; style="color:black; style="text-align:center; background:#318CE7"|<span style="color:white;">'''034'''</span> |
|style="border:solid 2px black; style="color:black; style="text-align:center; background:#318CE7"|<span style="color:white;">'''034'''</span> |
||
| − | |style="border:solid 2px black; style="color:black; style="text-align:center; background:White"|Guanna |
+ | |style="border:solid 2px black; style="color:black; style="text-align:center; background:White"|<span style="color:black;">Guanna |
| − | |style="border:solid 2px black; style="color:black; style="text-align:center; background:White"|3 |
+ | |style="border:solid 2px black; style="color:black; style="text-align:center; background:White"|<span style="color:black;">3 |
| − | |style="border:solid 2px black; style="color:black; style="text-align:center; background:White"|Chichen Itza, Pit Fight 2.1 |
+ | |style="border:solid 2px black; style="color:black; style="text-align:center; background:White"|<span style="color:black;">Chichen Itza, Pit Fight 2.1 |
| − | |style="border:solid 2px black; style="color:black; style="text-align:center; background:White"|[[File:shftnw_snaps_034.jpg|Guanna|50px]] |
+ | |style="border:solid 2px black; style="color:black; style="text-align:center; background:White"|<span style="color:black;">[[File:shftnw_snaps_034.jpg|Guanna|50px]] |
|- |
|- |
||
|style="border:solid 2px black; style="color:black; style="text-align:center; background:#318CE7"|<span style="color:white;">'''035'''</span> |
|style="border:solid 2px black; style="color:black; style="text-align:center; background:#318CE7"|<span style="color:white;">'''035'''</span> |
||
| − | |style="border:solid 2px black; style="color:black; style="text-align:center; background:White"|Jeb Niglas |
+ | |style="border:solid 2px black; style="color:black; style="text-align:center; background:White"|<span style="color:black;">Jeb Niglas |
| − | |style="border:solid 2px black; style="color:black; style="text-align:center; background:White"|1 |
+ | |style="border:solid 2px black; style="color:black; style="text-align:center; background:White"|<span style="color:black;">1 |
| − | |style="border:solid 2px black; style="color:black; style="text-align:center; background:White"|Chichen Itza (Boss), Samuel Trade #1 |
+ | |style="border:solid 2px black; style="color:black; style="text-align:center; background:White"|<span style="color:black;">Chichen Itza (Boss), Samuel Trade #1 |
| − | |style="border:solid 2px black; style="color:black; style="text-align:center; background:White"|[[File:shftnw_snaps_035.jpg|Jeb Niglas|50px]] |
+ | |style="border:solid 2px black; style="color:black; style="text-align:center; background:White"|<span style="color:black;">[[File:shftnw_snaps_035.jpg|Jeb Niglas|50px]] |
|- |
|- |
||
|style="border:solid 2px black; style="color:black; style="text-align:center; background:#318CE7"|<span style="color:white;">'''036'''</span> |
|style="border:solid 2px black; style="color:black; style="text-align:center; background:#318CE7"|<span style="color:white;">'''036'''</span> |
||
| − | |style="border:solid 2px black; style="color:black; style="text-align:center; background:White"|Dicteo |
+ | |style="border:solid 2px black; style="color:black; style="text-align:center; background:White"|<span style="color:black;">Dicteo |
| − | |style="border:solid 2px black; style="color:black; style="text-align:center; background:White"|3 |
+ | |style="border:solid 2px black; style="color:black; style="text-align:center; background:White"|<span style="color:black;">3 |
| − | |style="border:solid 2px black; style="color:black; style="text-align:center; background:White"|Machu Picchu, Pit Fight 3.4 |
+ | |style="border:solid 2px black; style="color:black; style="text-align:center; background:White"|<span style="color:black;">Machu Picchu, Pit Fight 3.4 |
| − | |style="border:solid 2px black; style="color:black; style="text-align:center; background:White"|[[File:shftnw_snaps_036.jpg|Dicteo|50px]] |
+ | |style="border:solid 2px black; style="color:black; style="text-align:center; background:White"|<span style="color:black;">[[File:shftnw_snaps_036.jpg|Dicteo|50px]] |
|- |
|- |
||
|style="border:solid 2px black; style="color:black; style="text-align:center; background:#318CE7"|<span style="color:white;">'''037'''</span> |
|style="border:solid 2px black; style="color:black; style="text-align:center; background:#318CE7"|<span style="color:white;">'''037'''</span> |
||
| − | |style="border:solid 2px black; style="color:black; style="text-align:center; background:White"|Xi Dazun |
+ | |style="border:solid 2px black; style="color:black; style="text-align:center; background:White"|<span style="color:black;">Xi Dazun |
| − | |style="border:solid 2px black; style="color:black; style="text-align:center; background:White"|3 |
+ | |style="border:solid 2px black; style="color:black; style="text-align:center; background:White"|<span style="color:black;">3 |
| − | |style="border:solid 2px black; style="color:black; style="text-align:center; background:White"|Machu Picchu, Pit Fight 3.4 |
+ | |style="border:solid 2px black; style="color:black; style="text-align:center; background:White"|<span style="color:black;">Machu Picchu, Pit Fight 3.4 |
| − | |style="border:solid 2px black; style="color:black; style="text-align:center; background:White"|[[File:shftnw_snaps_037.jpg|Xi Dazun|50px]] |
+ | |style="border:solid 2px black; style="color:black; style="text-align:center; background:White"|<span style="color:black;">[[File:shftnw_snaps_037.jpg|Xi Dazun|50px]] |
|- |
|- |
||
|style="border:solid 2px black; style="color:black; style="text-align:center; background:#318CE7"|<span style="color:white;">'''038'''</span> |
|style="border:solid 2px black; style="color:black; style="text-align:center; background:#318CE7"|<span style="color:white;">'''038'''</span> |
||
| − | |style="border:solid 2px black; style="color:black; style="text-align:center; background:White"|Xantak |
+ | |style="border:solid 2px black; style="color:black; style="text-align:center; background:White"|<span style="color:black;">Xantak |
| − | |style="border:solid 2px black; style="color:black; style="text-align:center; background:White"|3 |
+ | |style="border:solid 2px black; style="color:black; style="text-align:center; background:White"|<span style="color:black;">3 |
| − | |style="border:solid 2px black; style="color:black; style="text-align:center; background:White"|Machu Picchu |
+ | |style="border:solid 2px black; style="color:black; style="text-align:center; background:White"|<span style="color:black;">Machu Picchu |
| − | |style="border:solid 2px black; style="color:black; style="text-align:center; background:White"|[[File:shftnw_snaps_038.jpg|Xantak|50px]] |
+ | |style="border:solid 2px black; style="color:black; style="text-align:center; background:White"|<span style="color:black;">[[File:shftnw_snaps_038.jpg|Xantak|50px]] |
|- |
|- |
||
|style="border:solid 2px black; style="color:black; style="text-align:center; background:#318CE7"|<span style="color:white;">'''039'''</span> |
|style="border:solid 2px black; style="color:black; style="text-align:center; background:#318CE7"|<span style="color:white;">'''039'''</span> |
||
| − | |style="border:solid 2px black; style="color:black; style="text-align:center; background:White"|Wariche |
+ | |style="border:solid 2px black; style="color:black; style="text-align:center; background:White"|<span style="color:black;">Wariche |
| − | |style="border:solid 2px black; style="color:black; style="text-align:center; background:White"|3 |
+ | |style="border:solid 2px black; style="color:black; style="text-align:center; background:White"|<span style="color:black;">3 |
| − | |style="border:solid 2px black; style="color:black; style="text-align:center; background:White"|Machu Picchu, Pit Fight 3.4 |
+ | |style="border:solid 2px black; style="color:black; style="text-align:center; background:White"|<span style="color:black;">Machu Picchu, Pit Fight 3.4 |
| − | |style="border:solid 2px black; style="color:black; style="text-align:center; background:White"|[[File:shftnw_snaps_039.jpg|Wariche|50px]] |
+ | |style="border:solid 2px black; style="color:black; style="text-align:center; background:White"|<span style="color:black;">[[File:shftnw_snaps_039.jpg|Wariche|50px]] |
|- |
|- |
||
|style="border:solid 2px black; style="color:black; style="text-align:center; background:#318CE7"|<span style="color:white;">'''040'''</span> |
|style="border:solid 2px black; style="color:black; style="text-align:center; background:#318CE7"|<span style="color:white;">'''040'''</span> |
||
| − | |style="border:solid 2px black; style="color:black; style="text-align:center; background:White"|Kerufe |
+ | |style="border:solid 2px black; style="color:black; style="text-align:center; background:White"|<span style="color:black;">Kerufe |
| − | |style="border:solid 2px black; style="color:black; style="text-align:center; background:White"|3 |
+ | |style="border:solid 2px black; style="color:black; style="text-align:center; background:White"|<span style="color:black;">3 |
| − | |style="border:solid 2px black; style="color:black; style="text-align:center; background:White"|Machu Picchu, Pit Fight 3.2, Pissarro Trade #1 |
+ | |style="border:solid 2px black; style="color:black; style="text-align:center; background:White"|<span style="color:black;">Machu Picchu, Pit Fight 3.2, Pissarro Trade #1 |
| − | |style="border:solid 2px black; style="color:black; style="text-align:center; background:White"|[[File:shftnw_snaps_040.jpg|Kerufe|50px]] |
+ | |style="border:solid 2px black; style="color:black; style="text-align:center; background:White"|<span style="color:black;">[[File:shftnw_snaps_040.jpg|Kerufe|50px]] |
|- |
|- |
||
|style="border:solid 2px black; style="color:black; style="text-align:center; background:#318CE7"|<span style="color:white;">'''041'''</span> |
|style="border:solid 2px black; style="color:black; style="text-align:center; background:#318CE7"|<span style="color:white;">'''041'''</span> |
||
| − | |style="border:solid 2px black; style="color:black; style="text-align:center; background:White"|Wormy Worm |
+ | |style="border:solid 2px black; style="color:black; style="text-align:center; background:White"|<span style="color:black;">Wormy Worm |
| − | |style="border:solid 2px black; style="color:black; style="text-align:center; background:White"|2 |
+ | |style="border:solid 2px black; style="color:black; style="text-align:center; background:White"|<span style="color:black;">2 |
| − | |style="border:solid 2px black; style="color:black; style="text-align:center; background:White"|Vilcabamba, Pit Fight 3.1, 3.4 |
+ | |style="border:solid 2px black; style="color:black; style="text-align:center; background:White"|<span style="color:black;">Vilcabamba, Pit Fight 3.1, 3.4 |
| − | |style="border:solid 2px black; style="color:black; style="text-align:center; background:White"|[[File:shftnw_snaps_041.jpg|Wormy Worm|50px]] |
+ | |style="border:solid 2px black; style="color:black; style="text-align:center; background:White"|<span style="color:black;">[[File:shftnw_snaps_041.jpg|Wormy Worm|50px]] |
|- |
|- |
||
|style="border:solid 2px black; style="color:black; style="text-align:center; background:#318CE7"|<span style="color:white;">'''042'''</span> |
|style="border:solid 2px black; style="color:black; style="text-align:center; background:#318CE7"|<span style="color:white;">'''042'''</span> |
||
| − | |style="border:solid 2px black; style="color:black; style="text-align:center; background:White"|Ghatanothoa |
+ | |style="border:solid 2px black; style="color:black; style="text-align:center; background:White"|<span style="color:black;">Ghatanothoa |
| − | |style="border:solid 2px black; style="color:black; style="text-align:center; background:White"|2 |
+ | |style="border:solid 2px black; style="color:black; style="text-align:center; background:White"|<span style="color:black;">2 |
| − | |style="border:solid 2px black; style="color:black; style="text-align:center; background:White"|Vilcabamba, Pit Fight 3.1, 3.4 |
+ | |style="border:solid 2px black; style="color:black; style="text-align:center; background:White"|<span style="color:black;">Vilcabamba, Pit Fight 3.1, 3.4 |
| − | |style="border:solid 2px black; style="color:black; style="text-align:center; background:White"|[[File:shftnw_snaps_042.jpg|Ghatanothoa|50px]] |
+ | |style="border:solid 2px black; style="color:black; style="text-align:center; background:White"|<span style="color:black;">[[File:shftnw_snaps_042.jpg|Ghatanothoa|50px]] |
|- |
|- |
||
|style="border:solid 2px black; style="color:black; style="text-align:center; background:#318CE7"|<span style="color:white;">'''043'''</span> |
|style="border:solid 2px black; style="color:black; style="text-align:center; background:#318CE7"|<span style="color:white;">'''043'''</span> |
||
| − | |style="border:solid 2px black; style="color:black; style="text-align:center; background:White"|Tindaros |
+ | |style="border:solid 2px black; style="color:black; style="text-align:center; background:White"|<span style="color:black;">Tindaros |
| − | |style="border:solid 2px black; style="color:black; style="text-align:center; background:White"|2 |
+ | |style="border:solid 2px black; style="color:black; style="text-align:center; background:White"|<span style="color:black;">2 |
| − | |style="border:solid 2px black; style="color:black; style="text-align:center; background:White"|Vilcabamba, Pit Fight 3.4 |
+ | |style="border:solid 2px black; style="color:black; style="text-align:center; background:White"|<span style="color:black;">Vilcabamba, Pit Fight 3.4 |
| − | |style="border:solid 2px black; style="color:black; style="text-align:center; background:White"|[[File:shftnw_snaps_043.jpg|Tindaros|50px]] |
+ | |style="border:solid 2px black; style="color:black; style="text-align:center; background:White"|<span style="color:black;">[[File:shftnw_snaps_043.jpg|Tindaros|50px]] |
|- |
|- |
||
|style="border:solid 2px black; style="color:black; style="text-align:center; background:#318CE7"|<span style="color:white;">'''044'''</span> |
|style="border:solid 2px black; style="color:black; style="text-align:center; background:#318CE7"|<span style="color:white;">'''044'''</span> |
||
| − | |style="border:solid 2px black; style="color:black; style="text-align:center; background:White"|Woworito |
+ | |style="border:solid 2px black; style="color:black; style="text-align:center; background:White"|<span style="color:black;">Woworito |
| − | |style="border:solid 2px black; style="color:black; style="text-align:center; background:White"|4 |
+ | |style="border:solid 2px black; style="color:black; style="text-align:center; background:White"|<span style="color:black;">4 |
| − | |style="border:solid 2px black; style="color:black; style="text-align:center; background:White"|Vilcabamba, Pit Fight 3.4 |
+ | |style="border:solid 2px black; style="color:black; style="text-align:center; background:White"|<span style="color:black;">Vilcabamba, Pit Fight 3.4 |
| − | |style="border:solid 2px black; style="color:black; style="text-align:center; background:White"|[[File:shftnw_snaps_044.jpg|Woworito|50px]] |
+ | |style="border:solid 2px black; style="color:black; style="text-align:center; background:White"|<span style="color:black;">[[File:shftnw_snaps_044.jpg|Woworito|50px]] |
|- |
|- |
||
|style="border:solid 2px black; style="color:black; style="text-align:center; background:#318CE7"|<span style="color:white;">'''045'''</span> |
|style="border:solid 2px black; style="color:black; style="text-align:center; background:#318CE7"|<span style="color:white;">'''045'''</span> |
||
| − | |style="border:solid 2px black; style="color:black; style="text-align:center; background:White"|Daoros |
+ | |style="border:solid 2px black; style="color:black; style="text-align:center; background:White"|<span style="color:black;">Daoros |
| − | |style="border:solid 2px black; style="color:black; style="text-align:center; background:White"|1 |
+ | |style="border:solid 2px black; style="color:black; style="text-align:center; background:White"|<span style="color:black;">1 |
| − | |style="border:solid 2px black; style="color:black; style="text-align:center; background:White"|Vilcabamba (Boss) Mary Trade #1 |
+ | |style="border:solid 2px black; style="color:black; style="text-align:center; background:White"|<span style="color:black;">Vilcabamba (Boss) Mary Trade #1 |
| − | |style="border:solid 2px black; style="color:black; style="text-align:center; background:White"|[[File:shftnw_snaps_045.jpg|Daoros|50px]] |
+ | |style="border:solid 2px black; style="color:black; style="text-align:center; background:White"|<span style="color:black;">[[File:shftnw_snaps_045.jpg|Daoros|50px]] |
|- |
|- |
||
|style="border:solid 2px black; style="color:black; style="text-align:center; background:#318CE7"|<span style="color:white;">'''046'''</span> |
|style="border:solid 2px black; style="color:black; style="text-align:center; background:#318CE7"|<span style="color:white;">'''046'''</span> |
||
| − | |style="border:solid 2px black; style="color:black; style="text-align:center; background:White"|Killer |
+ | |style="border:solid 2px black; style="color:black; style="text-align:center; background:White"|<span style="color:black;">Killer |
| − | |style="border:solid 2px black; style="color:black; style="text-align:center; background:White"|1 |
+ | |style="border:solid 2px black; style="color:black; style="text-align:center; background:White"|<span style="color:black;">1 |
| − | |style="border:solid 2px black; style="color:black; style="text-align:center; background:White"|Vilcabamba (Boss), Uyuni Salt Lake (Boss), Louie Trade #1 |
+ | |style="border:solid 2px black; style="color:black; style="text-align:center; background:White"|<span style="color:black;">Vilcabamba (Boss), Uyuni Salt Lake (Boss), Louie Trade #1 |
| − | |style="border:solid 2px black; style="color:black; style="text-align:center; background:White"|[[File:shftnw_snaps_046.jpg|Killer|50px]] |
+ | |style="border:solid 2px black; style="color:black; style="text-align:center; background:White"|<span style="color:black;">[[File:shftnw_snaps_046.jpg|Killer|50px]] |
|- |
|- |
||
|style="border:solid 2px black; style="color:black; style="text-align:center; background:#318CE7"|<span style="color:white;">'''047'''</span> |
|style="border:solid 2px black; style="color:black; style="text-align:center; background:#318CE7"|<span style="color:white;">'''047'''</span> |
||
| − | |style="border:solid 2px black; style="color:black; style="text-align:center; background:White"|Chakmol |
+ | |style="border:solid 2px black; style="color:black; style="text-align:center; background:White"|<span style="color:black;">Chakmol |
| − | |style="border:solid 2px black; style="color:black; style="text-align:center; background:White"|3 |
+ | |style="border:solid 2px black; style="color:black; style="text-align:center; background:White"|<span style="color:black;">3 |
| − | |style="border:solid 2px black; style="color:black; style="text-align:center; background:White"|Aito Cave |
+ | |style="border:solid 2px black; style="color:black; style="text-align:center; background:White"|<span style="color:black;">Aito Cave |
| − | |style="border:solid 2px black; style="color:black; style="text-align:center; background:White"|[[File:shftnw_snaps_047.jpg|Chakmol|50px]] |
+ | |style="border:solid 2px black; style="color:black; style="text-align:center; background:White"|<span style="color:black;">[[File:shftnw_snaps_047.jpg|Chakmol|50px]] |
|- |
|- |
||
|style="border:solid 2px black; style="color:black; style="text-align:center; background:#318CE7"|<span style="color:white;">'''048'''</span> |
|style="border:solid 2px black; style="color:black; style="text-align:center; background:#318CE7"|<span style="color:white;">'''048'''</span> |
||
| − | |style="border:solid 2px black; style="color:black; style="text-align:center; background:White"|Saskachilli |
+ | |style="border:solid 2px black; style="color:black; style="text-align:center; background:White"|<span style="color:black;">Saskachilli |
| − | |style="border:solid 2px black; style="color:black; style="text-align:center; background:White"|3 |
+ | |style="border:solid 2px black; style="color:black; style="text-align:center; background:White"|<span style="color:black;">3 |
| − | |style="border:solid 2px black; style="color:black; style="text-align:center; background:White"|Aito Cave |
+ | |style="border:solid 2px black; style="color:black; style="text-align:center; background:White"|<span style="color:black;">Aito Cave |
| − | |style="border:solid 2px black; style="color:black; style="text-align:center; background:White"|[[File:shftnw_snaps_048.jpg|Saskachilli|50px]] |
+ | |style="border:solid 2px black; style="color:black; style="text-align:center; background:White"|<span style="color:black;">[[File:shftnw_snaps_048.jpg|Saskachilli|50px]] |
|- |
|- |
||
|style="border:solid 2px black; style="color:black; style="text-align:center; background:#318CE7"|<span style="color:white;">'''049'''</span> |
|style="border:solid 2px black; style="color:black; style="text-align:center; background:#318CE7"|<span style="color:white;">'''049'''</span> |
||
| − | |style="border:solid 2px black; style="color:black; style="text-align:center; background:White"|Cabracan |
+ | |style="border:solid 2px black; style="color:black; style="text-align:center; background:White"|<span style="color:black;">Cabracan |
| − | |style="border:solid 2px black; style="color:black; style="text-align:center; background:White"|3 |
+ | |style="border:solid 2px black; style="color:black; style="text-align:center; background:White"|<span style="color:black;">3 |
| − | |style="border:solid 2px black; style="color:black; style="text-align:center; background:White"|Aito Cave, Pit Fight 4.1 |
+ | |style="border:solid 2px black; style="color:black; style="text-align:center; background:White"|<span style="color:black;">Aito Cave, Pit Fight 4.1 |
| − | |style="border:solid 2px black; style="color:black; style="text-align:center; background:White"|[[File:shftnw_snaps_049.jpg|Cabracan|50px]] |
+ | |style="border:solid 2px black; style="color:black; style="text-align:center; background:White"|<span style="color:black;">[[File:shftnw_snaps_049.jpg|Cabracan|50px]] |
|- |
|- |
||
|style="border:solid 2px black; style="color:black; style="text-align:center; background:#318CE7"|<span style="color:white;">'''050'''</span> |
|style="border:solid 2px black; style="color:black; style="text-align:center; background:#318CE7"|<span style="color:white;">'''050'''</span> |
||
| − | |style="border:solid 2px black; style="color:black; style="text-align:center; background:White"|Delget |
+ | |style="border:solid 2px black; style="color:black; style="text-align:center; background:White"|<span style="color:black;">Delget |
| − | |style="border:solid 2px black; style="color:black; style="text-align:center; background:White"|4 |
+ | |style="border:solid 2px black; style="color:black; style="text-align:center; background:White"|<span style="color:black;">4 |
| − | |style="border:solid 2px black; style="color:black; style="text-align:center; background:White"|Aito Cave (Boss), Pit Fight 3.3 |
+ | |style="border:solid 2px black; style="color:black; style="text-align:center; background:White"|<span style="color:black;">Aito Cave (Boss), Pit Fight 3.3 |
| − | |style="border:solid 2px black; style="color:black; style="text-align:center; background:White"|[[File:shftnw_snaps_050.jpg|Delget|50px]] |
+ | |style="border:solid 2px black; style="color:black; style="text-align:center; background:White"|<span style="color:black;">[[File:shftnw_snaps_050.jpg|Delget|50px]] |
|- |
|- |
||
|style="border:solid 2px black; style="color:black; style="text-align:center; background:#318CE7"|<span style="color:white;">'''51'''</span> |
|style="border:solid 2px black; style="color:black; style="text-align:center; background:#318CE7"|<span style="color:white;">'''51'''</span> |
||
| − | |style="border:solid 2px black; style="color:black; style="text-align:center; background:White"|Harukigenia |
+ | |style="border:solid 2px black; style="color:black; style="text-align:center; background:White"|<span style="color:black;">Harukigenia |
| − | |style="border:solid 2px black; style="color:black; style="text-align:center; background:White"|6 |
+ | |style="border:solid 2px black; style="color:black; style="text-align:center; background:White"|<span style="color:black;">6 |
| − | |style="border:solid 2px black; style="color:black; style="text-align:center; background:White"|Uyuni Salt Lake, Pit Fight 4.2 |
+ | |style="border:solid 2px black; style="color:black; style="text-align:center; background:White"|<span style="color:black;">Uyuni Salt Lake, Pit Fight 4.2 |
| − | |style="border:solid 2px black; style="color:black; style="text-align:center; background:White"|[[File:shftnw_snaps_051.jpg|Harukigenia|50px]] |
+ | |style="border:solid 2px black; style="color:black; style="text-align:center; background:White"|<span style="color:black;">[[File:shftnw_snaps_051.jpg|Harukigenia|50px]] |
|- |
|- |
||
|style="border:solid 2px black; style="color:black; style="text-align:center; background:#318CE7"|<span style="color:white;">'''52'''</span> |
|style="border:solid 2px black; style="color:black; style="text-align:center; background:#318CE7"|<span style="color:white;">'''52'''</span> |
||
| − | |style="border:solid 2px black; style="color:black; style="text-align:center; background:White"|Sulagi |
+ | |style="border:solid 2px black; style="color:black; style="text-align:center; background:White"|<span style="color:black;">Sulagi |
| − | |style="border:solid 2px black; style="color:black; style="text-align:center; background:White"|6 |
+ | |style="border:solid 2px black; style="color:black; style="text-align:center; background:White"|<span style="color:black;">6 |
| − | |style="border:solid 2px black; style="color:black; style="text-align:center; background:White"|Uyuni Salt Lake, Pit Fight 4.2 |
+ | |style="border:solid 2px black; style="color:black; style="text-align:center; background:White"|<span style="color:black;">Uyuni Salt Lake, Pit Fight 4.2 |
| − | |style="border:solid 2px black; style="color:black; style="text-align:center; background:White"|[[File:shftnw_snaps_052.jpg|Sulagi|50px]] |
+ | |style="border:solid 2px black; style="color:black; style="text-align:center; background:White"|<span style="color:black;">[[File:shftnw_snaps_052.jpg|Sulagi|50px]] |
|- |
|- |
||
|style="border:solid 2px black; style="color:black; style="text-align:center; background:#318CE7"|<span style="color:white;">'''53'''</span> |
|style="border:solid 2px black; style="color:black; style="text-align:center; background:#318CE7"|<span style="color:white;">'''53'''</span> |
||
| − | |style="border:solid 2px black; style="color:black; style="text-align:center; background:White"|Ludirus |
+ | |style="border:solid 2px black; style="color:black; style="text-align:center; background:White"|<span style="color:black;">Ludirus |
| − | |style="border:solid 2px black; style="color:black; style="text-align:center; background:White"|6 |
+ | |style="border:solid 2px black; style="color:black; style="text-align:center; background:White"|<span style="color:black;">6 |
| − | |style="border:solid 2px black; style="color:black; style="text-align:center; background:White"|Uyuni Salt Lake, Pit Fight 4.2 |
+ | |style="border:solid 2px black; style="color:black; style="text-align:center; background:White"|<span style="color:black;">Uyuni Salt Lake, Pit Fight 4.2 |
| − | |style="border:solid 2px black; style="color:black; style="text-align:center; background:White"|[[File:shftnw_snaps_053.jpg|Ludirus|50px]] |
+ | |style="border:solid 2px black; style="color:black; style="text-align:center; background:White"|<span style="color:black;">[[File:shftnw_snaps_053.jpg|Ludirus|50px]] |
|- |
|- |
||
|style="border:solid 2px black; style="color:black; style="text-align:center; background:#318CE7"|<span style="color:white;">'''54'''</span> |
|style="border:solid 2px black; style="color:black; style="text-align:center; background:#318CE7"|<span style="color:white;">'''54'''</span> |
||
| − | |style="border:solid 2px black; style="color:black; style="text-align:center; background:White"|Ikcheon |
+ | |style="border:solid 2px black; style="color:black; style="text-align:center; background:White"|<span style="color:black;">Ikcheon |
| − | |style="border:solid 2px black; style="color:black; style="text-align:center; background:White"|4 |
+ | |style="border:solid 2px black; style="color:black; style="text-align:center; background:White"|<span style="color:black;">4 |
| − | |style="border:solid 2px black; style="color:black; style="text-align:center; background:White"|Uyuni Salt Lake, Pit Fight 4.2 |
+ | |style="border:solid 2px black; style="color:black; style="text-align:center; background:White"|<span style="color:black;">Uyuni Salt Lake, Pit Fight 4.2 |
| − | |style="border:solid 2px black; style="color:black; style="text-align:center; background:White"|[[File:shftnw_snaps_054.jpg|Ikcheon|50px]] |
+ | |style="border:solid 2px black; style="color:black; style="text-align:center; background:White"|<span style="color:black;">[[File:shftnw_snaps_054.jpg|Ikcheon|50px]] |
|- |
|- |
||
|style="border:solid 2px black; style="color:black; style="text-align:center; background:#318CE7"|<span style="color:white;">'''55'''</span> |
|style="border:solid 2px black; style="color:black; style="text-align:center; background:#318CE7"|<span style="color:white;">'''55'''</span> |
||
| − | |style="border:solid 2px black; style="color:black; style="text-align:center; background:White"|Blupe |
+ | |style="border:solid 2px black; style="color:black; style="text-align:center; background:White"|<span style="color:black;">Blupe |
| − | |style="border:solid 2px black; style="color:black; style="text-align:center; background:White"|2 |
+ | |style="border:solid 2px black; style="color:black; style="text-align:center; background:White"|<span style="color:black;">2 |
| − | |style="border:solid 2px black; style="color:black; style="text-align:center; background:White"|Garland Residence, Pit Fight 4.1, 4.2 |
+ | |style="border:solid 2px black; style="color:black; style="text-align:center; background:White"|<span style="color:black;">Garland Residence, Pit Fight 4.1, 4.2 |
| − | |style="border:solid 2px black; style="color:black; style="text-align:center; background:White"|[[File:shftnw_snaps_055.jpg|Blupe|50px]] |
+ | |style="border:solid 2px black; style="color:black; style="text-align:center; background:White"|<span style="color:black;">[[File:shftnw_snaps_055.jpg|Blupe|50px]] |
|- |
|- |
||
|style="border:solid 2px black; style="color:black; style="text-align:center; background:#318CE7"|<span style="color:white;">'''56'''</span> |
|style="border:solid 2px black; style="color:black; style="text-align:center; background:#318CE7"|<span style="color:white;">'''56'''</span> |
||
| − | |style="border:solid 2px black; style="color:black; style="text-align:center; background:White"|Ledope |
+ | |style="border:solid 2px black; style="color:black; style="text-align:center; background:White"|<span style="color:black;">Ledope |
| − | |style="border:solid 2px black; style="color:black; style="text-align:center; background:White"|2 |
+ | |style="border:solid 2px black; style="color:black; style="text-align:center; background:White"|<span style="color:black;">2 |
| − | |style="border:solid 2px black; style="color:black; style="text-align:center; background:White"|Garland Residence, Pit Fight 4.1, 4.2 |
+ | |style="border:solid 2px black; style="color:black; style="text-align:center; background:White"|<span style="color:black;">Garland Residence, Pit Fight 4.1, 4.2 |
| − | |style="border:solid 2px black; style="color:black; style="text-align:center; background:White"|[[File:shftnw_snaps_056.jpg|Ledope|50px]] |
+ | |style="border:solid 2px black; style="color:black; style="text-align:center; background:White"|<span style="color:black;">[[File:shftnw_snaps_056.jpg|Ledope|50px]] |
|- |
|- |
||
|style="border:solid 2px black; style="color:black; style="text-align:center; background:#318CE7"|<span style="color:white;">'''57'''</span> |
|style="border:solid 2px black; style="color:black; style="text-align:center; background:#318CE7"|<span style="color:white;">'''57'''</span> |
||
| − | |style="border:solid 2px black; style="color:black; style="text-align:center; background:White"|Alyosh |
+ | |style="border:solid 2px black; style="color:black; style="text-align:center; background:White"|<span style="color:black;">Alyosh |
| − | |style="border:solid 2px black; style="color:black; style="text-align:center; background:White"|2 |
+ | |style="border:solid 2px black; style="color:black; style="text-align:center; background:White"|<span style="color:black;">2 |
| − | |style="border:solid 2px black; style="color:black; style="text-align:center; background:White"|Garland Residence, Pit Fight 4.1, 4.2 |
+ | |style="border:solid 2px black; style="color:black; style="text-align:center; background:White"|<span style="color:black;">Garland Residence, Pit Fight 4.1, 4.2 |
| − | |style="border:solid 2px black; style="color:black; style="text-align:center; background:White"|[[File:shftnw_snaps_057.jpg|Alyosh|50px]] |
+ | |style="border:solid 2px black; style="color:black; style="text-align:center; background:White"|<span style="color:black;">[[File:shftnw_snaps_057.jpg|Alyosh|50px]] |
|- |
|- |
||
|style="border:solid 2px black; style="color:black; style="text-align:center; background:#318CE7"|<span style="color:white;">'''58'''</span> |
|style="border:solid 2px black; style="color:black; style="text-align:center; background:#318CE7"|<span style="color:white;">'''58'''</span> |
||
| − | |style="border:solid 2px black; style="color:black; style="text-align:center; background:White"|Tamaris |
+ | |style="border:solid 2px black; style="color:black; style="text-align:center; background:White"|<span style="color:black;">Tamaris |
| − | |style="border:solid 2px black; style="color:black; style="text-align:center; background:White"|7 |
+ | |style="border:solid 2px black; style="color:black; style="text-align:center; background:White"|<span style="color:black;">7 |
| − | |style="border:solid 2px black; style="color:black; style="text-align:center; background:White"|Garland Residence (Boss), Pit Fight 5.2 |
+ | |style="border:solid 2px black; style="color:black; style="text-align:center; background:White"|<span style="color:black;">Garland Residence (Boss), Pit Fight 5.2 |
| − | |style="border:solid 2px black; style="color:black; style="text-align:center; background:White"|[[File:shftnw_snaps_058.jpg|Tamaris|50px]] |
+ | |style="border:solid 2px black; style="color:black; style="text-align:center; background:White"|<span style="color:black;">[[File:shftnw_snaps_058.jpg|Tamaris|50px]] |
|- |
|- |
||
|style="border:solid 2px black; style="color:black; style="text-align:center; background:#318CE7"|<span style="color:white;">'''59'''</span> |
|style="border:solid 2px black; style="color:black; style="text-align:center; background:#318CE7"|<span style="color:white;">'''59'''</span> |
||
| − | |style="border:solid 2px black; style="color:black; style="text-align:center; background:White"|Malice Killer |
+ | |style="border:solid 2px black; style="color:black; style="text-align:center; background:White"|<span style="color:black;">Malice Killer |
| − | |style="border:solid 2px black; style="color:black; style="text-align:center; background:White"|1 |
+ | |style="border:solid 2px black; style="color:black; style="text-align:center; background:White"|<span style="color:black;">1 |
| − | |style="border:solid 2px black; style="color:black; style="text-align:center; background:White"|The Gate (limited) |
+ | |style="border:solid 2px black; style="color:black; style="text-align:center; background:White"|<span style="color:black;">The Gate (limited) |
| − | |style="border:solid 2px black; style="color:black; style="text-align:center; background:White"|[[File:shftnw_snaps_059.jpg|Malice Killer|50px]] |
+ | |style="border:solid 2px black; style="color:black; style="text-align:center; background:White"|<span style="color:black;">[[File:shftnw_snaps_059.jpg|Malice Killer|50px]] |
|- |
|- |
||
|style="border:solid 2px black; style="color:black; style="text-align:center; background:#318CE7"|<span style="color:white;">'''60'''</span> |
|style="border:solid 2px black; style="color:black; style="text-align:center; background:#318CE7"|<span style="color:white;">'''60'''</span> |
||
| − | |style="border:solid 2px black; style="color:black; style="text-align:center; background:White"|Ispus |
+ | |style="border:solid 2px black; style="color:black; style="text-align:center; background:White"|<span style="color:black;">Ispus |
| − | |style="border:solid 2px black; style="color:black; style="text-align:center; background:White"|3 |
+ | |style="border:solid 2px black; style="color:black; style="text-align:center; background:White"|<span style="color:black;">3 |
| − | |style="border:solid 2px black; style="color:black; style="text-align:center; background:White"|Beyond the Gate |
+ | |style="border:solid 2px black; style="color:black; style="text-align:center; background:White"|<span style="color:black;">Beyond the Gate |
| − | |style="border:solid 2px black; style="color:black; style="text-align:center; background:White"|[[File:shftnw_snaps_060.jpg|Ispus|50px]] |
+ | |style="border:solid 2px black; style="color:black; style="text-align:center; background:White"|<span style="color:black;">[[File:shftnw_snaps_060.jpg|Ispus|50px]] |
|- |
|- |
||
|style="border:solid 2px black; style="color:black; style="text-align:center; background:#318CE7"|<span style="color:white;">'''61'''</span> |
|style="border:solid 2px black; style="color:black; style="text-align:center; background:#318CE7"|<span style="color:white;">'''61'''</span> |
||
| − | |style="border:solid 2px black; style="color:black; style="text-align:center; background:White"|Larilari |
+ | |style="border:solid 2px black; style="color:black; style="text-align:center; background:White"|<span style="color:black;">Larilari |
| − | |style="border:solid 2px black; style="color:black; style="text-align:center; background:White"|3 |
+ | |style="border:solid 2px black; style="color:black; style="text-align:center; background:White"|<span style="color:black;">3 |
| − | |style="border:solid 2px black; style="color:black; style="text-align:center; background:White"|Beyond the Gate |
+ | |style="border:solid 2px black; style="color:black; style="text-align:center; background:White"|<span style="color:black;">Beyond the Gate |
| − | |style="border:solid 2px black; style="color:black; style="text-align:center; background:White"|[[File:shftnw_snaps_061.jpg|Larilari|50px]] |
+ | |style="border:solid 2px black; style="color:black; style="text-align:center; background:White"|<span style="color:black;">[[File:shftnw_snaps_061.jpg|Larilari|50px]] |
|- |
|- |
||
|style="border:solid 2px black; style="color:black; style="text-align:center; background:#318CE7"|<span style="color:white;">'''62'''</span> |
|style="border:solid 2px black; style="color:black; style="text-align:center; background:#318CE7"|<span style="color:white;">'''62'''</span> |
||
| − | |style="border:solid 2px black; style="color:black; style="text-align:center; background:White"|Phobos |
+ | |style="border:solid 2px black; style="color:black; style="text-align:center; background:White"|<span style="color:black;">Phobos |
| − | |style="border:solid 2px black; style="color:black; style="text-align:center; background:White"|5 |
+ | |style="border:solid 2px black; style="color:black; style="text-align:center; background:White"|<span style="color:black;">5 |
| − | |style="border:solid 2px black; style="color:black; style="text-align:center; background:White"|Beyond the Gate |
+ | |style="border:solid 2px black; style="color:black; style="text-align:center; background:White"|<span style="color:black;">Beyond the Gate |
| − | |style="border:solid 2px black; style="color:black; style="text-align:center; background:White"|[[File:shftnw_snaps_062.jpg|Phobos|50px]] |
+ | |style="border:solid 2px black; style="color:black; style="text-align:center; background:White"|<span style="color:black;">[[File:shftnw_snaps_062.jpg|Phobos|50px]] |
|- |
|- |
||
|style="border:solid 2px black; style="color:black; style="text-align:center; background:#318CE7"|<span style="color:white;">'''63'''</span> |
|style="border:solid 2px black; style="color:black; style="text-align:center; background:#318CE7"|<span style="color:white;">'''63'''</span> |
||
| − | |style="border:solid 2px black; style="color:black; style="text-align:center; background:White"|Bokrug |
+ | |style="border:solid 2px black; style="color:black; style="text-align:center; background:White"|<span style="color:black;">Bokrug |
| − | |style="border:solid 2px black; style="color:black; style="text-align:center; background:White"|3 |
+ | |style="border:solid 2px black; style="color:black; style="text-align:center; background:White"|<span style="color:black;">3 |
| − | |style="border:solid 2px black; style="color:black; style="text-align:center; background:White"|Beyond the Gate |
+ | |style="border:solid 2px black; style="color:black; style="text-align:center; background:White"|<span style="color:black;">Beyond the Gate |
| − | |style="border:solid 2px black; style="color:black; style="text-align:center; background:White"|[[File:shftnw_snaps_063.jpg|Bokrug|50px]] |
+ | |style="border:solid 2px black; style="color:black; style="text-align:center; background:White"|<span style="color:black;">[[File:shftnw_snaps_063.jpg|Bokrug|50px]] |
|- |
|- |
||
|style="border:solid 2px black; style="color:black; style="text-align:center; background:#318CE7"|<span style="color:white;">'''64'''</span> |
|style="border:solid 2px black; style="color:black; style="text-align:center; background:#318CE7"|<span style="color:white;">'''64'''</span> |
||
| − | |style="border:solid 2px black; style="color:black; style="text-align:center; background:White"|Len |
+ | |style="border:solid 2px black; style="color:black; style="text-align:center; background:White"|<span style="color:black;">Len |
| − | |style="border:solid 2px black; style="color:black; style="text-align:center; background:White"|4 |
+ | |style="border:solid 2px black; style="color:black; style="text-align:center; background:White"|<span style="color:black;">4 |
| − | |style="border:solid 2px black; style="color:black; style="text-align:center; background:White"|Beyond the Gate |
+ | |style="border:solid 2px black; style="color:black; style="text-align:center; background:White"|<span style="color:black;">Beyond the Gate |
| − | |style="border:solid 2px black; style="color:black; style="text-align:center; background:White"|[[File:shftnw_snaps_064.jpg|Len|50px]] |
+ | |style="border:solid 2px black; style="color:black; style="text-align:center; background:White"|<span style="color:black;">[[File:shftnw_snaps_064.jpg|Len|50px]] |
|- |
|- |
||
|style="border:solid 2px black; style="color:black; style="text-align:center; background:#318CE7"|<span style="color:white;">'''65'''</span> |
|style="border:solid 2px black; style="color:black; style="text-align:center; background:#318CE7"|<span style="color:white;">'''65'''</span> |
||
| − | |style="border:solid 2px black; style="color:black; style="text-align:center; background:White"|Malice Soaker |
+ | |style="border:solid 2px black; style="color:black; style="text-align:center; background:White"|<span style="color:black;">Malice Soaker |
| − | |style="border:solid 2px black; style="color:black; style="text-align:center; background:White"|1 |
+ | |style="border:solid 2px black; style="color:black; style="text-align:center; background:White"|<span style="color:black;">1 |
| − | |style="border:solid 2px black; style="color:black; style="text-align:center; background:White"|Beyond the Gate (limited) |
+ | |style="border:solid 2px black; style="color:black; style="text-align:center; background:White"|<span style="color:black;">Beyond the Gate (limited) |
| − | |style="border:solid 2px black; style="color:black; style="text-align:center; background:White"|[[File:shftnw_snaps_065.jpg|Malice Soaker|50px]] |
+ | |style="border:solid 2px black; style="color:black; style="text-align:center; background:White"|<span style="color:black;">[[File:shftnw_snaps_065.jpg|Malice Soaker|50px]] |
|- |
|- |
||
|style="border:solid 2px black; style="color:black; style="text-align:center; background:#318CE7"|<span style="color:white;">'''66'''</span> |
|style="border:solid 2px black; style="color:black; style="text-align:center; background:#318CE7"|<span style="color:white;">'''66'''</span> |
||
| − | |style="border:solid 2px black; style="color:black; style="text-align:center; background:White"|Janus |
+ | |style="border:solid 2px black; style="color:black; style="text-align:center; background:White"|<span style="color:black;">Janus |
| − | |style="border:solid 2px black; style="color:black; style="text-align:center; background:White"|2 |
+ | |style="border:solid 2px black; style="color:black; style="text-align:center; background:White"|<span style="color:black;">2 |
| − | |style="border:solid 2px black; style="color:black; style="text-align:center; background:White"|Beyond the Gate |
+ | |style="border:solid 2px black; style="color:black; style="text-align:center; background:White"|<span style="color:black;">Beyond the Gate |
| − | |style="border:solid 2px black; style="color:black; style="text-align:center; background:White"|[[File:shftnw_snaps_066.jpg|Janus|50px]] |
+ | |style="border:solid 2px black; style="color:black; style="text-align:center; background:White"|<span style="color:black;">[[File:shftnw_snaps_066.jpg|Janus|50px]] |
|- |
|- |
||
|style="border:solid 2px black; style="color:black; style="text-align:center; background:#318CE7"|<span style="color:white;">'''67'''</span> |
|style="border:solid 2px black; style="color:black; style="text-align:center; background:#318CE7"|<span style="color:white;">'''67'''</span> |
||
| − | |style="border:solid 2px black; style="color:black; style="text-align:center; background:White"|Malice Gilbert |
+ | |style="border:solid 2px black; style="color:black; style="text-align:center; background:White"|<span style="color:black;">Malice Gilbert |
| − | |style="border:solid 2px black; style="color:black; style="text-align:center; background:White"|1 |
+ | |style="border:solid 2px black; style="color:black; style="text-align:center; background:White"|<span style="color:black;">1 |
| − | |style="border:solid 2px black; style="color:black; style="text-align:center; background:White"|Beyond the Gate (Boss) |
+ | |style="border:solid 2px black; style="color:black; style="text-align:center; background:White"|<span style="color:black;">Beyond the Gate (Boss) |
| − | |style="border:solid 2px black; style="color:black; style="text-align:center; background:White"|[[File:shftnw_snaps_067.jpg|Malice Gilbert|50px]] |
+ | |style="border:solid 2px black; style="color:black; style="text-align:center; background:White"|<span style="color:black;">[[File:shftnw_snaps_067.jpg|Malice Gilbert|50px]] |
|- |
|- |
||
|style="border:solid 2px black; style="color:black; style="text-align:center; background:#318CE7"|<span style="color:white;">'''68'''</span> |
|style="border:solid 2px black; style="color:black; style="text-align:center; background:#318CE7"|<span style="color:white;">'''68'''</span> |
||
| − | |style="border:solid 2px black; style="color:black; style="text-align:center; background:White"|Lady |
+ | |style="border:solid 2px black; style="color:black; style="text-align:center; background:White"|<span style="color:black;">Lady |
| − | |style="border:solid 2px black; style="color:black; style="text-align:center; background:White"|1 |
+ | |style="border:solid 2px black; style="color:black; style="text-align:center; background:White"|<span style="color:black;">1 |
| − | |style="border:solid 2px black; style="color:black; style="text-align:center; background:White"|Beyond the Gate (Final Boss) |
+ | |style="border:solid 2px black; style="color:black; style="text-align:center; background:White"|<span style="color:black;">Beyond the Gate (Final Boss) |
| − | |style="border:solid 2px black; style="color:black; style="text-align:center; background:White"|[[File:shftnw_snaps_068.jpg|Lady|50px]] |
+ | |style="border:solid 2px black; style="color:black; style="text-align:center; background:White"|<span style="color:black;">[[File:shftnw_snaps_068.jpg|Lady|50px]] |
|- |
|- |
||
|style="border:solid 2px black; style="color:black; style="text-align:center; background:#318CE7"|<span style="color:white;">'''69'''</span> |
|style="border:solid 2px black; style="color:black; style="text-align:center; background:#318CE7"|<span style="color:white;">'''69'''</span> |
||
| − | |style="border:solid 2px black; style="color:black; style="text-align:center; background:White"|Malice Unbral |
+ | |style="border:solid 2px black; style="color:black; style="text-align:center; background:White"|<span style="color:black;">Malice Unbral |
| − | |style="border:solid 2px black; style="color:black; style="text-align:center; background:White"|1 |
+ | |style="border:solid 2px black; style="color:black; style="text-align:center; background:White"|<span style="color:black;">1 |
| − | |style="border:solid 2px black; style="color:black; style="text-align:center; background:White"|Beyond the Gate (Final Boss) |
+ | |style="border:solid 2px black; style="color:black; style="text-align:center; background:White"|<span style="color:black;">Beyond the Gate (Final Boss) |
| − | |style="border:solid 2px black; style="color:black; style="text-align:center; background:White"|[[File:shftnw_snaps_069.jpg|Malice Unbral|50px]] |
+ | |style="border:solid 2px black; style="color:black; style="text-align:center; background:White"|<span style="color:black;">[[File:shftnw_snaps_069.jpg|Malice Unbral|50px]] |
|- |
|- |
||
|style="border:solid 2px black; style="color:black; style="text-align:center; background:#318CE7"|<span style="color:white;">'''70'''</span> |
|style="border:solid 2px black; style="color:black; style="text-align:center; background:#318CE7"|<span style="color:white;">'''70'''</span> |
||
| − | |style="border:solid 2px black; style="color:black; style="text-align:center; background:White"|Sasquatch |
+ | |style="border:solid 2px black; style="color:black; style="text-align:center; background:White"|<span style="color:black;">Sasquatch |
| − | |style="border:solid 2px black; style="color:black; style="text-align:center; background:White"|1 |
+ | |style="border:solid 2px black; style="color:black; style="text-align:center; background:White"|<span style="color:black;">1 |
| − | |style="border:solid 2px black; style="color:black; style="text-align:center; background:White"|Grand Canyon (UMA), Pissarro Trade #6 |
+ | |style="border:solid 2px black; style="color:black; style="text-align:center; background:White"|<span style="color:black;">Grand Canyon (UMA), Pissarro Trade #6 |
| − | |style="border:solid 2px black; style="color:black; style="text-align:center; background:White"|[[File:shftnw_snaps_070.jpg|Sasquatch|50px]] |
+ | |style="border:solid 2px black; style="color:black; style="text-align:center; background:White"|<span style="color:black;">[[File:shftnw_snaps_070.jpg|Sasquatch|50px]] |
|- |
|- |
||
|style="border:solid 2px black; style="color:black; style="text-align:center; background:#318CE7"|<span style="color:white;">'''71'''</span> |
|style="border:solid 2px black; style="color:black; style="text-align:center; background:#318CE7"|<span style="color:white;">'''71'''</span> |
||
| − | |style="border:solid 2px black; style="color:black; style="text-align:center; background:White"|Tihozhodhi |
+ | |style="border:solid 2px black; style="color:black; style="text-align:center; background:White"|<span style="color:black;">Tihozhodhi |
| − | |style="border:solid 2px black; style="color:black; style="text-align:center; background:White"|1 |
+ | |style="border:solid 2px black; style="color:black; style="text-align:center; background:White"|<span style="color:black;">1 |
| − | |style="border:solid 2px black; style="color:black; style="text-align:center; background:White"|Caribbean (UMA), Pissarro Trade #6 |
+ | |style="border:solid 2px black; style="color:black; style="text-align:center; background:White"|<span style="color:black;">Caribbean (UMA), Pissarro Trade #6 |
| − | |style="border:solid 2px black; style="color:black; style="text-align:center; background:White"|[[File:shftnw_snaps_071.jpg|Tihozhodhi|50px]] |
+ | |style="border:solid 2px black; style="color:black; style="text-align:center; background:White"|<span style="color:black;">[[File:shftnw_snaps_071.jpg|Tihozhodhi|50px]] |
|- |
|- |
||
|style="border:solid 2px black; style="color:black; style="text-align:center; background:#318CE7"|<span style="color:white;">'''72'''</span> |
|style="border:solid 2px black; style="color:black; style="text-align:center; background:#318CE7"|<span style="color:white;">'''72'''</span> |
||
| − | |style="border:solid 2px black; style="color:black; style="text-align:center; background:White"|Chupakabra |
+ | |style="border:solid 2px black; style="color:black; style="text-align:center; background:White"|<span style="color:black;">Chupakabra |
| − | |style="border:solid 2px black; style="color:black; style="text-align:center; background:White"|1 |
+ | |style="border:solid 2px black; style="color:black; style="text-align:center; background:White"|<span style="color:black;">1 |
| − | |style="border:solid 2px black; style="color:black; style="text-align:center; background:White"|Chichen Itza (UMA), Pissarro Trade #6 |
+ | |style="border:solid 2px black; style="color:black; style="text-align:center; background:White"|<span style="color:black;">Chichen Itza (UMA), Pissarro Trade #6 |
| − | |style="border:solid 2px black; style="color:black; style="text-align:center; background:White"|[[File:shftnw_snaps_072.jpg|Chupakabra|50px]] |
+ | |style="border:solid 2px black; style="color:black; style="text-align:center; background:White"|<span style="color:black;">[[File:shftnw_snaps_072.jpg|Chupakabra|50px]] |
|- |
|- |
||
|style="border:solid 2px black; style="color:black; style="text-align:center; background:#318CE7"|<span style="color:white;">'''73'''</span> |
|style="border:solid 2px black; style="color:black; style="text-align:center; background:#318CE7"|<span style="color:white;">'''73'''</span> |
||
| − | |style="border:solid 2px black; style="color:black; style="text-align:center; background:White"|Rogotomhere |
+ | |style="border:solid 2px black; style="color:black; style="text-align:center; background:White"|<span style="color:black;">Rogotomhere |
| − | |style="border:solid 2px black; style="color:black; style="text-align:center; background:White"|1 |
+ | |style="border:solid 2px black; style="color:black; style="text-align:center; background:White"|<span style="color:black;">1 |
| − | |style="border:solid 2px black; style="color:black; style="text-align:center; background:White"|Aito Cave (UMA), Pissarro Trade #6 |
+ | |style="border:solid 2px black; style="color:black; style="text-align:center; background:White"|<span style="color:black;">Aito Cave (UMA), Pissarro Trade #6 |
| − | |style="border:solid 2px black; style="color:black; style="text-align:center; background:White"|[[File:shftnw_snaps_073.jpg|Rogotomhere|50px]] |
+ | |style="border:solid 2px black; style="color:black; style="text-align:center; background:White"|<span style="color:black;">[[File:shftnw_snaps_073.jpg|Rogotomhere|50px]] |
|- |
|- |
||
|style="border:solid 2px black; style="color:black; style="text-align:center; background:#318CE7"|<span style="color:white;">'''74'''</span> |
|style="border:solid 2px black; style="color:black; style="text-align:center; background:#318CE7"|<span style="color:white;">'''74'''</span> |
||
| − | |style="border:solid 2px black; style="color:black; style="text-align:center; background:White"|Sky Fish |
+ | |style="border:solid 2px black; style="color:black; style="text-align:center; background:White"|<span style="color:black;">Sky Fish |
| − | |style="border:solid 2px black; style="color:black; style="text-align:center; background:White"|1 |
+ | |style="border:solid 2px black; style="color:black; style="text-align:center; background:White"|<span style="color:black;">1 |
| − | |style="border:solid 2px black; style="color:black; style="text-align:center; background:White"|Uyuni Salt Lake (UMA), Pissarro Trade #6 |
+ | |style="border:solid 2px black; style="color:black; style="text-align:center; background:White"|<span style="color:black;">Uyuni Salt Lake (UMA), Pissarro Trade #6 |
| − | |style="border:solid 2px black; style="color:black; style="text-align:center; background:White"|[[File:shftnw_snaps_074.jpg|Sky Fish|50px]] |
+ | |style="border:solid 2px black; style="color:black; style="text-align:center; background:White"|<span style="color:black;">[[File:shftnw_snaps_074.jpg|Sky Fish|50px]] |
|- |
|- |
||
|style="border:solid 2px black; style="color:black; style="text-align:center; background:#318CE7"|<span style="color:white;">'''75'''</span> |
|style="border:solid 2px black; style="color:black; style="text-align:center; background:#318CE7"|<span style="color:white;">'''75'''</span> |
||
| − | |style="border:solid 2px black; style="color:black; style="text-align:center; background:White"|Golden Tinny |
+ | |style="border:solid 2px black; style="color:black; style="text-align:center; background:White"|<span style="color:black;">Golden Tinny |
| − | |style="border:solid 2px black; style="color:black; style="text-align:center; background:White"|2 |
+ | |style="border:solid 2px black; style="color:black; style="text-align:center; background:White"|<span style="color:black;">2 |
| − | |style="border:solid 2px black; style="color:black; style="text-align:center; background:White"|Pit Fight 6.1 |
+ | |style="border:solid 2px black; style="color:black; style="text-align:center; background:White"|<span style="color:black;">Pit Fight 6.1 |
| − | |style="border:solid 2px black; style="color:black; style="text-align:center; background:White"|[[File:shftnw_snaps_075.jpg|Golden Tinny|50px]] |
+ | |style="border:solid 2px black; style="color:black; style="text-align:center; background:White"|<span style="color:black;">[[File:shftnw_snaps_075.jpg|Golden Tinny|50px]] |
|- |
|- |
||
|style="border:solid 2px black; style="color:black; style="text-align:center; background:#318CE7"|<span style="color:white;">'''76'''</span> |
|style="border:solid 2px black; style="color:black; style="text-align:center; background:#318CE7"|<span style="color:white;">'''76'''</span> |
||
| − | |style="border:solid 2px black; style="color:black; style="text-align:center; background:White"|Black Bat |
+ | |style="border:solid 2px black; style="color:black; style="text-align:center; background:White"|<span style="color:black;">Black Bat |
| − | |style="border:solid 2px black; style="color:black; style="text-align:center; background:White"|0 |
+ | |style="border:solid 2px black; style="color:black; style="text-align:center; background:White"|<span style="color:black;">0 |
| − | |style="border:solid 2px black; style="color:black; style="text-align:center; background:White"|Mary Trade #6 |
+ | |style="border:solid 2px black; style="color:black; style="text-align:center; background:White"|<span style="color:black;">Mary Trade #6 |
| − | |style="border:solid 2px black; style="color:black; style="text-align:center; background:White"|[[File:shftnw_snaps_076.jpg|Black Bat|50px]] |
+ | |style="border:solid 2px black; style="color:black; style="text-align:center; background:White"|<span style="color:black;">[[File:shftnw_snaps_076.jpg|Black Bat|50px]] |
|- |
|- |
||
|style="border:solid 2px black; style="color:black; style="text-align:center; background:#318CE7"|<span style="color:white;">'''77'''</span> |
|style="border:solid 2px black; style="color:black; style="text-align:center; background:#318CE7"|<span style="color:white;">'''77'''</span> |
||
| − | |style="border:solid 2px black; style="color:black; style="text-align:center; background:White"|Cucumber Roll |
+ | |style="border:solid 2px black; style="color:black; style="text-align:center; background:White"|<span style="color:black;">Cucumber Roll |
| − | |style="border:solid 2px black; style="color:black; style="text-align:center; background:White"|2 |
+ | |style="border:solid 2px black; style="color:black; style="text-align:center; background:White"|<span style="color:black;">2 |
| − | |style="border:solid 2px black; style="color:black; style="text-align:center; background:White"|Sushi House, Pit Fight 6.1, Louie Trade #5 |
+ | |style="border:solid 2px black; style="color:black; style="text-align:center; background:White"|<span style="color:black;">Sushi House, Pit Fight 6.1, Louie Trade #5 |
| − | |style="border:solid 2px black; style="color:black; style="text-align:center; background:White"|[[File:shftnw_snaps_077.jpg|Cucumber Roll|50px]] |
+ | |style="border:solid 2px black; style="color:black; style="text-align:center; background:White"|<span style="color:black;">[[File:shftnw_snaps_077.jpg|Cucumber Roll|50px]] |
|- |
|- |
||
|style="border:solid 2px black; style="color:black; style="text-align:center; background:#318CE7"|<span style="color:white;">'''78'''</span> |
|style="border:solid 2px black; style="color:black; style="text-align:center; background:#318CE7"|<span style="color:white;">'''78'''</span> |
||
| − | |style="border:solid 2px black; style="color:black; style="text-align:center; background:White"|Tekka Roll |
+ | |style="border:solid 2px black; style="color:black; style="text-align:center; background:White"|<span style="color:black;">Tekka Roll |
| − | |style="border:solid 2px black; style="color:black; style="text-align:center; background:White"|1 |
+ | |style="border:solid 2px black; style="color:black; style="text-align:center; background:White"|<span style="color:black;">1 |
| − | |style="border:solid 2px black; style="color:black; style="text-align:center; background:White"|Sushi House, Louie Trade #5 |
+ | |style="border:solid 2px black; style="color:black; style="text-align:center; background:White"|<span style="color:black;">Sushi House, Louie Trade #5 |
| − | |style="border:solid 2px black; style="color:black; style="text-align:center; background:White"|[[File:shftnw_snaps_078.jpg|Tekka Roll|50px]] |
+ | |style="border:solid 2px black; style="color:black; style="text-align:center; background:White"|<span style="color:black;">[[File:shftnw_snaps_078.jpg|Tekka Roll|50px]] |
|- |
|- |
||
|style="border:solid 2px black; style="color:black; style="text-align:center; background:#318CE7"|<span style="color:white;">'''79'''</span> |
|style="border:solid 2px black; style="color:black; style="text-align:center; background:#318CE7"|<span style="color:white;">'''79'''</span> |
||
| − | |style="border:solid 2px black; style="color:black; style="text-align:center; background:White"|Natto Roll |
+ | |style="border:solid 2px black; style="color:black; style="text-align:center; background:White"|<span style="color:black;">Natto Roll |
| − | |style="border:solid 2px black; style="color:black; style="text-align:center; background:White"|1 |
+ | |style="border:solid 2px black; style="color:black; style="text-align:center; background:White"|<span style="color:black;">1 |
| − | |style="border:solid 2px black; style="color:black; style="text-align:center; background:White"|Sushi House, Pit Fight 5.2, Louie Trade #5 |
+ | |style="border:solid 2px black; style="color:black; style="text-align:center; background:White"|<span style="color:black;">Sushi House, Pit Fight 5.2, Louie Trade #5 |
| − | |style="border:solid 2px black; style="color:black; style="text-align:center; background:White"|[[File:shftnw_snaps_079.jpg|Natto Roll|50px]] |
+ | |style="border:solid 2px black; style="color:black; style="text-align:center; background:White"|<span style="color:black;">[[File:shftnw_snaps_079.jpg|Natto Roll|50px]] |
|- |
|- |
||
|style="border:solid 2px black; style="color:black; style="text-align:center; background:#318CE7"|<span style="color:white;">'''80'''</span> |
|style="border:solid 2px black; style="color:black; style="text-align:center; background:#318CE7"|<span style="color:white;">'''80'''</span> |
||
| − | |style="border:solid 2px black; style="color:black; style="text-align:center; background:White"|Shrimp Sushi |
+ | |style="border:solid 2px black; style="color:black; style="text-align:center; background:White"|<span style="color:black;">Shrimp Sushi |
| − | |style="border:solid 2px black; style="color:black; style="text-align:center; background:White"|0 |
+ | |style="border:solid 2px black; style="color:black; style="text-align:center; background:White"|<span style="color:black;">0 |
| − | |style="border:solid 2px black; style="color:black; style="text-align:center; background:White"|Louie Trade #5 |
+ | |style="border:solid 2px black; style="color:black; style="text-align:center; background:White"|<span style="color:black;">Louie Trade #5 |
| − | |style="border:solid 2px black; style="color:black; style="text-align:center; background:White"|[[File:shftnw_snaps_080.jpg|Shrimp Sushi|50px]] |
+ | |style="border:solid 2px black; style="color:black; style="text-align:center; background:White"|<span style="color:black;">[[File:shftnw_snaps_080.jpg|Shrimp Sushi|50px]] |
|- |
|- |
||
|style="border:solid 2px black; style="color:black; style="text-align:center; background:#318CE7"|<span style="color:white;">'''81'''</span> |
|style="border:solid 2px black; style="color:black; style="text-align:center; background:#318CE7"|<span style="color:white;">'''81'''</span> |
||
| − | |style="border:solid 2px black; style="color:black; style="text-align:center; background:White"|Eel Sushi |
+ | |style="border:solid 2px black; style="color:black; style="text-align:center; background:White"|<span style="color:black;">Eel Sushi |
| − | |style="border:solid 2px black; style="color:black; style="text-align:center; background:White"|3 |
+ | |style="border:solid 2px black; style="color:black; style="text-align:center; background:White"|<span style="color:black;">3 |
| − | |style="border:solid 2px black; style="color:black; style="text-align:center; background:White"|Pit Fight 5.1, Louie Trade #5 |
+ | |style="border:solid 2px black; style="color:black; style="text-align:center; background:White"|<span style="color:black;">Pit Fight 5.1, Louie Trade #5 |
| − | |style="border:solid 2px black; style="color:black; style="text-align:center; background:White"|[[File:shftnw_snaps_081.jpg|Eel Sushi|50px]] |
+ | |style="border:solid 2px black; style="color:black; style="text-align:center; background:White"|<span style="color:black;">[[File:shftnw_snaps_081.jpg|Eel Sushi|50px]] |
|- |
|- |
||
|style="border:solid 2px black; style="color:black; style="text-align:center; background:#318CE7"|<span style="color:white;">'''82'''</span> |
|style="border:solid 2px black; style="color:black; style="text-align:center; background:#318CE7"|<span style="color:white;">'''82'''</span> |
||
| − | |style="border:solid 2px black; style="color:black; style="text-align:center; background:White"|Salmon Sushi |
+ | |style="border:solid 2px black; style="color:black; style="text-align:center; background:White"|<span style="color:black;">Salmon Sushi |
| − | |style="border:solid 2px black; style="color:black; style="text-align:center; background:White"|0 |
+ | |style="border:solid 2px black; style="color:black; style="text-align:center; background:White"|<span style="color:black;">0 |
| − | |style="border:solid 2px black; style="color:black; style="text-align:center; background:White"|Louie Trade #5 |
+ | |style="border:solid 2px black; style="color:black; style="text-align:center; background:White"|<span style="color:black;">Louie Trade #5 |
| − | |style="border:solid 2px black; style="color:black; style="text-align:center; background:White"|[[File:shftnw_snaps_082.jpg|Salmon Sushi|50px]] |
+ | |style="border:solid 2px black; style="color:black; style="text-align:center; background:White"|<span style="color:black;">[[File:shftnw_snaps_082.jpg|Salmon Sushi|50px]] |
|- |
|- |
||
|style="border:solid 2px black; style="color:black; style="text-align:center; background:#318CE7"|<span style="color:white;">'''83'''</span> |
|style="border:solid 2px black; style="color:black; style="text-align:center; background:#318CE7"|<span style="color:white;">'''83'''</span> |
||
| − | |style="border:solid 2px black; style="color:black; style="text-align:center; background:White"|Octopus Sushi |
+ | |style="border:solid 2px black; style="color:black; style="text-align:center; background:White"|<span style="color:black;">Octopus Sushi |
| − | |style="border:solid 2px black; style="color:black; style="text-align:center; background:White"|2 |
+ | |style="border:solid 2px black; style="color:black; style="text-align:center; background:White"|<span style="color:black;">2 |
| − | |style="border:solid 2px black; style="color:black; style="text-align:center; background:White"|Pit Fight 5.1, Louie Trade #5 |
+ | |style="border:solid 2px black; style="color:black; style="text-align:center; background:White"|<span style="color:black;">Pit Fight 5.1, Louie Trade #5 |
| − | |style="border:solid 2px black; style="color:black; style="text-align:center; background:White"|[[File:shftnw_snaps_083.jpg|Octopus Sushi|50px]] |
+ | |style="border:solid 2px black; style="color:black; style="text-align:center; background:White"|<span style="color:black;">[[File:shftnw_snaps_083.jpg|Octopus Sushi|50px]] |
|- |
|- |
||
|style="border:solid 2px black; style="color:black; style="text-align:center; background:#318CE7"|<span style="color:white;">'''84'''</span> |
|style="border:solid 2px black; style="color:black; style="text-align:center; background:#318CE7"|<span style="color:white;">'''84'''</span> |
||
| − | |style="border:solid 2px black; style="color:black; style="text-align:center; background:White"|Rice Ball |
+ | |style="border:solid 2px black; style="color:black; style="text-align:center; background:White"|<span style="color:black;">Rice Ball |
| − | |style="border:solid 2px black; style="color:black; style="text-align:center; background:White"|0 |
+ | |style="border:solid 2px black; style="color:black; style="text-align:center; background:White"|<span style="color:black;">0 |
| − | |style="border:solid 2px black; style="color:black; style="text-align:center; background:White"|Louie Trade #5 |
+ | |style="border:solid 2px black; style="color:black; style="text-align:center; background:White"|<span style="color:black;">Louie Trade #5 |
| − | |style="border:solid 2px black; style="color:black; style="text-align:center; background:White"|[[File:shftnw_snaps_084.jpg|Rice Ball|50px]] |
+ | |style="border:solid 2px black; style="color:black; style="text-align:center; background:White"|<span style="color:black;">[[File:shftnw_snaps_084.jpg|Rice Ball|50px]] |
|- |
|- |
||
|style="border:solid 2px black; style="color:black; style="text-align:center; background:#318CE7"|<span style="color:white;">'''85'''</span> |
|style="border:solid 2px black; style="color:black; style="text-align:center; background:#318CE7"|<span style="color:white;">'''85'''</span> |
||
| − | |style="border:solid 2px black; style="color:black; style="text-align:center; background:White"|Ginger Sushi |
+ | |style="border:solid 2px black; style="color:black; style="text-align:center; background:White"|<span style="color:black;">Ginger Sushi |
| − | |style="border:solid 2px black; style="color:black; style="text-align:center; background:White"|0 |
+ | |style="border:solid 2px black; style="color:black; style="text-align:center; background:White"|<span style="color:black;">0 |
| − | |style="border:solid 2px black; style="color:black; style="text-align:center; background:White"|Louie Trade #5 |
+ | |style="border:solid 2px black; style="color:black; style="text-align:center; background:White"|<span style="color:black;">Louie Trade #5 |
| − | |style="border:solid 2px black; style="color:black; style="text-align:center; background:White"|[[File:shftnw_snaps_085.jpg|Ginger Sushi|50px]] |
+ | |style="border:solid 2px black; style="color:black; style="text-align:center; background:White"|<span style="color:black;">[[File:shftnw_snaps_085.jpg|Ginger Sushi|50px]] |
|- |
|- |
||
|style="border:solid 2px black; style="color:black; style="text-align:center; background:#318CE7"|<span style="color:white;">'''86'''</span> |
|style="border:solid 2px black; style="color:black; style="text-align:center; background:#318CE7"|<span style="color:white;">'''86'''</span> |
||
| − | |style="border:solid 2px black; style="color:black; style="text-align:center; background:White"|Fatty Tuna Sushi |
+ | |style="border:solid 2px black; style="color:black; style="text-align:center; background:White"|<span style="color:black;">Fatty Tuna Sushi |
| − | |style="border:solid 2px black; style="color:black; style="text-align:center; background:White"|2 |
+ | |style="border:solid 2px black; style="color:black; style="text-align:center; background:White"|<span style="color:black;">2 |
| − | |style="border:solid 2px black; style="color:black; style="text-align:center; background:White"|Pit Fight 6.1, Louie Trade #5 |
+ | |style="border:solid 2px black; style="color:black; style="text-align:center; background:White"|<span style="color:black;">Pit Fight 6.1, Louie Trade #5 |
| − | |style="border:solid 2px black; style="color:black; style="text-align:center; background:White"|[[File:shftnw_snaps_086.jpg|Fatty Tuna Sushi|50px]] |
+ | |style="border:solid 2px black; style="color:black; style="text-align:center; background:White"|<span style="color:black;">[[File:shftnw_snaps_086.jpg|Fatty Tuna Sushi|50px]] |
|- |
|- |
||
|style="border:solid 2px black; style="color:black; style="text-align:center; background:#318CE7"|<span style="color:white;">'''87'''</span> |
|style="border:solid 2px black; style="color:black; style="text-align:center; background:#318CE7"|<span style="color:white;">'''87'''</span> |
||
| − | |style="border:solid 2px black; style="color:black; style="text-align:center; background:White"|Egg Roll |
+ | |style="border:solid 2px black; style="color:black; style="text-align:center; background:White"|<span style="color:black;">Egg Roll |
| − | |style="border:solid 2px black; style="color:black; style="text-align:center; background:White"|2 |
+ | |style="border:solid 2px black; style="color:black; style="text-align:center; background:White"|<span style="color:black;">2 |
| − | |style="border:solid 2px black; style="color:black; style="text-align:center; background:White"|Sushi House, Pit Fight 5.2, Louie Trade #5 |
+ | |style="border:solid 2px black; style="color:black; style="text-align:center; background:White"|<span style="color:black;">Sushi House, Pit Fight 5.2, Louie Trade #5 |
| − | |style="border:solid 2px black; style="color:black; style="text-align:center; background:White"|[[File:shftnw_snaps_087.jpg|Egg Roll|50px]] |
+ | |style="border:solid 2px black; style="color:black; style="text-align:center; background:White"|<span style="color:black;">[[File:shftnw_snaps_087.jpg|Egg Roll|50px]] |
|- |
|- |
||
|style="border:solid 2px black; style="color:black; style="text-align:center; background:#318CE7"|<span style="color:white;">'''88'''</span> |
|style="border:solid 2px black; style="color:black; style="text-align:center; background:#318CE7"|<span style="color:white;">'''88'''</span> |
||
| − | |style="border:solid 2px black; style="color:black; style="text-align:center; background:White"|Q the Great |
+ | |style="border:solid 2px black; style="color:black; style="text-align:center; background:White"|<span style="color:black;">Q the Great |
| − | |style="border:solid 2px black; style="color:black; style="text-align:center; background:White"|0 |
+ | |style="border:solid 2px black; style="color:black; style="text-align:center; background:White"|<span style="color:black;">0 |
| − | |style="border:solid 2px black; style="color:black; style="text-align:center; background:White"|Masatoshi Trade #7 |
+ | |style="border:solid 2px black; style="color:black; style="text-align:center; background:White"|<span style="color:black;">Masatoshi Trade #7 |
| − | |style="border:solid 2px black; style="color:black; style="text-align:center; background:White"|[[File:shftnw_snaps_088.jpg|Q the Great|50px]] |
+ | |style="border:solid 2px black; style="color:black; style="text-align:center; background:White"|<span style="color:black;">[[File:shftnw_snaps_088.jpg|Q the Great|50px]] |
|- |
|- |
||
|style="border:solid 2px black; style="color:black; style="text-align:center; background:#318CE7"|<span style="color:white;">'''89'''</span> |
|style="border:solid 2px black; style="color:black; style="text-align:center; background:#318CE7"|<span style="color:white;">'''89'''</span> |
||
| − | |style="border:solid 2px black; style="color:black; style="text-align:center; background:White"|Ninja |
+ | |style="border:solid 2px black; style="color:black; style="text-align:center; background:White"|<span style="color:black;">Ninja |
| − | |style="border:solid 2px black; style="color:black; style="text-align:center; background:White"|1 |
+ | |style="border:solid 2px black; style="color:black; style="text-align:center; background:White"|<span style="color:black;">1 |
| − | |style="border:solid 2px black; style="color:black; style="text-align:center; background:White"|Ninja Hideaway (limited), Pit Fight 5.2, Louie Trade #6 |
+ | |style="border:solid 2px black; style="color:black; style="text-align:center; background:White"|<span style="color:black;">Ninja Hideaway (limited), Pit Fight 5.2, Louie Trade #6 |
| − | |style="border:solid 2px black; style="color:black; style="text-align:center; background:White"|[[File:shftnw_snaps_089.jpg|Ninja|50px]] |
+ | |style="border:solid 2px black; style="color:black; style="text-align:center; background:White"|<span style="color:black;">[[File:shftnw_snaps_089.jpg|Ninja|50px]] |
|- |
|- |
||
|style="border:solid 2px black; style="color:black; style="text-align:center; background:#318CE7"|<span style="color:white;">'''90'''</span> |
|style="border:solid 2px black; style="color:black; style="text-align:center; background:#318CE7"|<span style="color:white;">'''90'''</span> |
||
| − | |style="border:solid 2px black; style="color:black; style="text-align:center; background:White"|The Jonin |
+ | |style="border:solid 2px black; style="color:black; style="text-align:center; background:White"|<span style="color:black;">The Jonin |
| − | |style="border:solid 2px black; style="color:black; style="text-align:center; background:White"|0 |
+ | |style="border:solid 2px black; style="color:black; style="text-align:center; background:White"|<span style="color:black;">0 |
| − | |style="border:solid 2px black; style="color:black; style="text-align:center; background:White"|Louie Trade #6 |
+ | |style="border:solid 2px black; style="color:black; style="text-align:center; background:White"|<span style="color:black;">Louie Trade #6 |
| − | |style="border:solid 2px black; style="color:black; style="text-align:center; background:White"|[[File:shftnw_snaps_090.jpg|The Jonin|50px]] |
+ | |style="border:solid 2px black; style="color:black; style="text-align:center; background:White"|<span style="color:black;">[[File:shftnw_snaps_090.jpg|The Jonin|50px]] |
|- |
|- |
||
|style="border:solid 2px black; style="color:black; style="text-align:center; background:#318CE7"|<span style="color:white;">'''91'''</span> |
|style="border:solid 2px black; style="color:black; style="text-align:center; background:#318CE7"|<span style="color:white;">'''91'''</span> |
||
| − | |style="border:solid 2px black; style="color:black; style="text-align:center; background:White"|Seymouria |
+ | |style="border:solid 2px black; style="color:black; style="text-align:center; background:White"|<span style="color:black;">Seymouria |
| − | |style="border:solid 2px black; style="color:black; style="text-align:center; background:White"|6 |
+ | |style="border:solid 2px black; style="color:black; style="text-align:center; background:White"|<span style="color:black;">6 |
| − | |style="border:solid 2px black; style="color:black; style="text-align:center; background:White"|Guiana Highlands |
+ | |style="border:solid 2px black; style="color:black; style="text-align:center; background:White"|<span style="color:black;">Guiana Highlands |
| − | |style="border:solid 2px black; style="color:black; style="text-align:center; background:White"|[[File:shftnw_snaps_091.jpg|Seymouria|50px]] |
+ | |style="border:solid 2px black; style="color:black; style="text-align:center; background:White"|<span style="color:black;">[[File:shftnw_snaps_091.jpg|Seymouria|50px]] |
|- |
|- |
||
|style="border:solid 2px black; style="color:black; style="text-align:center; background:#318CE7"|<span style="color:white;">'''92'''</span> |
|style="border:solid 2px black; style="color:black; style="text-align:center; background:#318CE7"|<span style="color:white;">'''92'''</span> |
||
| − | |style="border:solid 2px black; style="color:black; style="text-align:center; background:White"|Soldes |
+ | |style="border:solid 2px black; style="color:black; style="text-align:center; background:White"|<span style="color:black;">Soldes |
| − | |style="border:solid 2px black; style="color:black; style="text-align:center; background:White"|2 |
+ | |style="border:solid 2px black; style="color:black; style="text-align:center; background:White"|<span style="color:black;">2 |
| − | |style="border:solid 2px black; style="color:black; style="text-align:center; background:White"|Guiana Highlands |
+ | |style="border:solid 2px black; style="color:black; style="text-align:center; background:White"|<span style="color:black;">Guiana Highlands |
| − | |style="border:solid 2px black; style="color:black; style="text-align:center; background:White"|[[File:shftnw_snaps_092.jpg|Soldes|50px]] |
+ | |style="border:solid 2px black; style="color:black; style="text-align:center; background:White"|<span style="color:black;">[[File:shftnw_snaps_092.jpg|Soldes|50px]] |
|- |
|- |
||
|style="border:solid 2px black; style="color:black; style="text-align:center; background:#318CE7"|<span style="color:white;">'''93'''</span> |
|style="border:solid 2px black; style="color:black; style="text-align:center; background:#318CE7"|<span style="color:white;">'''93'''</span> |
||
| − | |style="border:solid 2px black; style="color:black; style="text-align:center; background:White"|Ananka |
+ | |style="border:solid 2px black; style="color:black; style="text-align:center; background:White"|<span style="color:black;">Ananka |
| − | |style="border:solid 2px black; style="color:black; style="text-align:center; background:White"|2 |
+ | |style="border:solid 2px black; style="color:black; style="text-align:center; background:White"|<span style="color:black;">2 |
| − | |style="border:solid 2px black; style="color:black; style="text-align:center; background:White"|Guiana Highlands |
+ | |style="border:solid 2px black; style="color:black; style="text-align:center; background:White"|<span style="color:black;">Guiana Highlands |
| − | |style="border:solid 2px black; style="color:black; style="text-align:center; background:White"|[[File:shftnw_snaps_093.jpg|Ananka|50px]] |
+ | |style="border:solid 2px black; style="color:black; style="text-align:center; background:White"|<span style="color:black;">[[File:shftnw_snaps_093.jpg|Ananka|50px]] |
|- |
|- |
||
|style="border:solid 2px black; style="color:black; style="text-align:center; background:#318CE7"|<span style="color:white;">'''94'''</span> |
|style="border:solid 2px black; style="color:black; style="text-align:center; background:#318CE7"|<span style="color:white;">'''94'''</span> |
||
| − | |style="border:solid 2px black; style="color:black; style="text-align:center; background:White"|Mudopkan |
+ | |style="border:solid 2px black; style="color:black; style="text-align:center; background:White"|<span style="color:black;">Mudopkan |
| − | |style="border:solid 2px black; style="color:black; style="text-align:center; background:White"|1 |
+ | |style="border:solid 2px black; style="color:black; style="text-align:center; background:White"|<span style="color:black;">1 |
| − | |style="border:solid 2px black; style="color:black; style="text-align:center; background:White"|Guiana Highlands (UMA), Samuel Trade #6 |
+ | |style="border:solid 2px black; style="color:black; style="text-align:center; background:White"|<span style="color:black;">Guiana Highlands (UMA), Samuel Trade #6 |
| − | |style="border:solid 2px black; style="color:black; style="text-align:center; background:White"|[[File:shftnw_snaps_094.jpg|Mudopkan|50px]] |
+ | |style="border:solid 2px black; style="color:black; style="text-align:center; background:White"|<span style="color:black;">[[File:shftnw_snaps_094.jpg|Mudopkan|50px]] |
|- |
|- |
||
|style="border:solid 2px black; style="color:black; style="text-align:center; background:#318CE7"|<span style="color:white;">'''95'''</span> |
|style="border:solid 2px black; style="color:black; style="text-align:center; background:#318CE7"|<span style="color:white;">'''95'''</span> |
||
| − | |style="border:solid 2px black; style="color:black; style="text-align:center; background:White"|Gregor |
+ | |style="border:solid 2px black; style="color:black; style="text-align:center; background:White"|<span style="color:black;">Gregor |
| − | |style="border:solid 2px black; style="color:black; style="text-align:center; background:White"|12 |
+ | |style="border:solid 2px black; style="color:black; style="text-align:center; background:White"|<span style="color:black;">12 |
| − | |style="border:solid 2px black; style="color:black; style="text-align:center; background:White"|Doll House, Pit Fight 5.2 |
+ | |style="border:solid 2px black; style="color:black; style="text-align:center; background:White"|<span style="color:black;">Doll House, Pit Fight 5.2 |
| − | |style="border:solid 2px black; style="color:black; style="text-align:center; background:White"|[[File:shftnw_snaps_095.jpg|Gregor|50px]] |
+ | |style="border:solid 2px black; style="color:black; style="text-align:center; background:White"|<span style="color:black;">[[File:shftnw_snaps_095.jpg|Gregor|50px]] |
|- |
|- |
||
|style="border:solid 2px black; style="color:black; style="text-align:center; background:#318CE7"|<span style="color:white;">'''96'''</span> |
|style="border:solid 2px black; style="color:black; style="text-align:center; background:#318CE7"|<span style="color:white;">'''96'''</span> |
||
| − | |style="border:solid 2px black; style="color:black; style="text-align:center; background:White"|Kareau |
+ | |style="border:solid 2px black; style="color:black; style="text-align:center; background:White"|<span style="color:black;">Kareau |
| − | |style="border:solid 2px black; style="color:black; style="text-align:center; background:White"|6 |
+ | |style="border:solid 2px black; style="color:black; style="text-align:center; background:White"|<span style="color:black;">6 |
| − | |style="border:solid 2px black; style="color:black; style="text-align:center; background:White"|Doll House, Pit Fight 5.2 |
+ | |style="border:solid 2px black; style="color:black; style="text-align:center; background:White"|<span style="color:black;">Doll House, Pit Fight 5.2 |
| − | |style="border:solid 2px black; style="color:black; style="text-align:center; background:White"|[[File:shftnw_snaps_096.jpg|Kareau|50px]] |
+ | |style="border:solid 2px black; style="color:black; style="text-align:center; background:White"|<span style="color:black;">[[File:shftnw_snaps_096.jpg|Kareau|50px]] |
|- |
|- |
||
|style="border:solid 2px black; style="color:black; style="text-align:center; background:#318CE7"|<span style="color:white;">'''97'''</span> |
|style="border:solid 2px black; style="color:black; style="text-align:center; background:#318CE7"|<span style="color:white;">'''97'''</span> |
||
| − | |style="border:solid 2px black; style="color:black; style="text-align:center; background:White"|Gresiru |
+ | |style="border:solid 2px black; style="color:black; style="text-align:center; background:White"|<span style="color:black;">Gresiru |
| − | |style="border:solid 2px black; style="color:black; style="text-align:center; background:White"|8 |
+ | |style="border:solid 2px black; style="color:black; style="text-align:center; background:White"|<span style="color:black;">8 |
| − | |style="border:solid 2px black; style="color:black; style="text-align:center; background:White"|Doll House, Pit Fight 5.2 |
+ | |style="border:solid 2px black; style="color:black; style="text-align:center; background:White"|<span style="color:black;">Doll House, Pit Fight 5.2 |
| − | |style="border:solid 2px black; style="color:black; style="text-align:center; background:White"|[[File:shftnw_snaps_097.jpg|Gresiru|50px]] |
+ | |style="border:solid 2px black; style="color:black; style="text-align:center; background:White"|<span style="color:black;">[[File:shftnw_snaps_097.jpg|Gresiru|50px]] |
|- |
|- |
||
|style="border:solid 2px black; style="color:black; style="text-align:center; background:#318CE7"|<span style="color:white;">'''98'''</span> |
|style="border:solid 2px black; style="color:black; style="text-align:center; background:#318CE7"|<span style="color:white;">'''98'''</span> |
||
| − | |style="border:solid 2px black; style="color:black; style="text-align:center; background:White"|Dana |
+ | |style="border:solid 2px black; style="color:black; style="text-align:center; background:White"|<span style="color:black;">Dana |
| − | |style="border:solid 2px black; style="color:black; style="text-align:center; background:White"|1 |
+ | |style="border:solid 2px black; style="color:black; style="text-align:center; background:White"|<span style="color:black;">1 |
| − | |style="border:solid 2px black; style="color:black; style="text-align:center; background:White"|Doll House (Boss), Pit Fight 5.2 |
+ | |style="border:solid 2px black; style="color:black; style="text-align:center; background:White"|<span style="color:black;">Doll House (Boss), Pit Fight 5.2 |
| − | |style="border:solid 2px black; style="color:black; style="text-align:center; background:White"|[[File:shftnw_snaps_098.jpg|Dana|50px]] |
+ | |style="border:solid 2px black; style="color:black; style="text-align:center; background:White"|<span style="color:black;">[[File:shftnw_snaps_098.jpg|Dana|50px]] |
|- |
|- |
||
|style="border:solid 2px black; style="color:black; style="text-align:center; background:#318CE7"|<span style="color:white;">'''99'''</span> |
|style="border:solid 2px black; style="color:black; style="text-align:center; background:#318CE7"|<span style="color:white;">'''99'''</span> |
||
| − | |style="border:solid 2px black; style="color:black; style="text-align:center; background:White"|Tsui Zooi |
+ | |style="border:solid 2px black; style="color:black; style="text-align:center; background:White"|<span style="color:black;">Tsui Zooi |
| − | |style="border:solid 2px black; style="color:black; style="text-align:center; background:White"|6 |
+ | |style="border:solid 2px black; style="color:black; style="text-align:center; background:White"|<span style="color:black;">6 |
| − | |style="border:solid 2px black; style="color:black; style="text-align:center; background:White"|Garvoy Valley |
+ | |style="border:solid 2px black; style="color:black; style="text-align:center; background:White"|<span style="color:black;">Garvoy Valley |
| − | |style="border:solid 2px black; style="color:black; style="text-align:center; background:White"|[[File:shftnw_snaps_099.jpg|Tsui Zooi|50px]] |
+ | |style="border:solid 2px black; style="color:black; style="text-align:center; background:White"|<span style="color:black;">[[File:shftnw_snaps_099.jpg|Tsui Zooi|50px]] |
|- |
|- |
||
|style="border:solid 2px black; style="color:black; style="text-align:center; background:#318CE7"|<span style="color:white;">'''100'''</span> |
|style="border:solid 2px black; style="color:black; style="text-align:center; background:#318CE7"|<span style="color:white;">'''100'''</span> |
||
| − | |style="border:solid 2px black; style="color:black; style="text-align:center; background:White"|Ignis |
+ | |style="border:solid 2px black; style="color:black; style="text-align:center; background:White"|<span style="color:black;">Ignis |
| − | |style="border:solid 2px black; style="color:black; style="text-align:center; background:White"|6 |
+ | |style="border:solid 2px black; style="color:black; style="text-align:center; background:White"|<span style="color:black;">6 |
| − | |style="border:solid 2px black; style="color:black; style="text-align:center; background:White"|Garvoy Valley |
+ | |style="border:solid 2px black; style="color:black; style="text-align:center; background:White"|<span style="color:black;">Garvoy Valley |
| − | |style="border:solid 2px black; style="color:black; style="text-align:center; background:White"|[[File:shftnw_snaps_100.jpg|Ignus|50px]] |
+ | |style="border:solid 2px black; style="color:black; style="text-align:center; background:White"|<span style="color:black;">[[File:shftnw_snaps_100.jpg|Ignus|50px]] |
|- |
|- |
||
|style="border:solid 2px black; style="color:black; style="text-align:center; background:#318CE7"|<span style="color:white;">'''101'''</span> |
|style="border:solid 2px black; style="color:black; style="text-align:center; background:#318CE7"|<span style="color:white;">'''101'''</span> |
||
| − | |style="border:solid 2px black; style="color:black; style="text-align:center; background:White"|Xukrus |
+ | |style="border:solid 2px black; style="color:black; style="text-align:center; background:White"|<span style="color:black;">Xukrus |
| − | |style="border:solid 2px black; style="color:black; style="text-align:center; background:White"|6 |
+ | |style="border:solid 2px black; style="color:black; style="text-align:center; background:White"|<span style="color:black;">6 |
| − | |style="border:solid 2px black; style="color:black; style="text-align:center; background:White"|Garvoy Valley |
+ | |style="border:solid 2px black; style="color:black; style="text-align:center; background:White"|<span style="color:black;">Garvoy Valley |
| − | |style="border:solid 2px black; style="color:black; style="text-align:center; background:White"|[[File:shftnw_snaps_101.jpg|Xukrus|50px]] |
+ | |style="border:solid 2px black; style="color:black; style="text-align:center; background:White"|<span style="color:black;">[[File:shftnw_snaps_101.jpg|Xukrus|50px]] |
|- |
|- |
||
|style="border:solid 2px black; style="color:black; style="text-align:center; background:#318CE7"|<span style="color:white;">'''102'''</span> |
|style="border:solid 2px black; style="color:black; style="text-align:center; background:#318CE7"|<span style="color:white;">'''102'''</span> |
||
| − | |style="border:solid 2px black; style="color:black; style="text-align:center; background:White"|Tirawa |
+ | |style="border:solid 2px black; style="color:black; style="text-align:center; background:White"|<span style="color:black;">Tirawa |
| − | |style="border:solid 2px black; style="color:black; style="text-align:center; background:White"|1 |
+ | |style="border:solid 2px black; style="color:black; style="text-align:center; background:White"|<span style="color:black;">1 |
| − | |style="border:solid 2px black; style="color:black; style="text-align:center; background:White"|Garvoy Valley (Boss), Mary Trade #7 |
+ | |style="border:solid 2px black; style="color:black; style="text-align:center; background:White"|<span style="color:black;">Garvoy Valley (Boss), Mary Trade #7 |
| − | |style="border:solid 2px black; style="color:black; style="text-align:center; background:White"|[[File:shftnw_snaps_102.jpg|Tirawa|50px]] |
+ | |style="border:solid 2px black; style="color:black; style="text-align:center; background:White"|<span style="color:black;">[[File:shftnw_snaps_102.jpg|Tirawa|50px]] |
|- |
|- |
||
|style="border:solid 2px black; style="color:black; style="text-align:center; background:#318CE7"|<span style="color:white;">'''103'''</span> |
|style="border:solid 2px black; style="color:black; style="text-align:center; background:#318CE7"|<span style="color:white;">'''103'''</span> |
||
| − | |style="border:solid 2px black; style="color:black; style="text-align:center; background:White"|Torment Gluttony |
+ | |style="border:solid 2px black; style="color:black; style="text-align:center; background:White"|<span style="color:black;">Torment Gluttony |
| − | |style="border:solid 2px black; style="color:black; style="text-align:center; background:White"|1 |
+ | |style="border:solid 2px black; style="color:black; style="text-align:center; background:White"|<span style="color:black;">1 |
| − | |style="border:solid 2px black; style="color:black; style="text-align:center; background:White"|Purgatory: Green (limited) |
+ | |style="border:solid 2px black; style="color:black; style="text-align:center; background:White"|<span style="color:black;">Purgatory: Green (limited) |
| − | |style="border:solid 2px black; style="color:black; style="text-align:center; background:White"|[[File:shftnw_snaps_103.jpg|Torment Gluttony|50px]] |
+ | |style="border:solid 2px black; style="color:black; style="text-align:center; background:White"|<span style="color:black;">[[File:shftnw_snaps_103.jpg|Torment Gluttony|50px]] |
|- |
|- |
||
|style="border:solid 2px black; style="color:black; style="text-align:center; background:#318CE7"|<span style="color:white;">'''104'''</span> |
|style="border:solid 2px black; style="color:black; style="text-align:center; background:#318CE7"|<span style="color:white;">'''104'''</span> |
||
| − | |style="border:solid 2px black; style="color:black; style="text-align:center; background:White"|Gnawing Gluttony |
+ | |style="border:solid 2px black; style="color:black; style="text-align:center; background:White"|<span style="color:black;">Gnawing Gluttony |
| − | |style="border:solid 2px black; style="color:black; style="text-align:center; background:White"|1 |
+ | |style="border:solid 2px black; style="color:black; style="text-align:center; background:White"|<span style="color:black;">1 |
| − | |style="border:solid 2px black; style="color:black; style="text-align:center; background:White"|Purgatory: Green (limited) |
+ | |style="border:solid 2px black; style="color:black; style="text-align:center; background:White"|<span style="color:black;">Purgatory: Green (limited) |
| − | |style="border:solid 2px black; style="color:black; style="text-align:center; background:White"|[[File:shftnw_snaps_104.jpg|Gnawing Gluttony|50px]] |
+ | |style="border:solid 2px black; style="color:black; style="text-align:center; background:White"|<span style="color:black;">[[File:shftnw_snaps_104.jpg|Gnawing Gluttony|50px]] |
|- |
|- |
||
|style="border:solid 2px black; style="color:black; style="text-align:center; background:#318CE7"|<span style="color:white;">'''105'''</span> |
|style="border:solid 2px black; style="color:black; style="text-align:center; background:#318CE7"|<span style="color:white;">'''105'''</span> |
||
| − | |style="border:solid 2px black; style="color:black; style="text-align:center; background:White"|Twisted Gluttony |
+ | |style="border:solid 2px black; style="color:black; style="text-align:center; background:White"|<span style="color:black;">Twisted Gluttony |
| − | |style="border:solid 2px black; style="color:black; style="text-align:center; background:White"|1 |
+ | |style="border:solid 2px black; style="color:black; style="text-align:center; background:White"|<span style="color:black;">1 |
| − | |style="border:solid 2px black; style="color:black; style="text-align:center; background:White"|Purgatory: Green (limited) |
+ | |style="border:solid 2px black; style="color:black; style="text-align:center; background:White"|<span style="color:black;">Purgatory: Green (limited) |
| − | |style="border:solid 2px black; style="color:black; style="text-align:center; background:White"|[[File:shftnw_snaps_105.jpg|Twisted Gluttony|50px]] |
+ | |style="border:solid 2px black; style="color:black; style="text-align:center; background:White"|<span style="color:black;">[[File:shftnw_snaps_105.jpg|Twisted Gluttony|50px]] |
|- |
|- |
||
|style="border:solid 2px black; style="color:black; style="text-align:center; background:#318CE7"|<span style="color:white;">'''106'''</span> |
|style="border:solid 2px black; style="color:black; style="text-align:center; background:#318CE7"|<span style="color:white;">'''106'''</span> |
||
| − | |style="border:solid 2px black; style="color:black; style="text-align:center; background:White"|Great Hunger |
+ | |style="border:solid 2px black; style="color:black; style="text-align:center; background:White"|<span style="color:black;">Great Hunger |
| − | |style="border:solid 2px black; style="color:black; style="text-align:center; background:White"|1 |
+ | |style="border:solid 2px black; style="color:black; style="text-align:center; background:White"|<span style="color:black;">1 |
| − | |style="border:solid 2px black; style="color:black; style="text-align:center; background:White"|Purgatory: Green (Boss) |
+ | |style="border:solid 2px black; style="color:black; style="text-align:center; background:White"|<span style="color:black;">Purgatory: Green (Boss) |
| − | |style="border:solid 2px black; style="color:black; style="text-align:center; background:White"|[[File:shftnw_snaps_106.jpg|Great Hunger|50px]] |
+ | |style="border:solid 2px black; style="color:black; style="text-align:center; background:White"|<span style="color:black;">[[File:shftnw_snaps_106.jpg|Great Hunger|50px]] |
|- |
|- |
||
|style="border:solid 2px black; style="color:black; style="text-align:center; background:#318CE7"|<span style="color:white;">'''107'''</span> |
|style="border:solid 2px black; style="color:black; style="text-align:center; background:#318CE7"|<span style="color:white;">'''107'''</span> |
||
| − | |style="border:solid 2px black; style="color:black; style="text-align:center; background:White"|Torment Greed |
+ | |style="border:solid 2px black; style="color:black; style="text-align:center; background:White"|<span style="color:black;">Torment Greed |
| − | |style="border:solid 2px black; style="color:black; style="text-align:center; background:White"|1 |
+ | |style="border:solid 2px black; style="color:black; style="text-align:center; background:White"|<span style="color:black;">1 |
| − | |style="border:solid 2px black; style="color:black; style="text-align:center; background:White"|Purgatory: Blue (limited) |
+ | |style="border:solid 2px black; style="color:black; style="text-align:center; background:White"|<span style="color:black;">Purgatory: Blue (limited) |
| − | |style="border:solid 2px black; style="color:black; style="text-align:center; background:White"|[[File:shftnw_snaps_107.jpg|Torment Greed|50px]] |
+ | |style="border:solid 2px black; style="color:black; style="text-align:center; background:White"|<span style="color:black;">[[File:shftnw_snaps_107.jpg|Torment Greed|50px]] |
|- |
|- |
||
|style="border:solid 2px black; style="color:black; style="text-align:center; background:#318CE7"|<span style="color:white;">'''108'''</span> |
|style="border:solid 2px black; style="color:black; style="text-align:center; background:#318CE7"|<span style="color:white;">'''108'''</span> |
||
| − | |style="border:solid 2px black; style="color:black; style="text-align:center; background:White"|Gnawing Greed |
+ | |style="border:solid 2px black; style="color:black; style="text-align:center; background:White"|<span style="color:black;">Gnawing Greed |
| − | |style="border:solid 2px black; style="color:black; style="text-align:center; background:White"|1 |
+ | |style="border:solid 2px black; style="color:black; style="text-align:center; background:White"|<span style="color:black;">1 |
| − | |style="border:solid 2px black; style="color:black; style="text-align:center; background:White"|Purgatory: Blue (limited) |
+ | |style="border:solid 2px black; style="color:black; style="text-align:center; background:White"|<span style="color:black;">Purgatory: Blue (limited) |
| − | |style="border:solid 2px black; style="color:black; style="text-align:center; background:White"|[[File:shftnw_snaps_108.jpg|Gnawing Greed|50px]] |
+ | |style="border:solid 2px black; style="color:black; style="text-align:center; background:White"|<span style="color:black;">[[File:shftnw_snaps_108.jpg|Gnawing Greed|50px]] |
|- |
|- |
||
|style="border:solid 2px black; style="color:black; style="text-align:center; background:#318CE7"|<span style="color:white;">'''109'''</span> |
|style="border:solid 2px black; style="color:black; style="text-align:center; background:#318CE7"|<span style="color:white;">'''109'''</span> |
||
| − | |style="border:solid 2px black; style="color:black; style="text-align:center; background:White"|Twisted Greed |
+ | |style="border:solid 2px black; style="color:black; style="text-align:center; background:White"|<span style="color:black;">Twisted Greed |
| − | |style="border:solid 2px black; style="color:black; style="text-align:center; background:White"|1 |
+ | |style="border:solid 2px black; style="color:black; style="text-align:center; background:White"|<span style="color:black;">1 |
| − | |style="border:solid 2px black; style="color:black; style="text-align:center; background:White"|Purgatory: Blue (limited) |
+ | |style="border:solid 2px black; style="color:black; style="text-align:center; background:White"|<span style="color:black;">Purgatory: Blue (limited) |
| − | |style="border:solid 2px black; style="color:black; style="text-align:center; background:White"|[[File:shftnw_snaps_109.jpg|Twisted Greed|50px]] |
+ | |style="border:solid 2px black; style="color:black; style="text-align:center; background:White"|<span style="color:black;">[[File:shftnw_snaps_109.jpg|Twisted Greed|50px]] |
|- |
|- |
||
|style="border:solid 2px black; style="color:black; style="text-align:center; background:#318CE7"|<span style="color:white;">'''110'''</span> |
|style="border:solid 2px black; style="color:black; style="text-align:center; background:#318CE7"|<span style="color:white;">'''110'''</span> |
||
| − | |style="border:solid 2px black; style="color:black; style="text-align:center; background:White"|Avarice |
+ | |style="border:solid 2px black; style="color:black; style="text-align:center; background:White"|<span style="color:black;">Avarice |
| − | |style="border:solid 2px black; style="color:black; style="text-align:center; background:White"|1 |
+ | |style="border:solid 2px black; style="color:black; style="text-align:center; background:White"|<span style="color:black;">1 |
| − | |style="border:solid 2px black; style="color:black; style="text-align:center; background:White"|Purgatory: Blue (Boss) |
+ | |style="border:solid 2px black; style="color:black; style="text-align:center; background:White"|<span style="color:black;">Purgatory: Blue (Boss) |
| − | |style="border:solid 2px black; style="color:black; style="text-align:center; background:White"|[[File:shftnw_snaps_110.jpg|Avarice|50px]] |
+ | |style="border:solid 2px black; style="color:black; style="text-align:center; background:White"|<span style="color:black;">[[File:shftnw_snaps_110.jpg|Avarice|50px]] |
|- |
|- |
||
|style="border:solid 2px black; style="color:black; style="text-align:center; background:#318CE7"|<span style="color:white;">'''111'''</span> |
|style="border:solid 2px black; style="color:black; style="text-align:center; background:#318CE7"|<span style="color:white;">'''111'''</span> |
||
| − | |style="border:solid 2px black; style="color:black; style="text-align:center; background:White"|Torment Lust |
+ | |style="border:solid 2px black; style="color:black; style="text-align:center; background:White"|<span style="color:black;">Torment Lust |
| − | |style="border:solid 2px black; style="color:black; style="text-align:center; background:White"|1 |
+ | |style="border:solid 2px black; style="color:black; style="text-align:center; background:White"|<span style="color:black;">1 |
| − | |style="border:solid 2px black; style="color:black; style="text-align:center; background:White"|Purgatory: Red (limited) |
+ | |style="border:solid 2px black; style="color:black; style="text-align:center; background:White"|<span style="color:black;">Purgatory: Red (limited) |
| − | |style="border:solid 2px black; style="color:black; style="text-align:center; background:White"|[[File:shftnw_snaps_111.jpg|Torment Lust|50px]] |
+ | |style="border:solid 2px black; style="color:black; style="text-align:center; background:White"|<span style="color:black;">[[File:shftnw_snaps_111.jpg|Torment Lust|50px]] |
|- |
|- |
||
|style="border:solid 2px black; style="color:black; style="text-align:center; background:#318CE7"|<span style="color:white;">'''112'''</span> |
|style="border:solid 2px black; style="color:black; style="text-align:center; background:#318CE7"|<span style="color:white;">'''112'''</span> |
||
| − | |style="border:solid 2px black; style="color:black; style="text-align:center; background:White"|Gnawing Lust |
+ | |style="border:solid 2px black; style="color:black; style="text-align:center; background:White"|<span style="color:black;">Gnawing Lust |
| − | |style="border:solid 2px black; style="color:black; style="text-align:center; background:White"|1 |
+ | |style="border:solid 2px black; style="color:black; style="text-align:center; background:White"|<span style="color:black;">1 |
| − | |style="border:solid 2px black; style="color:black; style="text-align:center; background:White"|Purgatory: Red (limited) |
+ | |style="border:solid 2px black; style="color:black; style="text-align:center; background:White"|<span style="color:black;">Purgatory: Red (limited) |
| − | |style="border:solid 2px black; style="color:black; style="text-align:center; background:White"|[[File:shftnw_snaps_112.jpg|Gnawing Lust|50px]] |
+ | |style="border:solid 2px black; style="color:black; style="text-align:center; background:White"|<span style="color:black;">[[File:shftnw_snaps_112.jpg|Gnawing Lust|50px]] |
|- |
|- |
||
|style="border:solid 2px black; style="color:black; style="text-align:center; background:#318CE7"|<span style="color:white;">'''113'''</span> |
|style="border:solid 2px black; style="color:black; style="text-align:center; background:#318CE7"|<span style="color:white;">'''113'''</span> |
||
| − | |style="border:solid 2px black; style="color:black; style="text-align:center; background:White"|Twisted Lust |
+ | |style="border:solid 2px black; style="color:black; style="text-align:center; background:White"|<span style="color:black;">Twisted Lust |
| − | |style="border:solid 2px black; style="color:black; style="text-align:center; background:White"|1 |
+ | |style="border:solid 2px black; style="color:black; style="text-align:center; background:White"|<span style="color:black;">1 |
| − | |style="border:solid 2px black; style="color:black; style="text-align:center; background:White"|Purgatory: Red (limited) |
+ | |style="border:solid 2px black; style="color:black; style="text-align:center; background:White"|<span style="color:black;">Purgatory: Red (limited) |
| − | |style="border:solid 2px black; style="color:black; style="text-align:center; background:White"|[[File:shftnw_snaps_113.jpg|Twisted Lust|50px]] |
+ | |style="border:solid 2px black; style="color:black; style="text-align:center; background:White"|<span style="color:black;">[[File:shftnw_snaps_113.jpg|Twisted Lust|50px]] |
|- |
|- |
||
|style="border:solid 2px black; style="color:black; style="text-align:center; background:#318CE7"|<span style="color:white;">'''114'''</span> |
|style="border:solid 2px black; style="color:black; style="text-align:center; background:#318CE7"|<span style="color:white;">'''114'''</span> |
||
| − | |style="border:solid 2px black; style="color:black; style="text-align:center; background:White"|Impure Thought |
+ | |style="border:solid 2px black; style="color:black; style="text-align:center; background:White"|<span style="color:black;">Impure Thought |
| − | |style="border:solid 2px black; style="color:black; style="text-align:center; background:White"|1 |
+ | |style="border:solid 2px black; style="color:black; style="text-align:center; background:White"|<span style="color:black;">1 |
| − | |style="border:solid 2px black; style="color:black; style="text-align:center; background:White"|Purgatory: Red (Boss) |
+ | |style="border:solid 2px black; style="color:black; style="text-align:center; background:White"|<span style="color:black;">Purgatory: Red (Boss) |
| − | |style="border:solid 2px black; style="color:black; style="text-align:center; background:White"|[[File:shftnw_snaps_114.jpg|Impure Thought|50px]] |
+ | |style="border:solid 2px black; style="color:black; style="text-align:center; background:White"|<span style="color:black;">[[File:shftnw_snaps_114.jpg|Impure Thought|50px]] |
|- |
|- |
||
|style="border:solid 2px black; style="color:black; style="text-align:center; background:#318CE7"|<span style="color:white;">'''115'''</span> |
|style="border:solid 2px black; style="color:black; style="text-align:center; background:#318CE7"|<span style="color:white;">'''115'''</span> |
||
| − | |style="border:solid 2px black; style="color:black; style="text-align:center; background:White"|Torment Sloth |
+ | |style="border:solid 2px black; style="color:black; style="text-align:center; background:White"|<span style="color:black;">Torment Sloth |
| − | |style="border:solid 2px black; style="color:black; style="text-align:center; background:White"|1 |
+ | |style="border:solid 2px black; style="color:black; style="text-align:center; background:White"|<span style="color:black;">1 |
| − | |style="border:solid 2px black; style="color:black; style="text-align:center; background:White"|Purgatory: Orange (limited) |
+ | |style="border:solid 2px black; style="color:black; style="text-align:center; background:White"|<span style="color:black;">Purgatory: Orange (limited) |
| − | |style="border:solid 2px black; style="color:black; style="text-align:center; background:White"|[[File:shftnw_snaps_115.jpg|Torment Sloth|50px]] |
+ | |style="border:solid 2px black; style="color:black; style="text-align:center; background:White"|<span style="color:black;">[[File:shftnw_snaps_115.jpg|Torment Sloth|50px]] |
|- |
|- |
||
|style="border:solid 2px black; style="color:black; style="text-align:center; background:#318CE7"|<span style="color:white;">'''116'''</span> |
|style="border:solid 2px black; style="color:black; style="text-align:center; background:#318CE7"|<span style="color:white;">'''116'''</span> |
||
| − | |style="border:solid 2px black; style="color:black; style="text-align:center; background:White"|Gnawing Sloth |
+ | |style="border:solid 2px black; style="color:black; style="text-align:center; background:White"|<span style="color:black;">Gnawing Sloth |
| − | |style="border:solid 2px black; style="color:black; style="text-align:center; background:White"|1 |
+ | |style="border:solid 2px black; style="color:black; style="text-align:center; background:White"|<span style="color:black;">1 |
| − | |style="border:solid 2px black; style="color:black; style="text-align:center; background:White"|Purgatory: Orange (limited) |
+ | |style="border:solid 2px black; style="color:black; style="text-align:center; background:White"|<span style="color:black;">Purgatory: Orange (limited) |
| − | |style="border:solid 2px black; style="color:black; style="text-align:center; background:White"|[[File:shftnw_snaps_116.jpg|Gnawing Sloth|50px]] |
+ | |style="border:solid 2px black; style="color:black; style="text-align:center; background:White"|<span style="color:black;">[[File:shftnw_snaps_116.jpg|Gnawing Sloth|50px]] |
|- |
|- |
||
|style="border:solid 2px black; style="color:black; style="text-align:center; background:#318CE7"|<span style="color:white;">'''117'''</span> |
|style="border:solid 2px black; style="color:black; style="text-align:center; background:#318CE7"|<span style="color:white;">'''117'''</span> |
||
| − | |style="border:solid 2px black; style="color:black; style="text-align:center; background:White"|Twisted Sloth |
+ | |style="border:solid 2px black; style="color:black; style="text-align:center; background:White"|<span style="color:black;">Twisted Sloth |
| − | |style="border:solid 2px black; style="color:black; style="text-align:center; background:White"|1 |
+ | |style="border:solid 2px black; style="color:black; style="text-align:center; background:White"|<span style="color:black;">1 |
| − | |style="border:solid 2px black; style="color:black; style="text-align:center; background:White"|Purgatory: Orange (limited) |
+ | |style="border:solid 2px black; style="color:black; style="text-align:center; background:White"|<span style="color:black;">Purgatory: Orange (limited) |
| − | |style="border:solid 2px black; style="color:black; style="text-align:center; background:White"|[[File:shftnw_snaps_117.jpg|Twisted Sloth|50px]] |
+ | |style="border:solid 2px black; style="color:black; style="text-align:center; background:White"|<span style="color:black;">[[File:shftnw_snaps_117.jpg|Twisted Sloth|50px]] |
|- |
|- |
||
|style="border:solid 2px black; style="color:black; style="text-align:center; background:#318CE7"|<span style="color:white;">'''118'''</span> |
|style="border:solid 2px black; style="color:black; style="text-align:center; background:#318CE7"|<span style="color:white;">'''118'''</span> |
||
| − | |style="border:solid 2px black; style="color:black; style="text-align:center; background:White"|Decadence |
+ | |style="border:solid 2px black; style="color:black; style="text-align:center; background:White"|<span style="color:black;">Decadence |
| − | |style="border:solid 2px black; style="color:black; style="text-align:center; background:White"|1 |
+ | |style="border:solid 2px black; style="color:black; style="text-align:center; background:White"|<span style="color:black;">1 |
| − | |style="border:solid 2px black; style="color:black; style="text-align:center; background:White"|Purgatory: Orange (Boss) |
+ | |style="border:solid 2px black; style="color:black; style="text-align:center; background:White"|<span style="color:black;">Purgatory: Orange (Boss) |
| − | |style="border:solid 2px black; style="color:black; style="text-align:center; background:White"|[[File:shftnw_snaps_118.jpg|Decadence|50px]] |
+ | |style="border:solid 2px black; style="color:black; style="text-align:center; background:White"|<span style="color:black;">[[File:shftnw_snaps_118.jpg|Decadence|50px]] |
|- |
|- |
||
|style="border:solid 2px black; style="color:black; style="text-align:center; background:#318CE7"|<span style="color:white;">'''119'''</span> |
|style="border:solid 2px black; style="color:black; style="text-align:center; background:#318CE7"|<span style="color:white;">'''119'''</span> |
||
| − | |style="border:solid 2px black; style="color:black; style="text-align:center; background:White"|Torment Pride |
+ | |style="border:solid 2px black; style="color:black; style="text-align:center; background:White"|<span style="color:black;">Torment Pride |
| − | |style="border:solid 2px black; style="color:black; style="text-align:center; background:White"|1 |
+ | |style="border:solid 2px black; style="color:black; style="text-align:center; background:White"|<span style="color:black;">1 |
| − | |style="border:solid 2px black; style="color:black; style="text-align:center; background:White"|Purgatory: Yellow (limited) |
+ | |style="border:solid 2px black; style="color:black; style="text-align:center; background:White"|<span style="color:black;">Purgatory: Yellow (limited) |
| − | |style="border:solid 2px black; style="color:black; style="text-align:center; background:White"|[[File:shftnw_snaps_119.jpg|Torment Pride|50px]] |
+ | |style="border:solid 2px black; style="color:black; style="text-align:center; background:White"|<span style="color:black;">[[File:shftnw_snaps_119.jpg|Torment Pride|50px]] |
|- |
|- |
||
|style="border:solid 2px black; style="color:black; style="text-align:center; background:#318CE7"|<span style="color:white;">'''120'''</span> |
|style="border:solid 2px black; style="color:black; style="text-align:center; background:#318CE7"|<span style="color:white;">'''120'''</span> |
||
| − | |style="border:solid 2px black; style="color:black; style="text-align:center; background:White"|Gnawing Pride |
+ | |style="border:solid 2px black; style="color:black; style="text-align:center; background:White"|<span style="color:black;">Gnawing Pride |
| − | |style="border:solid 2px black; style="color:black; style="text-align:center; background:White"|1 |
+ | |style="border:solid 2px black; style="color:black; style="text-align:center; background:White"|<span style="color:black;">1 |
| − | |style="border:solid 2px black; style="color:black; style="text-align:center; background:White"|Purgatory: Yellow (limited) |
+ | |style="border:solid 2px black; style="color:black; style="text-align:center; background:White"|<span style="color:black;">Purgatory: Yellow (limited) |
| − | |style="border:solid 2px black; style="color:black; style="text-align:center; background:White"|[[File:shftnw_snaps_120.jpg|Gnawing Pride|50px]] |
+ | |style="border:solid 2px black; style="color:black; style="text-align:center; background:White"|<span style="color:black;">[[File:shftnw_snaps_120.jpg|Gnawing Pride|50px]] |
|- |
|- |
||
|style="border:solid 2px black; style="color:black; style="text-align:center; background:#318CE7"|<span style="color:white;">'''121'''</span> |
|style="border:solid 2px black; style="color:black; style="text-align:center; background:#318CE7"|<span style="color:white;">'''121'''</span> |
||
| − | |style="border:solid 2px black; style="color:black; style="text-align:center; background:White"|Twisted Pride |
+ | |style="border:solid 2px black; style="color:black; style="text-align:center; background:White"|<span style="color:black;">Twisted Pride |
| − | |style="border:solid 2px black; style="color:black; style="text-align:center; background:White"|1 |
+ | |style="border:solid 2px black; style="color:black; style="text-align:center; background:White"|<span style="color:black;">1 |
| − | |style="border:solid 2px black; style="color:black; style="text-align:center; background:White"|Purgatory: Yellow (limited) |
+ | |style="border:solid 2px black; style="color:black; style="text-align:center; background:White"|<span style="color:black;">Purgatory: Yellow (limited) |
| − | |style="border:solid 2px black; style="color:black; style="text-align:center; background:White"|[[File:shftnw_snaps_121.jpg|Twisted Pride|50px]] |
+ | |style="border:solid 2px black; style="color:black; style="text-align:center; background:White"|<span style="color:black;">[[File:shftnw_snaps_121.jpg|Twisted Pride|50px]] |
|- |
|- |
||
|style="border:solid 2px black; style="color:black; style="text-align:center; background:#318CE7"|<span style="color:white;">'''122'''</span> |
|style="border:solid 2px black; style="color:black; style="text-align:center; background:#318CE7"|<span style="color:white;">'''122'''</span> |
||
| − | |style="border:solid 2px black; style="color:black; style="text-align:center; background:White"|Arrogance |
+ | |style="border:solid 2px black; style="color:black; style="text-align:center; background:White"|<span style="color:black;">Arrogance |
| − | |style="border:solid 2px black; style="color:black; style="text-align:center; background:White"|1 |
+ | |style="border:solid 2px black; style="color:black; style="text-align:center; background:White"|<span style="color:black;">1 |
| − | |style="border:solid 2px black; style="color:black; style="text-align:center; background:White"|Purgatory: Yellow (Boss) |
+ | |style="border:solid 2px black; style="color:black; style="text-align:center; background:White"|<span style="color:black;">Purgatory: Yellow (Boss) |
| − | |style="border:solid 2px black; style="color:black; style="text-align:center; background:White"|[[File:shftnw_snaps_122.jpg|Arrogance|50px]] |
+ | |style="border:solid 2px black; style="color:black; style="text-align:center; background:White"|<span style="color:black;">[[File:shftnw_snaps_122.jpg|Arrogance|50px]] |
|- |
|- |
||
|style="border:solid 2px black; style="color:black; style="text-align:center; background:#318CE7"|<span style="color:white;">'''123'''</span> |
|style="border:solid 2px black; style="color:black; style="text-align:center; background:#318CE7"|<span style="color:white;">'''123'''</span> |
||
| − | |style="border:solid 2px black; style="color:black; style="text-align:center; background:White"|Torment Anger |
+ | |style="border:solid 2px black; style="color:black; style="text-align:center; background:White"|<span style="color:black;">Torment Anger |
| − | |style="border:solid 2px black; style="color:black; style="text-align:center; background:White"|1 |
+ | |style="border:solid 2px black; style="color:black; style="text-align:center; background:White"|<span style="color:black;">1 |
| − | |style="border:solid 2px black; style="color:black; style="text-align:center; background:White"|Purgatory: Purple (limited) |
+ | |style="border:solid 2px black; style="color:black; style="text-align:center; background:White"|<span style="color:black;">Purgatory: Purple (limited) |
| − | |style="border:solid 2px black; style="color:black; style="text-align:center; background:White"|[[File:shftnw_snaps_123.jpg|Torment Anger|50px]] |
+ | |style="border:solid 2px black; style="color:black; style="text-align:center; background:White"|<span style="color:black;">[[File:shftnw_snaps_123.jpg|Torment Anger|50px]] |
|- |
|- |
||
|style="border:solid 2px black; style="color:black; style="text-align:center; background:#318CE7"|<span style="color:white;">'''124'''</span> |
|style="border:solid 2px black; style="color:black; style="text-align:center; background:#318CE7"|<span style="color:white;">'''124'''</span> |
||
| − | |style="border:solid 2px black; style="color:black; style="text-align:center; background:White"|Gnawing Anger |
+ | |style="border:solid 2px black; style="color:black; style="text-align:center; background:White"|<span style="color:black;">Gnawing Anger |
| − | |style="border:solid 2px black; style="color:black; style="text-align:center; background:White"|1 |
+ | |style="border:solid 2px black; style="color:black; style="text-align:center; background:White"|<span style="color:black;">1 |
| − | |style="border:solid 2px black; style="color:black; style="text-align:center; background:White"|Purgatory: Purple (limited) |
+ | |style="border:solid 2px black; style="color:black; style="text-align:center; background:White"|<span style="color:black;">Purgatory: Purple (limited) |
| − | |style="border:solid 2px black; style="color:black; style="text-align:center; background:White"|[[File:shftnw_snaps_124.jpg|Gnawing Anger|50px]] |
+ | |style="border:solid 2px black; style="color:black; style="text-align:center; background:White"|<span style="color:black;">[[File:shftnw_snaps_124.jpg|Gnawing Anger|50px]] |
|- |
|- |
||
|style="border:solid 2px black; style="color:black; style="text-align:center; background:#318CE7"|<span style="color:white;">'''125'''</span> |
|style="border:solid 2px black; style="color:black; style="text-align:center; background:#318CE7"|<span style="color:white;">'''125'''</span> |
||
| − | |style="border:solid 2px black; style="color:black; style="text-align:center; background:White"|Twisted Anger |
+ | |style="border:solid 2px black; style="color:black; style="text-align:center; background:White"|<span style="color:black;">Twisted Anger |
| − | |style="border:solid 2px black; style="color:black; style="text-align:center; background:White"|1 |
+ | |style="border:solid 2px black; style="color:black; style="text-align:center; background:White"|<span style="color:black;">1 |
| − | |style="border:solid 2px black; style="color:black; style="text-align:center; background:White"|Purgatory: Purple (limited) |
+ | |style="border:solid 2px black; style="color:black; style="text-align:center; background:White"|<span style="color:black;">Purgatory: Purple (limited) |
| − | |style="border:solid 2px black; style="color:black; style="text-align:center; background:White"|[[File:shftnw_snaps_125.jpg|Twisted Anger|50px]] |
+ | |style="border:solid 2px black; style="color:black; style="text-align:center; background:White"|<span style="color:black;">[[File:shftnw_snaps_125.jpg|Twisted Anger|50px]] |
|- |
|- |
||
|style="border:solid 2px black; style="color:black; style="text-align:center; background:#318CE7"|<span style="color:white;">'''126'''</span> |
|style="border:solid 2px black; style="color:black; style="text-align:center; background:#318CE7"|<span style="color:white;">'''126'''</span> |
||
| − | |style="border:solid 2px black; style="color:black; style="text-align:center; background:White"|Rage |
+ | |style="border:solid 2px black; style="color:black; style="text-align:center; background:White"|<span style="color:black;">Rage |
| − | |style="border:solid 2px black; style="color:black; style="text-align:center; background:White"|1 |
+ | |style="border:solid 2px black; style="color:black; style="text-align:center; background:White"|<span style="color:black;">1 |
| − | |style="border:solid 2px black; style="color:black; style="text-align:center; background:White"|Purgatory: Purple (Boss) |
+ | |style="border:solid 2px black; style="color:black; style="text-align:center; background:White"|<span style="color:black;">Purgatory: Purple (Boss) |
| − | |style="border:solid 2px black; style="color:black; style="text-align:center; background:White"|[[File:shftnw_snaps_126.jpg|Rage|50px]] |
+ | |style="border:solid 2px black; style="color:black; style="text-align:center; background:White"|<span style="color:black;">[[File:shftnw_snaps_126.jpg|Rage|50px]] |
|- |
|- |
||
|style="border:solid 2px black; style="color:black; style="text-align:center; background:#318CE7"|<span style="color:white;">'''127'''</span> |
|style="border:solid 2px black; style="color:black; style="text-align:center; background:#318CE7"|<span style="color:white;">'''127'''</span> |
||
| − | |style="border:solid 2px black; style="color:black; style="text-align:center; background:White"|Envious Jealousy |
+ | |style="border:solid 2px black; style="color:black; style="text-align:center; background:White"|<span style="color:black;">Envious Jealousy |
| − | |style="border:solid 2px black; style="color:black; style="text-align:center; background:White"|1 |
+ | |style="border:solid 2px black; style="color:black; style="text-align:center; background:White"|<span style="color:black;">1 |
| − | |style="border:solid 2px black; style="color:black; style="text-align:center; background:White"|Purgatory (Boss) ♦ |
+ | |style="border:solid 2px black; style="color:black; style="text-align:center; background:White"|<span style="color:black;">Purgatory (Boss) ♦ |
| − | |style="border:solid 2px black; style="color:black; style="text-align:center; background:White"|[[File:Shftnw_snaps_127_All.jpg|Envious Jealousy|50px]] |
+ | |style="border:solid 2px black; style="color:black; style="text-align:center; background:White"|<span style="color:black;">[[File:Shftnw_snaps_127_All.jpg|Envious Jealousy|50px]] |
|- |
|- |
||
|style="border:solid 2px black; style="color:black; style="text-align:center; background:#318CE7"|<span style="color:white;">'''128'''</span> |
|style="border:solid 2px black; style="color:black; style="text-align:center; background:#318CE7"|<span style="color:white;">'''128'''</span> |
||
| − | |style="border:solid 2px black; style="color:black; style="text-align:center; background:White"|The Meowmenator |
+ | |style="border:solid 2px black; style="color:black; style="text-align:center; background:White"|<span style="color:black;">The Meowmenator |
| − | |style="border:solid 2px black; style="color:black; style="text-align:center; background:White"|4 |
+ | |style="border:solid 2px black; style="color:black; style="text-align:center; background:White"|<span style="color:black;">4 |
| − | |style="border:solid 2px black; style="color:black; style="text-align:center; background:White"|Pit Fight 6.1 |
+ | |style="border:solid 2px black; style="color:black; style="text-align:center; background:White"|<span style="color:black;">Pit Fight 6.1 |
| − | |style="border:solid 2px black; style="color:black; style="text-align:center; background:White"|[[File:shftnw_snaps_128.jpg|The Mewomenator|50px]] |
+ | |style="border:solid 2px black; style="color:black; style="text-align:center; background:White"|<span style="color:black;">[[File:shftnw_snaps_128.jpg|The Mewomenator|50px]] |
|- |
|- |
||
|style="border:solid 2px black; style="color:black; style="text-align:center; background:#318CE7"|<span style="color:white;">'''129'''</span> |
|style="border:solid 2px black; style="color:black; style="text-align:center; background:#318CE7"|<span style="color:white;">'''129'''</span> |
||
| − | |style="border:solid 2px black; style="color:black; style="text-align:center; background:White"|Sammo Meow |
+ | |style="border:solid 2px black; style="color:black; style="text-align:center; background:White"|<span style="color:black;">Sammo Meow |
| − | |style="border:solid 2px black; style="color:black; style="text-align:center; background:White"|4 |
+ | |style="border:solid 2px black; style="color:black; style="text-align:center; background:White"|<span style="color:black;">4 |
| − | |style="border:solid 2px black; style="color:black; style="text-align:center; background:White"|Pit Fight 5.1 |
+ | |style="border:solid 2px black; style="color:black; style="text-align:center; background:White"|<span style="color:black;">Pit Fight 5.1 |
| − | |style="border:solid 2px black; style="color:black; style="text-align:center; background:White"|[[File:shftnw_snaps_129.jpg|Sammo Meow|50px]] |
+ | |style="border:solid 2px black; style="color:black; style="text-align:center; background:White"|<span style="color:black;">[[File:shftnw_snaps_129.jpg|Sammo Meow|50px]] |
|- |
|- |
||
|style="border:solid 2px black; style="color:black; style="text-align:center; background:#318CE7"|<span style="color:white;">'''130'''</span> |
|style="border:solid 2px black; style="color:black; style="text-align:center; background:#318CE7"|<span style="color:white;">'''130'''</span> |
||
| − | |style="border:solid 2px black; style="color:black; style="text-align:center; background:White"|Cat Morita |
+ | |style="border:solid 2px black; style="color:black; style="text-align:center; background:White"|<span style="color:black;">Cat Morita |
| − | |style="border:solid 2px black; style="color:black; style="text-align:center; background:White"|4 |
+ | |style="border:solid 2px black; style="color:black; style="text-align:center; background:White"|<span style="color:black;">4 |
| − | |style="border:solid 2px black; style="color:black; style="text-align:center; background:White"|Pit Fight 5.1 |
+ | |style="border:solid 2px black; style="color:black; style="text-align:center; background:White"|<span style="color:black;">Pit Fight 5.1 |
| − | |style="border:solid 2px black; style="color:black; style="text-align:center; background:White"|[[File:shftnw_snaps_130.jpg|Cat Morita|50px]] |
+ | |style="border:solid 2px black; style="color:black; style="text-align:center; background:White"|<span style="color:black;">[[File:shftnw_snaps_130.jpg|Cat Morita|50px]] |
|- |
|- |
||
|style="border:solid 2px black; style="color:black; style="text-align:center; background:#318CE7"|<span style="color:white;">'''131'''</span> |
|style="border:solid 2px black; style="color:black; style="text-align:center; background:#318CE7"|<span style="color:white;">'''131'''</span> |
||
| − | |style="border:solid 2px black; style="color:black; style="text-align:center; background:White"|Meowara |
+ | |style="border:solid 2px black; style="color:black; style="text-align:center; background:White"|<span style="color:black;">Meowara |
| − | |style="border:solid 2px black; style="color:black; style="text-align:center; background:White"|8 |
+ | |style="border:solid 2px black; style="color:black; style="text-align:center; background:White"|<span style="color:black;">8 |
| − | |style="border:solid 2px black; style="color:black; style="text-align:center; background:White"|Pit Fight 6.1 |
+ | |style="border:solid 2px black; style="color:black; style="text-align:center; background:White"|<span style="color:black;">Pit Fight 6.1 |
| − | |style="border:solid 2px black; style="color:black; style="text-align:center; background:White"|[[File:shftnw_snaps_131.jpg|Meowara|50px]] |
+ | |style="border:solid 2px black; style="color:black; style="text-align:center; background:White"|<span style="color:black;">[[File:shftnw_snaps_131.jpg|Meowara|50px]] |
|- |
|- |
||
|style="border:solid 2px black; style="color:black; style="text-align:center; background:#318CE7"|<span style="color:white;">'''132'''</span> |
|style="border:solid 2px black; style="color:black; style="text-align:center; background:#318CE7"|<span style="color:white;">'''132'''</span> |
||
| − | |style="border:solid 2px black; style="color:black; style="text-align:center; background:White"|Bruce Meow |
+ | |style="border:solid 2px black; style="color:black; style="text-align:center; background:White"|<span style="color:black;">Bruce Meow |
| − | |style="border:solid 2px black; style="color:black; style="text-align:center; background:White"|3 |
+ | |style="border:solid 2px black; style="color:black; style="text-align:center; background:White"|<span style="color:black;">3 |
| − | |style="border:solid 2px black; style="color:black; style="text-align:center; background:White"|Pit Fight 5.1 |
+ | |style="border:solid 2px black; style="color:black; style="text-align:center; background:White"|<span style="color:black;">Pit Fight 5.1 |
| − | |style="border:solid 2px black; style="color:black; style="text-align:center; background:White"|[[File:shftnw_snaps_132.jpg|Bruce Meow|50px]] |
+ | |style="border:solid 2px black; style="color:black; style="text-align:center; background:White"|<span style="color:black;">[[File:shftnw_snaps_132.jpg|Bruce Meow|50px]] |
|- |
|- |
||
|style="border:solid 2px black; style="color:black; style="text-align:center; background:#318CE7"|<span style="color:white;">'''133'''</span> |
|style="border:solid 2px black; style="color:black; style="text-align:center; background:#318CE7"|<span style="color:white;">'''133'''</span> |
||
| − | |style="border:solid 2px black; style="color:black; style="text-align:center; background:White"|Pe Meowmeow |
+ | |style="border:solid 2px black; style="color:black; style="text-align:center; background:White"|<span style="color:black;">Pe Meowmeow |
| − | |style="border:solid 2px black; style="color:black; style="text-align:center; background:White"|0 |
+ | |style="border:solid 2px black; style="color:black; style="text-align:center; background:White"|<span style="color:black;">0 |
| − | |style="border:solid 2px black; style="color:black; style="text-align:center; background:White"|Pissarro Trade #5 |
+ | |style="border:solid 2px black; style="color:black; style="text-align:center; background:White"|<span style="color:black;">Pissarro Trade #5 |
| − | |style="border:solid 2px black; style="color:black; style="text-align:center; background:White"|[[File:shftnw_snaps_133.jpg|Pe Meowmeow|50px]] |
+ | |style="border:solid 2px black; style="color:black; style="text-align:center; background:White"|<span style="color:black;">[[File:shftnw_snaps_133.jpg|Pe Meowmeow|50px]] |
|- |
|- |
||
|style="border:solid 2px black; style="color:black; style="text-align:center; background:#318CE7"|<span style="color:white;">'''134'''</span> |
|style="border:solid 2px black; style="color:black; style="text-align:center; background:#318CE7"|<span style="color:white;">'''134'''</span> |
||
| − | |style="border:solid 2px black; style="color:black; style="text-align:center; background:White"|Johnny |
+ | |style="border:solid 2px black; style="color:black; style="text-align:center; background:White"|<span style="color:black;">Johnny |
| − | |style="border:solid 2px black; style="color:black; style="text-align:center; background:White"|0 |
+ | |style="border:solid 2px black; style="color:black; style="text-align:center; background:White"|<span style="color:black;">0 |
| − | |style="border:solid 2px black; style="color:black; style="text-align:center; background:White"|Masotoshi Trade #5 |
+ | |style="border:solid 2px black; style="color:black; style="text-align:center; background:White"|<span style="color:black;">Masotoshi Trade #5 |
| − | |style="border:solid 2px black; style="color:black; style="text-align:center; background:White"|[[File:shftnw_snaps_134.jpg|Johnny|50px]] |
+ | |style="border:solid 2px black; style="color:black; style="text-align:center; background:White"|<span style="color:black;">[[File:shftnw_snaps_134.jpg|Johnny|50px]] |
|- |
|- |
||
|style="border:solid 2px black; style="color:black; style="text-align:center; background:#318CE7"|<span style="color:white;">'''135'''</span> |
|style="border:solid 2px black; style="color:black; style="text-align:center; background:#318CE7"|<span style="color:white;">'''135'''</span> |
||
| − | |style="border:solid 2px black; style="color:black; style="text-align:center; background:White"|Shania |
+ | |style="border:solid 2px black; style="color:black; style="text-align:center; background:White"|<span style="color:black;">Shania |
| − | |style="border:solid 2px black; style="color:black; style="text-align:center; background:White"|0 |
+ | |style="border:solid 2px black; style="color:black; style="text-align:center; background:White"|<span style="color:black;">0 |
| − | |style="border:solid 2px black; style="color:black; style="text-align:center; background:White"|Louie Trade #7 |
+ | |style="border:solid 2px black; style="color:black; style="text-align:center; background:White"|<span style="color:black;">Louie Trade #7 |
| − | |style="border:solid 2px black; style="color:black; style="text-align:center; background:White"|[[File:shftnw_snaps_135.jpg|Shania|50px]] |
+ | |style="border:solid 2px black; style="color:black; style="text-align:center; background:White"|<span style="color:black;">[[File:shftnw_snaps_135.jpg|Shania|50px]] |
|- |
|- |
||
|style="border:solid 2px black; style="color:black; style="text-align:center; background:#318CE7"|<span style="color:white;">'''136'''</span> |
|style="border:solid 2px black; style="color:black; style="text-align:center; background:#318CE7"|<span style="color:white;">'''136'''</span> |
||
| − | |style="border:solid 2px black; style="color:black; style="text-align:center; background:White"|Natan |
+ | |style="border:solid 2px black; style="color:black; style="text-align:center; background:White"|<span style="color:black;">Natan |
| − | |style="border:solid 2px black; style="color:black; style="text-align:center; background:White"|0 |
+ | |style="border:solid 2px black; style="color:black; style="text-align:center; background:White"|<span style="color:black;">0 |
| − | |style="border:solid 2px black; style="color:black; style="text-align:center; background:White"|Samuel Trade #5 |
+ | |style="border:solid 2px black; style="color:black; style="text-align:center; background:White"|<span style="color:black;">Samuel Trade #5 |
| − | |style="border:solid 2px black; style="color:black; style="text-align:center; background:White"|[[File:shftnw_snaps_136.jpg|Natan|50px]] |
+ | |style="border:solid 2px black; style="color:black; style="text-align:center; background:White"|<span style="color:black;">[[File:shftnw_snaps_136.jpg|Natan|50px]] |
|- |
|- |
||
|style="border:solid 2px black; style="color:black; style="text-align:center; background:#318CE7"|<span style="color:white;">'''137'''</span> |
|style="border:solid 2px black; style="color:black; style="text-align:center; background:#318CE7"|<span style="color:white;">'''137'''</span> |
||
| − | |style="border:solid 2px black; style="color:black; style="text-align:center; background:White"|Frank |
+ | |style="border:solid 2px black; style="color:black; style="text-align:center; background:White"|<span style="color:black;">Frank |
| − | |style="border:solid 2px black; style="color:black; style="text-align:center; background:White"|0 |
+ | |style="border:solid 2px black; style="color:black; style="text-align:center; background:White"|<span style="color:black;">0 |
| − | |style="border:solid 2px black; style="color:black; style="text-align:center; background:White"|Pissarro Trade #7 |
+ | |style="border:solid 2px black; style="color:black; style="text-align:center; background:White"|<span style="color:black;">Pissarro Trade #7 |
| − | |style="border:solid 2px black; style="color:black; style="text-align:center; background:White"|[[File:shftnw_snaps_137.jpg|Frank|50px]] |
+ | |style="border:solid 2px black; style="color:black; style="text-align:center; background:White"|<span style="color:black;">[[File:shftnw_snaps_137.jpg|Frank|50px]] |
|- |
|- |
||
|style="border:solid 2px black; style="color:black; style="text-align:center; background:#318CE7"|<span style="color:white;">'''138'''</span> |
|style="border:solid 2px black; style="color:black; style="text-align:center; background:#318CE7"|<span style="color:white;">'''138'''</span> |
||
| − | |style="border:solid 2px black; style="color:black; style="text-align:center; background:White"|Mao |
+ | |style="border:solid 2px black; style="color:black; style="text-align:center; background:White"|<span style="color:black;">Mao |
| − | |style="border:solid 2px black; style="color:black; style="text-align:center; background:White"|0 |
+ | |style="border:solid 2px black; style="color:black; style="text-align:center; background:White"|<span style="color:black;">0 |
| − | |style="border:solid 2px black; style="color:black; style="text-align:center; background:White"|Pissarro Trade #5 |
+ | |style="border:solid 2px black; style="color:black; style="text-align:center; background:White"|<span style="color:black;">Pissarro Trade #5 |
| − | |style="border:solid 2px black; style="color:black; style="text-align:center; background:White"|[[File:shftnw_snaps_138.jpg|Mao|50px]] |
+ | |style="border:solid 2px black; style="color:black; style="text-align:center; background:White"|<span style="color:black;">[[File:shftnw_snaps_138.jpg|Mao|50px]] |
|- |
|- |
||
|style="border:solid 2px black; style="color:black; style="text-align:center; background:#318CE7"|<span style="color:white;">'''139'''</span> |
|style="border:solid 2px black; style="color:black; style="text-align:center; background:#318CE7"|<span style="color:white;">'''139'''</span> |
||
| − | |style="border:solid 2px black; style="color:black; style="text-align:center; background:White"|Pink Bat |
+ | |style="border:solid 2px black; style="color:black; style="text-align:center; background:White"|<span style="color:black;">Pink Bat |
| − | |style="border:solid 2px black; style="color:black; style="text-align:center; background:White"|0 |
+ | |style="border:solid 2px black; style="color:black; style="text-align:center; background:White"|<span style="color:black;">0 |
| − | |style="border:solid 2px black; style="color:black; style="text-align:center; background:White"|Louie Trade #4 |
+ | |style="border:solid 2px black; style="color:black; style="text-align:center; background:White"|<span style="color:black;">Louie Trade #4 |
| − | |style="border:solid 2px black; style="color:black; style="text-align:center; background:White"|[[File:shftnw_snaps_139.jpg|Pink Bat|50px]] |
+ | |style="border:solid 2px black; style="color:black; style="text-align:center; background:White"|<span style="color:black;">[[File:shftnw_snaps_139.jpg|Pink Bat|50px]] |
|- |
|- |
||
|style="border:solid 2px black; style="color:black; style="text-align:center; background:#318CE7"|<span style="color:white;">'''140'''</span> |
|style="border:solid 2px black; style="color:black; style="text-align:center; background:#318CE7"|<span style="color:white;">'''140'''</span> |
||
| − | |style="border:solid 2px black; style="color:black; style="text-align:center; background:White"|Slim Hilda |
+ | |style="border:solid 2px black; style="color:black; style="text-align:center; background:White"|<span style="color:black;">Slim Hilda |
| − | |style="border:solid 2px black; style="color:black; style="text-align:center; background:White"|0 |
+ | |style="border:solid 2px black; style="color:black; style="text-align:center; background:White"|<span style="color:black;">0 |
| − | |style="border:solid 2px black; style="color:black; style="text-align:center; background:White"|Louie Trade #4 |
+ | |style="border:solid 2px black; style="color:black; style="text-align:center; background:White"|<span style="color:black;">Louie Trade #4 |
| − | |style="border:solid 2px black; style="color:black; style="text-align:center; background:White"|[[File:shftnw_snaps_140.jpg|Slim Hilda|50px]] |
+ | |style="border:solid 2px black; style="color:black; style="text-align:center; background:White"|<span style="color:black;">[[File:shftnw_snaps_140.jpg|Slim Hilda|50px]] |
|- |
|- |
||
|style="border:solid 2px black; style="color:black; style="text-align:center; background:#318CE7"|<span style="color:white;">'''141'''</span> |
|style="border:solid 2px black; style="color:black; style="text-align:center; background:#318CE7"|<span style="color:white;">'''141'''</span> |
||
| − | |style="border:solid 2px black; style="color:black; style="text-align:center; background:White"|Curvy Hilda |
+ | |style="border:solid 2px black; style="color:black; style="text-align:center; background:White"|<span style="color:black;">Curvy Hilda |
| − | |style="border:solid 2px black; style="color:black; style="text-align:center; background:White"|0 |
+ | |style="border:solid 2px black; style="color:black; style="text-align:center; background:White"|<span style="color:black;">0 |
| − | |style="border:solid 2px black; style="color:black; style="text-align:center; background:White"|Louie Trade #4 |
+ | |style="border:solid 2px black; style="color:black; style="text-align:center; background:White"|<span style="color:black;">Louie Trade #4 |
| − | |style="border:solid 2px black; style="color:black; style="text-align:center; background:White"|[[File:shftnw_snaps_141.jpg|Curvy Hilda|50px]] |
+ | |style="border:solid 2px black; style="color:black; style="text-align:center; background:White"|<span style="color:black;">[[File:shftnw_snaps_141.jpg|Curvy Hilda|50px]] |
|- |
|- |
||
|style="border:solid 2px black; style="color:black; style="text-align:center; background:#318CE7"|<span style="color:white;">'''142'''</span> |
|style="border:solid 2px black; style="color:black; style="text-align:center; background:#318CE7"|<span style="color:white;">'''142'''</span> |
||
| − | |style="border:solid 2px black; style="color:black; style="text-align:center; background:White"|Ricardo |
+ | |style="border:solid 2px black; style="color:black; style="text-align:center; background:White"|<span style="color:black;">Ricardo |
| − | |style="border:solid 2px black; style="color:black; style="text-align:center; background:White"|0 |
+ | |style="border:solid 2px black; style="color:black; style="text-align:center; background:White"|<span style="color:black;">0 |
| − | |style="border:solid 2px black; style="color:black; style="text-align:center; background:White"|Mary Trade 6 |
+ | |style="border:solid 2px black; style="color:black; style="text-align:center; background:White"|<span style="color:black;">Mary Trade 6 |
| − | |style="border:solid 2px black; style="color:black; style="text-align:center; background:White"|[[File:shftnw_snaps_142.jpg|Ricardo|50px]] |
+ | |style="border:solid 2px black; style="color:black; style="text-align:center; background:White"|<span style="color:black;">[[File:shftnw_snaps_142.jpg|Ricardo|50px]] |
|} |
|} |
||
♦ NOTE: Due to the nature of the Envious Jealousy boss, there are six mutually exclusive variations, only one of which is obtainable at any given time. |
♦ NOTE: Due to the nature of the Envious Jealousy boss, there are six mutually exclusive variations, only one of which is obtainable at any given time. |
||
| Line 877: | Line 877: | ||
===Masatoshi=== |
===Masatoshi=== |
||
[[File:Snapcardtrader01.jpg|thumb|Masatoshi in Chicago]] |
[[File:Snapcardtrader01.jpg|thumb|Masatoshi in Chicago]] |
||
| − | Masatoshi |
+ | Masatoshi introduces you into the world of Snap Card trading. |
His rewards in the game are invaluable, but towards the end of New Game+, his rewards become exceptional with a Seventh Key or an Eternal Key as prize. |
His rewards in the game are invaluable, but towards the end of New Game+, his rewards become exceptional with a Seventh Key or an Eternal Key as prize. |
||
| Line 884: | Line 884: | ||
|colspan="4" style="text-align:center; color:white; background:#318CE7; -moz-border-radius-topleft: 1em; -moz-border-radius-topright: 1em;"|<big>'''Masatoshi Trades'''<big> </big></big> |
|colspan="4" style="text-align:center; color:white; background:#318CE7; -moz-border-radius-topleft: 1em; -moz-border-radius-topright: 1em;"|<big>'''Masatoshi Trades'''<big> </big></big> |
||
|- |
|- |
||
| − | |style="border:solid 2px black; style="text-align:center |
+ | |style="border:solid 2px black; style="color:black; style="text-align:center; background:#318CE7"|<span style="color:white;">'''Trade #'''</span> |
| − | |style="border:solid 2px black; style="text-align:center |
+ | |style="border:solid 2px black; style="color:black; style="text-align:center; background:#318CE7"|<span style="color:white;">'''Cards Wanted'''</span> |
| − | |style="border:solid 2px black; style="text-align:center |
+ | |style="border:solid 2px black; style="color:black; style="text-align:center; background:#318CE7"|<span style="color:white;">'''Rewards'''</span> |
| − | |style="border:solid 2px black; style="text-align:center |
+ | |style="border:solid 2px black; style="color:black; style="text-align:center; background:#318CE7"|<span style="color:white;">'''New Game+ Reward'''</span> |
|- |
|- |
||
| − | |style="border:solid |
+ | |style="border:solid 2px black; style="color:black; style="text-align:center; background:#318CE7"|<span style="color:white;">'''First Trade 1'''</span> |
| − | |style="color:black; style="text-align:center; background: |
+ | |style="border:solid 2px black; style="color:black; style="text-align:center; background:White"|<span style="color:black;">007 Tonakh x 3 |
| − | |style="color:black; style="text-align:center; background: |
+ | |style="border:solid 2px black; style="color:black; style="text-align:center; background:White"|<span style="color:black;"> |
| − | *[[Rock Bump]] Stellar |
+ | *[[File:Attacknodeearthlv1.png]] [[Rock Bump]] Stellar |
| − | *[[Gale Rod]] Stellar |
+ | *[[File:Attacknodewindlv1.png]] [[Gale Rod]] Stellar |
| − | |style="color:black; style="text-align:center; background: |
+ | |style="border:solid 2px black; style="color:black; style="text-align:center; background:White"|<span style="color:black;">[[File:Sh3itemicon.png]] [[Mana Extract]] |
|- |
|- |
||
| − | |style="border:solid |
+ | |style="border:solid 2px black; style="color:black; style="text-align:center; background:#318CE7"|<span style="color:white;">'''First Trade 2'''</span> |
| − | |style="color:black; style="text-align:center; background: |
+ | |style="border:solid 2px black; style="color:black; style="text-align:center; background:White"|<span style="color:black;"> |
*008 Maii x 1 |
*008 Maii x 1 |
||
*009 Argen Tabisu x 1 |
*009 Argen Tabisu x 1 |
||
| − | |style="color:black; style="text-align:center; background: |
+ | |style="border:solid 2px black; style="color:black; style="text-align:center; background:White"|<span style="color:black;">[[File:Restorationnodelv1.png]] [[Cure]] Stellar |
| − | |style="color:black; style="text-align:center; background: |
+ | |style="border:solid 2px black; style="color:black; style="text-align:center; background:White"|<span style="color:black;">[[File:Sh3itemicon.png]] [[Pure Extract]] |
|- |
|- |
||
| − | |style="border:solid |
+ | |style="border:solid 2px black; style="color:black; style="text-align:center; background:#318CE7"|<span style="color:white;">'''Request from Masatoshi 1'''</span> |
| − | |style="color:black; style="text-align:center; background: |
+ | |style="border:solid 2px black; style="color:black; style="text-align:center; background:White"|<span style="color:black;">031 Prison Guard x1 |
| − | |style="color:black; style="text-align:center; background: |
+ | |style="border:solid 2px black; style="color:black; style="text-align:center; background:White"|<span style="color:black;">021 Procyon |
| − | |style="color:black; style="text-align:center; background: |
+ | |style="border:solid 2px black; style="color:black; style="text-align:center; background:White"|<span style="color:black;">N/A |
|- |
|- |
||
| − | |style="border:solid |
+ | |style="border:solid 2px black; style="color:black; style="text-align:center; background:#318CE7"|<span style="color:white;">'''Request from Masatoshi 2'''</span> |
| − | |style="color:black; style="text-align:center; background: |
+ | |style="border:solid 2px black; style="color:black; style="text-align:center; background:White"|<span style="color:black;"> |
*026 Petty Gangster x1 |
*026 Petty Gangster x1 |
||
*027 Gangster Hoodlum x 1 |
*027 Gangster Hoodlum x 1 |
||
| − | |style="color:black; style="text-align:center; background: |
+ | |style="border:solid 2px black; style="color:black; style="text-align:center; background:White"|<span style="color:black;">[[File:Sh3accessoriesicon.png]] [[Demon Earrings]] |
| − | |style="color:black; style="text-align:center; background: |
+ | |style="border:solid 2px black; style="color:black; style="text-align:center; background:White"|<span style="color:black;">N/A |
|- |
|- |
||
| − | |style="border:solid |
+ | |style="border:solid 2px black; style="color:black; style="text-align:center; background:#318CE7"|<span style="color:white;">'''High Level Trade 1'''</span> |
| − | |style="color:black; style="text-align:center; background: |
+ | |style="border:solid 2px black; style="color:black; style="text-align:center; background:White"|<span style="color:black;"> |
*054 Ikcheon x3 |
*054 Ikcheon x3 |
||
*058 Tamaris x3 |
*058 Tamaris x3 |
||
*064 Len x3 |
*064 Len x3 |
||
| − | |style="color:black; style="text-align:center; background: |
+ | |style="border:solid 2px black; style="color:black; style="text-align:center; background:White"|<span style="color:black;">134 Johnny |
| − | |style="color:black; style="text-align:center; background: |
+ | |style="border:solid 2px black; style="color:black; style="text-align:center; background:White"|<span style="color:black;">N/A |
|- |
|- |
||
| − | |style="border:solid |
+ | |style="border:solid 2px black; style="color:black; style="text-align:center; background:#318CE7"|<span style="color:white;">'''High Level Trade 2'''</span> |
| − | |style="color:black; style="text-align:center; background: |
+ | |style="border:solid 2px black; style="color:black; style="text-align:center; background:White"|<span style="color:black;"> |
*060 Ispus x2 |
*060 Ispus x2 |
||
*062 Phobos x2 |
*062 Phobos x2 |
||
*063 Bokrug x2 |
*063 Bokrug x2 |
||
| − | |style="color:black; style="text-align:center; background: |
+ | |style="border:solid 2px black; style="color:black; style="text-align:center; background:White"|<span style="color:black;">[[File:Restorationnodelv4.png]] [[Resurrection]] Stellar |
| − | |style="color:black; style="text-align:center; background: |
+ | |style="border:solid 2px black; style="color:black; style="text-align:center; background:White"|<span style="color:black;">[[File:Sh3itemicon.png]] [[Seventh Key]] |
|- |
|- |
||
| − | |style="border:solid |
+ | |style="border:solid 2px black; style="color:black; style="text-align:center; background:#318CE7"|<span style="color:white;">'''Masatoshi's Final Request'''</span> |
| − | |style="color:black; style="text-align:center; background: |
+ | |style="border:solid 2px black; style="color:black; style="text-align:center; background:White"|<span style="color:black;">075 Golden Tinny |
| − | |style="color:black; style="text-align:center; background: |
+ | |style="border:solid 2px black; style="color:black; style="text-align:center; background:White"|<span style="color:black;">088 Q the Great |
| − | |style="color:black; style="text-align:center; background: |
+ | |style="border:solid 2px black; style="color:black; style="text-align:center; background:White"|<span style="color:black;">[[File:Sh3itemicon.png]] [[Eternal Key]] (if obtained every card) |
|} |
|} |
||
| + | |||
===Samuel=== |
===Samuel=== |
||
| Line 945: | Line 946: | ||
|colspan="4" style="text-align:center; color:white; background:#318CE7; -moz-border-radius-topleft: 1em; -moz-border-radius-topright: 1em;"|<big>'''Samuel Trades'''<big> </big></big> |
|colspan="4" style="text-align:center; color:white; background:#318CE7; -moz-border-radius-topleft: 1em; -moz-border-radius-topright: 1em;"|<big>'''Samuel Trades'''<big> </big></big> |
||
|- |
|- |
||
| − | |style="border:solid 2px black; style="text-align:center |
+ | |style="border:solid 2px black; style="color:black; style="text-align:center; background:#318CE7"|<span style="color:white;">'''Trade #'''</span> |
| − | |style="border:solid 2px black; style="text-align:center |
+ | |style="border:solid 2px black; style="color:black; style="text-align:center; background:#318CE7"|<span style="color:white;">'''Cards Wanted'''</span> |
| − | |style="border:solid 2px black; style="text-align:center |
+ | |style="border:solid 2px black; style="color:black; style="text-align:center; background:#318CE7"|<span style="color:white;">'''Rewards'''</span> |
| − | |style="border:solid 2px black; style="text-align:center |
+ | |style="border:solid 2px black; style="color:black; style="text-align:center; background:#318CE7"|<span style="color:white;">'''New Game+ Reward'''</span> |
|- |
|- |
||
| − | |style="border:solid |
+ | |style="border:solid 2px black; style="color:black; style="text-align:center; background:#318CE7"|<span style="color:white;">'''Simple Request 1'''</span> |
| − | |style="color:black; style="text-align:center; background: |
+ | |style="border:solid 2px black; style="color:black; style="text-align:center; background:White"|<span style="color:black;"> |
*004 Sergei x3 |
*004 Sergei x3 |
||
*005 Gagu x3 |
*005 Gagu x3 |
||
| − | |style="color:black; style="text-align:center; background: |
+ | |style="border:solid 2px black; style="color:black; style="text-align:center; background:White"|<span style="color:black;">035 Jeb Niglas |
| − | |style="color:black; style="text-align:center; background: |
+ | |style="border:solid 2px black; style="color:black; style="text-align:center; background:White"|<span style="color:black;">N/A |
|- |
|- |
||
| − | |style="border:solid |
+ | |style="border:solid 2px black; style="color:black; style="text-align:center; background:#318CE7"|<span style="color:white;">'''Simple Request 2'''</span> |
| − | |style="color:black; style="text-align:center; background: |
+ | |style="border:solid 2px black; style="color:black; style="text-align:center; background:White"|<span style="color:black;">015 Womp x5 |
| − | |style="color:black; style="text-align:center; background: |
+ | |style="border:solid 2px black; style="color:black; style="text-align:center; background:White"|<span style="color:black;">[[File:Sh3stellarcharticon.png]] [[Aquarius]] Stellar Chart |
| − | |style="color:black; style="text-align:center; background: |
+ | |style="border:solid 2px black; style="color:black; style="text-align:center; background:White"|<span style="color:black;">[[File:Sh3itemicon.png]] [[Daphne Fruit]] |
|- |
|- |
||
| − | |style="border:solid |
+ | |style="border:solid 2px black; style="color:black; style="text-align:center; background:#318CE7"|<span style="color:white;">'''Please Find This 1'''</span> |
| − | |style="color:black; style="text-align:center; background: |
+ | |style="border:solid 2px black; style="color:black; style="text-align:center; background:White"|<span style="color:black;"> |
*018 Sirius x1 |
*018 Sirius x1 |
||
*019 Betelgeuse x1 |
*019 Betelgeuse x1 |
||
*020 Acteon x1 |
*020 Acteon x1 |
||
| − | |style="color:black; style="text-align:center; background: |
+ | |style="border:solid 2px black; style="color:black; style="text-align:center; background:White"|<span style="color:black;">[[File:Sh3accessoriesicon.png]] [[Pirate Earrings]] |
| − | |style="color:black; style="text-align:center; background: |
+ | |style="border:solid 2px black; style="color:black; style="text-align:center; background:White"|<span style="color:black;">N/A |
|- |
|- |
||
| − | |style="border:solid |
+ | |style="border:solid 2px black; style="color:black; style="text-align:center; background:#318CE7"|<span style="color:white;">'''Please Find This 2'''</span> |
| − | |style="color:black; style="text-align:center; background: |
+ | |style="border:solid 2px black; style="color:black; style="text-align:center; background:White"|<span style="color:black;">023 Heinz x5 |
| − | |style="color:black; style="text-align:center; background: |
+ | |style="border:solid 2px black; style="color:black; style="text-align:center; background:White"|<span style="color:black;">[[File:Sh3fetishicon.png]] [[Bear Statue]] |
| − | |style="color:black; style="text-align:center; background: |
+ | |style="border:solid 2px black; style="color:black; style="text-align:center; background:White"|<span style="color:black;">N/A |
|- |
|- |
||
| − | |style="border:solid |
+ | |style="border:solid 2px black; style="color:black; style="text-align:center; background:#318CE7"|<span style="color:white;">'''Difficult Request 1'''</span> |
| − | |style="color:black; style="text-align:center; background: |
+ | |style="border:solid 2px black; style="color:black; style="text-align:center; background:White"|<span style="color:black;"> |
*036 Dicteo x02 |
*036 Dicteo x02 |
||
*047 Chakmol x02 |
*047 Chakmol x02 |
||
| Line 982: | Line 983: | ||
*062 Phobos x02 |
*062 Phobos x02 |
||
*097 Gresiru x02 |
*097 Gresiru x02 |
||
| − | |style="color:black; style="text-align:center; background: |
+ | |style="border:solid 2px black; style="color:black; style="text-align:center; background:White"|<span style="color:black;">136 Natan |
| − | |style="color:black; style="text-align:center; background: |
+ | |style="border:solid 2px black; style="color:black; style="text-align:center; background:White"|<span style="color:black;">N/A |
|- |
|- |
||
| − | |style="border:solid |
+ | |style="border:solid 2px black; style="color:black; style="text-align:center; background:#318CE7"|<span style="color:white;">'''Difficult Request 2'''</span> |
| − | |style="color:black; style="text-align:center; background: |
+ | |style="border:solid 2px black; style="color:black; style="text-align:center; background:White"|<span style="color:black;">058 Tamaris x03 |
| − | |style="color:black; style="text-align:center; background: |
+ | |style="border:solid 2px black; style="color:black; style="text-align:center; background:White"|<span style="color:black;">094 Mudopkan |
| − | |style="color:black; style="text-align:center; background: |
+ | |style="border:solid 2px black; style="color:black; style="text-align:center; background:White"|<span style="color:black;">N/A |
|- |
|- |
||
| − | |style="border:solid |
+ | |style="border:solid 2px black; style="color:black; style="text-align:center; background:#318CE7"|<span style="color:white;">'''Very Difficult Request'''</span> |
| − | |style="color:black; style="text-align:center; background: |
+ | |style="border:solid 2px black; style="color:black; style="text-align:center; background:White"|<span style="color:black;">091 Seymouria x05 |
| − | |style="color:black; style="text-align:center; background: |
+ | |style="border:solid 2px black; style="color:black; style="text-align:center; background:White"|<span style="color:black;">003 Deep One |
| − | |style="color:black; style="text-align:center; background: |
+ | |style="border:solid 2px black; style="color:black; style="text-align:center; background:White"|<span style="color:black;">N/A |
|} |
|} |
||
| Line 1,006: | Line 1,007: | ||
|colspan="4" style="text-align:center; color:white; background:#318CE7; -moz-border-radius-topleft: 1em; -moz-border-radius-topright: 1em;"|<big>'''Pissarrio Trades'''<big> </big></big> |
|colspan="4" style="text-align:center; color:white; background:#318CE7; -moz-border-radius-topleft: 1em; -moz-border-radius-topright: 1em;"|<big>'''Pissarrio Trades'''<big> </big></big> |
||
|- |
|- |
||
| − | |style="border:solid 2px black; style="text-align:center |
+ | |style="border:solid 2px black; style="color:black; style="text-align:center; background:#318CE7"|<span style="color:white;">'''Trade #'''</span> |
| − | |style="border:solid 2px black; style="text-align:center |
+ | |style="border:solid 2px black; style="color:black; style="text-align:center; background:#318CE7"|<span style="color:white;">'''Cards Wanted'''</span> |
| − | |style="border:solid 2px black; style="text-align:center |
+ | |style="border:solid 2px black; style="color:black; style="text-align:center; background:#318CE7"|<span style="color:white;">'''Rewards'''</span> |
| − | |style="border:solid 2px black; style="text-align:center |
+ | |style="border:solid 2px black; style="color:black; style="text-align:center; background:#318CE7"|<span style="color:white;">'''New Game+ Reward'''</span> |
|- |
|- |
||
| − | |style="border:solid |
+ | |style="border:solid 2px black; style="color:black; style="text-align:center; background:#318CE7"|<span style="color:white;">'''No Greetings Necessary 1'''</span> |
| − | |style="color:black; style="text-align:center; background: |
+ | |style="border:solid 2px black; style="color:black; style="text-align:center; background:White"|<span style="color:black;">022 Bablovia x03 |
| − | |style="color:black; style="text-align:center; background: |
+ | |style="border:solid 2px black; style="color:black; style="text-align:center; background:White"|<span style="color:black;">040 Kerufe |
| − | |style="color:black; style="text-align:center; background: |
+ | |style="border:solid 2px black; style="color:black; style="text-align:center; background:White"|<span style="color:black;">N/A |
|- |
|- |
||
| − | |style="border:solid |
+ | |style="border:solid 2px black; style="color:black; style="text-align:center; background:#318CE7"|<span style="color:white;">'''No Greetings Necessary 2'''</span> |
| − | |style="color:black; style="text-align:center; background: |
+ | |style="border:solid 2px black; style="color:black; style="text-align:center; background:White"|<span style="color:black;">032 Eliops x03 |
| − | |style="color:black; style="text-align:center; background: |
+ | |style="border:solid 2px black; style="color:black; style="text-align:center; background:White"|<span style="color:black;">[[File:Sh3accessoriesicon.png]] [[Mind's Eye]] |
| − | |style="color:black; style="text-align:center; background: |
+ | |style="border:solid 2px black; style="color:black; style="text-align:center; background:White"|<span style="color:black;">N/A |
|- |
|- |
||
| − | |style="border:solid |
+ | |style="border:solid 2px black; style="color:black; style="text-align:center; background:#318CE7"|<span style="color:white;">'''Please Find It! 1'''</span> |
| − | |style="color:black; style="text-align:center; background: |
+ | |style="border:solid 2px black; style="color:black; style="text-align:center; background:White"|<span style="color:black;"> |
*037 Xi Dazun x02 |
*037 Xi Dazun x02 |
||
*038 Xantak x02 |
*038 Xantak x02 |
||
*039 Wariche x02 |
*039 Wariche x02 |
||
| − | |style="color:black; style="text-align:center; background: |
+ | |style="border:solid 2px black; style="color:black; style="text-align:center; background:White"|<span style="color:black;">[[File:Sh3accessoriesicon.png]] [[Devil Straw]] |
| − | |style="color:black; style="text-align:center; background: |
+ | |style="border:solid 2px black; style="color:black; style="text-align:center; background:White"|<span style="color:black;">N/A |
|- |
|- |
||
| − | |style="border:solid |
+ | |style="border:solid 2px black; style="color:black; style="text-align:center; background:#318CE7"|<span style="color:white;">'''Please Find It! 2'''</span> |
| − | |style="color:black; style="text-align:center; background: |
+ | |style="border:solid 2px black; style="color:black; style="text-align:center; background:White"|<span style="color:black;"> |
*044 Woworito x03 |
*044 Woworito x03 |
||
*050 Delget x03 |
*050 Delget x03 |
||
| − | |style="color:black; style="text-align:center; background: |
+ | |style="border:solid 2px black; style="color:black; style="text-align:center; background:White"|<span style="color:black;"> |
| − | *[[Arc Gale]] Stellar |
+ | *[[File:Supportnodelv2.png]] [[Arc Gale]] Stellar |
| − | *[[Arc Mirage]] Stellar |
+ | *[[File:Supportnodelv2.png]] [[Arc Mirage]] Stellar |
| − | |style="color:black; style="text-align:center; background: |
+ | |style="border:solid 2px black; style="color:black; style="text-align:center; background:White"|<span style="color:black;">[[File:Sh3itemicon.png]] [[Daphne Fruit]] |
|- |
|- |
||
| − | |style="border:solid |
+ | |style="border:solid 2px black; style="color:black; style="text-align:center; background:#318CE7"|<span style="color:white;">'''Trade Me a Strange Snap'''</span> |
| − | |style="color:black; style="text-align:center; background: |
+ | |style="border:solid 2px black; style="color:black; style="text-align:center; background:White"|<span style="color:black;"> |
*128 The Meowmenator x03 |
*128 The Meowmenator x03 |
||
*129 Sammo Meow x03 |
*129 Sammo Meow x03 |
||
*130 Cat Morita x03 |
*130 Cat Morita x03 |
||
| − | |style="color:black; style="text-align:center; background: |
+ | |style="border:solid 2px black; style="color:black; style="text-align:center; background:White"|<span style="color:black;"> |
*138 Mao |
*138 Mao |
||
*133 Pe MeowMeow |
*133 Pe MeowMeow |
||
| − | |style="color:black; style="text-align:center; background: |
+ | |style="border:solid 2px black; style="color:black; style="text-align:center; background:White"|<span style="color:black;">N/A |
|- |
|- |
||
| − | |style="border:solid |
+ | |style="border:solid 2px black; style="color:black; style="text-align:center; background:#318CE7"|<span style="color:white;">'''Special Request, Bro'''</span> |
| − | |style="color:black; style="text-align:center; background: |
+ | |style="border:solid 2px black; style="color:black; style="text-align:center; background:White"|<span style="color:black;"> |
*033 Jig Ruta x02 |
*033 Jig Ruta x02 |
||
*034 Guanna x02 |
*034 Guanna x02 |
||
| − | |style="color:black; style="text-align:center; background: |
+ | |style="border:solid 2px black; style="color:black; style="text-align:center; background:White"|<span style="color:black;"> |
*070 Sasquatch |
*070 Sasquatch |
||
*071 Tihozhodhi |
*071 Tihozhodhi |
||
| Line 1,058: | Line 1,059: | ||
*073 Rogotomhere |
*073 Rogotomhere |
||
*074 Sky Fish |
*074 Sky Fish |
||
| − | |style="color:black; style="text-align:center; background: |
+ | |style="border:solid 2px black; style="color:black; style="text-align:center; background:White"|<span style="color:black;">N/A |
|- |
|- |
||
| − | |style="border:solid |
+ | |style="border:solid 2px black; style="color:black; style="text-align:center; background:#318CE7"|<span style="color:white;">'''I'll Do Anything for These'''</span> |
| − | |style="color:black; style="text-align:center; background: |
+ | |style="border:solid 2px black; style="color:black; style="text-align:center; background:White"|<span style="color:black;"> |
*011 Petty Mafioso x02 |
*011 Petty Mafioso x02 |
||
*013 Prison Guard x02 |
*013 Prison Guard x02 |
||
*081 Eel Sushi x02 |
*081 Eel Sushi x02 |
||
*132 Bruce Meow x02 |
*132 Bruce Meow x02 |
||
| − | |style="color:black; style="text-align:center; background: |
+ | |style="border:solid 2px black; style="color:black; style="text-align:center; background:White"|<span style="color:black;">137 Frank |
| − | |style="color:black; style="text-align:center; background: |
+ | |style="border:solid 2px black; style="color:black; style="text-align:center; background:White"|<span style="color:black;">N/A |
|} |
|} |
||
| Line 1,078: | Line 1,079: | ||
|colspan="4" style="text-align:center; color:white; background:#318CE7; -moz-border-radius-topleft: 1em; -moz-border-radius-topright: 1em;"|<big>'''Mary Trades'''<big> </big></big> |
|colspan="4" style="text-align:center; color:white; background:#318CE7; -moz-border-radius-topleft: 1em; -moz-border-radius-topright: 1em;"|<big>'''Mary Trades'''<big> </big></big> |
||
|- |
|- |
||
| − | |style="border:solid 2px black; style="text-align:center |
+ | |style="border:solid 2px black; style="color:black; style="text-align:center; background:#318CE7"|<span style="color:white;">'''Trade #'''</span> |
| − | |style="border:solid 2px black; style="text-align:center |
+ | |style="border:solid 2px black; style="color:black; style="text-align:center; background:#318CE7"|<span style="color:white;">'''Cards Wanted'''</span> |
| − | |style="border:solid 2px black; style="text-align:center |
+ | |style="border:solid 2px black; style="color:black; style="text-align:center; background:#318CE7"|<span style="color:white;">'''Rewards'''</span> |
| − | |style="border:solid 2px black; style="text-align:center |
+ | |style="border:solid 2px black; style="color:black; style="text-align:center; background:#318CE7"|<span style="color:white;">'''New Game+ Reward'''</span> |
|- |
|- |
||
| − | |style="border:solid |
+ | |style="border:solid 2px black; style="color:black; style="text-align:center; background:#318CE7"|<span style="color:white;">'''Help Me, Mister 1'''</span> |
| − | |style="color:black; style="text-align:center; background: |
+ | |style="border:solid 2px black; style="color:black; style="text-align:center; background:White"|<span style="color:black;"> |
*024 Okeron x02 |
*024 Okeron x02 |
||
*040 Kerufe x02 |
*040 Kerufe x02 |
||
| − | |style="color:black; style="text-align:center; background: |
+ | |style="border:solid 2px black; style="color:black; style="text-align:center; background:White"|<span style="color:black;">045 Daoros |
| − | |style="color:black; style="text-align:center; background: |
+ | |style="border:solid 2px black; style="color:black; style="text-align:center; background:White"|<span style="color:black;">N/A |
|- |
|- |
||
| − | |style="border:solid |
+ | |style="border:solid 2px black; style="color:black; style="text-align:center; background:#318CE7"|<span style="color:white;">'''Help Me, Mister 2'''</span> |
| − | |style="color:black; style="text-align:center; background: |
+ | |style="border:solid 2px black; style="color:black; style="text-align:center; background:White"|<span style="color:black;"> |
*041 Wormy Worm x01 |
*041 Wormy Worm x01 |
||
*042 Ghatanothoa x01 |
*042 Ghatanothoa x01 |
||
*043 Tindaros x01 |
*043 Tindaros x01 |
||
| − | |style="color:black; style="text-align:center; background: |
+ | |style="border:solid 2px black; style="color:black; style="text-align:center; background:White"|<span style="color:black;"> |
| − | *[[Air Resist]] Stellar |
+ | * [[File:Supportnodelv3.png]] [[Air Resist]] Stellar |
| − | *[[Gale Vortex]] Stellar |
+ | *[[File:Attacknodewindlv3.png]] [[Gale Vortex]] Stellar |
| − | |style="color:black; style="text-align:center; background: |
+ | |style="border:solid 2px black; style="color:black; style="text-align:center; background:White"|<span style="color:black;">[[File:Sh3itemicon.png]] [[Third Key]] |
|- |
|- |
||
| − | |style="border:solid |
+ | |style="border:solid 2px black; style="color:black; style="text-align:center; background:#318CE7"|<span style="color:white;">'''I Want This 1'''</span> |
| − | |style="color:black; style="text-align:center; background: |
+ | |style="border:solid 2px black; style="color:black; style="text-align:center; background:White"|<span style="color:black;">049 Cabracan x01 |
| − | |style="color:black; style="text-align:center; background: |
+ | |style="border:solid 2px black; style="color:black; style="text-align:center; background:White"|<span style="color:black;"> |
| − | *[[Aqua Resist]] Stellar |
+ | *[[File:Supportnodelv3.png]] [[Aqua Resist]] Stellar |
| − | *[[Hail Exceed]] Stellar |
+ | *[[File:Attacknodewaterlv3.png]] [[Hail Exceed]] Stellar |
| − | |style="color:black; style="text-align:center; background: |
+ | |style="border:solid 2px black; style="color:black; style="text-align:center; background:White"|<span style="color:black;">[[File:Sh3itemicon.png]] [[Thera Extract]] |
|- |
|- |
||
| − | |style="border:solid |
+ | |style="border:solid 2px black; style="color:black; style="text-align:center; background:#318CE7"|<span style="color:white;">'''I Want This 2'''</span> |
| − | |style="color:black; style="text-align:center; background: |
+ | |style="border:solid 2px black; style="color:black; style="text-align:center; background:White"|<span style="color:black;"> |
*051 Harukigenia x05 |
*051 Harukigenia x05 |
||
*052 Sulagi x05 |
*052 Sulagi x05 |
||
*053 Ludirus x05 |
*053 Ludirus x05 |
||
| − | |style="color:black; style="text-align:center; background: |
+ | |style="border:solid 2px black; style="color:black; style="text-align:center; background:White"|<span style="color:black;"> |
| − | *[[Heat Resist]] Stellar |
+ | *[[File:Supportnodelv3.png]] [[Heat Resist]] Stellar |
| − | *[[Red Gravity]] Stellar |
+ | *[[File:Attacknodefirelv3.png]] [[Red Gravity]] Stellar |
| − | |style="color:black; style="text-align:center; background: |
+ | |style="border:solid 2px black; style="color:black; style="text-align:center; background:White"|<span style="color:black;">[[File:Sh3itemicon.png]] [[Fifth Key]] |
|- |
|- |
||
| − | |style="border:solid |
+ | |style="border:solid 2px black; style="color:black; style="text-align:center; background:#318CE7"|<span style="color:white;">'''Mary's Dream 1'''</span> |
| − | |style="color:black; style="text-align:center; background: |
+ | |style="border:solid 2px black; style="color:black; style="text-align:center; background:White"|<span style="color:black;"> |
*026 Petty Gangster x01 |
*026 Petty Gangster x01 |
||
*049 Cabracan x01 |
*049 Cabracan x01 |
||
*095 Gregor x01 |
*095 Gregor x01 |
||
| − | |style="color:black; style="text-align:center; background: |
+ | |style="border:solid 2px black; style="color:black; style="text-align:center; background:White"|<span style="color:black;">076 Black Bat |
| − | |style="color:black; style="text-align:center; background: |
+ | |style="border:solid 2px black; style="color:black; style="text-align:center; background:White"|<span style="color:black;">N/A |
|- |
|- |
||
| − | |style="border:solid |
+ | |style="border:solid 2px black; style="color:black; style="text-align:center; background:#318CE7"|<span style="color:white;">'''Mary's Dream 2'''</span> |
| − | |style="color:black; style="text-align:center; background: |
+ | |style="border:solid 2px black; style="color:black; style="text-align:center; background:White"|<span style="color:black;"> |
*096 Kareau x05 |
*096 Kareau x05 |
||
*097 Gresiru x05 |
*097 Gresiru x05 |
||
| − | |style="color:black; style="text-align:center; background: |
+ | |style="border:solid 2px black; style="color:black; style="text-align:center; background:White"|<span style="color:black;">142 Ricardo |
| − | |style="color:black; style="text-align:center; background: |
+ | |style="border:solid 2px black; style="color:black; style="text-align:center; background:White"|<span style="color:black;">N/A |
|- |
|- |
||
| − | |style="border:solid |
+ | |style="border:solid 2px black; style="color:black; style="text-align:center; background:#318CE7"|<span style="color:white;">'''A Secret Request'''</span> |
| − | |style="color:black; style="text-align:center; background: |
+ | |style="border:solid 2px black; style="color:black; style="text-align:center; background:White"|<span style="color:black;">066 Janus x01 |
| − | |style="color:black; style="text-align:center; background: |
+ | |style="border:solid 2px black; style="color:black; style="text-align:center; background:White"|<span style="color:black;"> |
*010 Tatan'ka |
*010 Tatan'ka |
||
*025 La Sirene |
*025 La Sirene |
||
*102 Tirawa |
*102 Tirawa |
||
| − | |style="color:black; style="text-align:center; background: |
+ | |style="border:solid 2px black; style="color:black; style="text-align:center; background:White"|<span style="color:black;">N/A |
|} |
|} |
||
| Line 1,151: | Line 1,152: | ||
|colspan="4" style="text-align:center; color:white; background:#318CE7; -moz-border-radius-topleft: 1em; -moz-border-radius-topright: 1em;"|<big>'''Louie Trades'''<big> </big></big> |
|colspan="4" style="text-align:center; color:white; background:#318CE7; -moz-border-radius-topleft: 1em; -moz-border-radius-topright: 1em;"|<big>'''Louie Trades'''<big> </big></big> |
||
|- |
|- |
||
| − | |style="border:solid 2px black; style="text-align:center |
+ | |style="border:solid 2px black; style="color:black; style="text-align:center; background:#318CE7"|<span style="color:white;">'''Trade #'''</span> |
| − | |style="border:solid 2px black; style="text-align:center |
+ | |style="border:solid 2px black; style="color:black; style="text-align:center; background:#318CE7"|<span style="color:white;">'''Cards Wanted'''</span> |
| − | |style="border:solid 2px black; style="text-align:center |
+ | |style="border:solid 2px black; style="color:black; style="text-align:center; background:#318CE7"|<span style="color:white;">'''Rewards'''</span> |
| − | |style="border:solid 2px black; style="text-align:center |
+ | |style="border:solid 2px black; style="color:black; style="text-align:center; background:#318CE7"|<span style="color:white;">'''New Game+ Reward'''</span> |
|- |
|- |
||
| − | |style="border:solid |
+ | |style="border:solid 2px black; style="color:black; style="text-align:center; background:#318CE7"|<span style="color:white;">'''Cool Snap Trade'''</span> |
| − | |style="color:black; style="text-align:center; background: |
+ | |style="border:solid 2px black; style="color:black; style="text-align:center; background:White"|<span style="color:black;"> |
*055 Blupe x01 |
*055 Blupe x01 |
||
*056 Ledope x01 |
*056 Ledope x01 |
||
*057 Alyosh x01 |
*057 Alyosh x01 |
||
| − | |style="color:black; style="text-align:center; background: |
+ | |style="border:solid 2px black; style="color:black; style="text-align:center; background:White"|<span style="color:black;">046 Killer |
| − | |style="color:black; style="text-align:center; background: |
+ | |style="border:solid 2px black; style="color:black; style="text-align:center; background:White"|<span style="color:black;">N/A |
|- |
|- |
||
| − | |style="border:solid |
+ | |style="border:solid 2px black; style="color:black; style="text-align:center; background:#318CE7"|<span style="color:white;">'''Superstar Snap'''</span> |
| − | |style="color:black; style="text-align:center; background: |
+ | |style="border:solid 2px black; style="color:black; style="text-align:center; background:White"|<span style="color:black;">131 Meowara x07 |
| − | |style="color:black; style="text-align:center; background: |
+ | |style="border:solid 2px black; style="color:black; style="text-align:center; background:White"|<span style="color:black;">[[File:Sh3accessoriesicon.png]] [[Cat Rush]] |
| − | |style="color:black; style="text-align:center; background: |
+ | |style="border:solid 2px black; style="color:black; style="text-align:center; background:White"|<span style="color:black;">N/A |
|- |
|- |
||
| − | |style="border:solid |
+ | |style="border:solid 2px black; style="color:black; style="text-align:center; background:#318CE7"|<span style="color:white;">'''I Don't Really Want it, But...'''</span> |
| − | |style="color:black; style="text-align:center; background: |
+ | |style="border:solid 2px black; style="color:black; style="text-align:center; background:White"|<span style="color:black;">095 Gregor x10 |
| − | |style="color:black; style="text-align:center; background: |
+ | |style="border:solid 2px black; style="color:black; style="text-align:center; background:White"|<span style="color:black;">[[File:Ricardoguitars.png]] [[Diosa]] |
| − | |style="color:black; style="text-align:center; background: |
+ | |style="border:solid 2px black; style="color:black; style="text-align:center; background:White"|<span style="color:black;">N/A |
|- |
|- |
||
| − | |style="border:solid |
+ | |style="border:solid 2px black; style="color:black; style="text-align:center; background:#318CE7"|<span style="color:white;">'''Exotic Snap 1'''</span> |
| − | |style="color:black; style="text-align:center; background: |
+ | |style="border:solid 2px black; style="color:black; style="text-align:center; background:White"|<span style="color:black;"> |
*083 Octopus Sushi x01 |
*083 Octopus Sushi x01 |
||
*086 Fatty Tuna Sushi x01 |
*086 Fatty Tuna Sushi x01 |
||
*087 Egg Roll x01 |
*087 Egg Roll x01 |
||
| − | |style="color:black; style="text-align:center; background: |
+ | |style="border:solid 2px black; style="color:black; style="text-align:center; background:White"|<span style="color:black;"> |
*139 Pink Bat |
*139 Pink Bat |
||
*140 Slim Hilda |
*140 Slim Hilda |
||
*141 Curvy Hilda |
*141 Curvy Hilda |
||
| − | |style="color:black; style="text-align:center; background: |
+ | |style="border:solid 2px black; style="color:black; style="text-align:center; background:White"|<span style="color:black;">N/A |
|- |
|- |
||
| − | |style="border:solid |
+ | |style="border:solid 2px black; style="color:black; style="text-align:center; background:#318CE7"|<span style="color:white;">'''Exotic Snap 2'''</span> |
| − | |style="color:black; style="text-align:center; background: |
+ | |style="border:solid 2px black; style="color:black; style="text-align:center; background:White"|<span style="color:black;">077 Cucumber Roll x01 |
| − | |style="color:black; style="text-align:center; background: |
+ | |style="border:solid 2px black; style="color:black; style="text-align:center; background:White"|<span style="color:black;"> |
*077 Cucumber Roll |
*077 Cucumber Roll |
||
*078 Tekka Roll |
*078 Tekka Roll |
||
| Line 1,199: | Line 1,200: | ||
*086 Fatty Tuna Sushi |
*086 Fatty Tuna Sushi |
||
*087 Egg Roll |
*087 Egg Roll |
||
| − | |style="color:black; style="text-align:center; background: |
+ | |style="border:solid 2px black; style="color:black; style="text-align:center; background:White"|<span style="color:black;">N/A |
|- |
|- |
||
| − | |style="border:solid |
+ | |style="border:solid 2px black; style="color:black; style="text-align:center; background:#318CE7"|<span style="color:white;">'''A Hot Request'''</span> |
| − | |style="color:black; style="text-align:center; background: |
+ | |style="border:solid 2px black; style="color:black; style="text-align:center; background:White"|<span style="color:black;"> |
*092 Soldes x01 |
*092 Soldes x01 |
||
*093 Ananka x01 |
*093 Ananka x01 |
||
| − | |style="color:black; style="text-align:center; background: |
+ | |style="border:solid 2px black; style="color:black; style="text-align:center; background:White"|<span style="color:black;"> |
*089 Ninja |
*089 Ninja |
||
*090 The Jonin |
*090 The Jonin |
||
| − | |style="color:black; style="text-align:center; background: |
+ | |style="border:solid 2px black; style="color:black; style="text-align:center; background:White"|<span style="color:black;">N/A |
|- |
|- |
||
| − | |style="border:solid |
+ | |style="border:solid 2px black; style="color:black; style="text-align:center; background:#318CE7"|<span style="color:white;">'''Something for My Baby'''</span> |
| − | |style="color:black; style="text-align:center; background: |
+ | |style="border:solid 2px black; style="color:black; style="text-align:center; background:White"|<span style="color:black;"> |
*099 Tsui Zooi x05 |
*099 Tsui Zooi x05 |
||
*100 Ignis x05 |
*100 Ignis x05 |
||
*101 Xukrus x05 |
*101 Xukrus x05 |
||
| − | |style="color:black; style="text-align:center; background: |
+ | |style="border:solid 2px black; style="color:black; style="text-align:center; background:White"|<span style="color:black;">135 Shania |
| − | |style="color:black; style="text-align:center; background: |
+ | |style="border:solid 2px black; style="color:black; style="text-align:center; background:White"|<span style="color:black;">N/A |
|} |
|} |
||
Latest revision as of 22:00, 9 September 2022
Johnny, snapping away
Snap Cards are trading cards in Shadow Hearts: From the New World.
Johnny can use his "Snap" ability on an enemy to obtain a single Snap Card of that enemy, and may take multiple snaps of the same enemy to increase the number of Snap Cards.
He can eventually receive the Panoramic Lens, which allows for a single Snap to obtain all the enemies' cards, as opposed to snapping each enemy individually (including multiples of the same enemy if there is more than one in battle).
Some Cards can only be obtained upon trading, while others are limited, and can potentially be missed in a single playthrough, though can be obtained later on New Game+.
There are 142 Snap Cards in total, but upon obtaining 115 Snap Cards of individual enemies, Purgatory, an optional dungeon, becomes unlocked.
Cards[]
For a large view of the cards, visit the gallery.
| Snap Cards | ||||
| Number | Name | No. of Snaps Needed | Obtained | Image |
| 001 | Thug | 1 | Chelsea (limited), Pit Fight 1.1, 1.2, 2.4 | 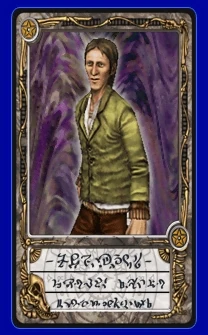
|
| 002 | Fat Thug | 1 | Chelsea (limited), Pit Fight 1.1, 1.2 | 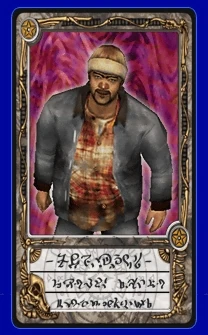
|
| 003 | Deep One | 0 | Pissarro Trade #7 | 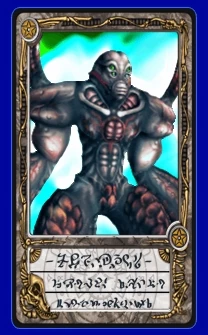
|
| 004 | Sergei | 4 | Arkham University, Pit Fight 1.1 | 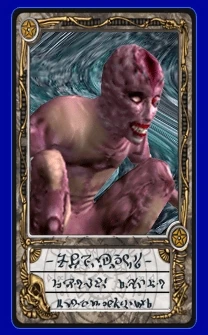
|
| 005 | Gagu | 4 | Arkham University, Pit Fight 1.1 | 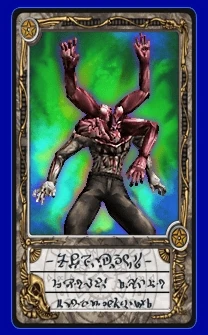
|
| 006 | Ignornak | 1 | Arkham University (Boss), Pit Fight 1.3 | 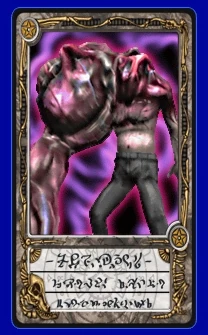
|
| 007 | Tonakh | 4 | Grand Canyon, Pit Fight 1.3 | 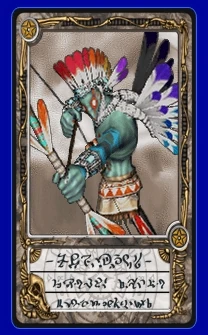
|
| 008 | Maii | 2 | Grand Canyon, Pit Fight 1.1, 1.3 | 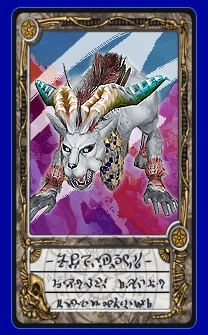
|
| 009 | Argen Tabisu | 2 | Grand Canyon, Pit Fight 1.1, 1.3 | 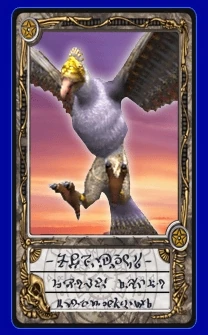
|
| 010 | Tatan'ka | 0 | Mary Trade #7 | 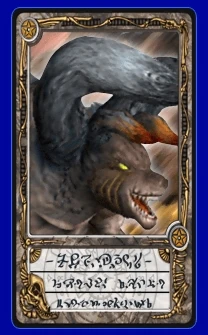
|
| 011 | Petty Mafioso | 3 | Chicago (limited), Pit Fight 1.2 | 
|
| 012 | Mafia Hoodlum | 1 | Chicago (limited), Pit Fight 1.2 | 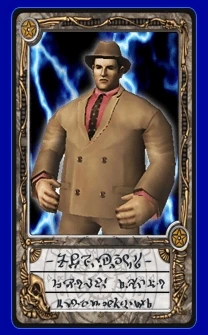
|
| 013 | Prison Guard | 4 | Alcatraz (limited), Pit Fight 1.2 | 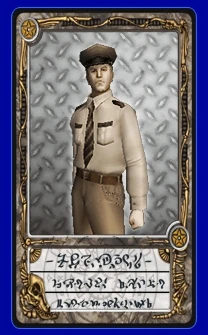
|
| 014 | Chon Chon | 1 | Alcatraz (limited), Pit Fight 1.1 | 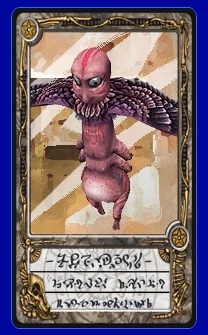
|
| 015 | Womp | 6 | Alcatraz (limited), Pit Fight 1.1 | 
|
| 016 | Byarki | 1 | Alcatraz (limited), Pit Fight 1.1 | 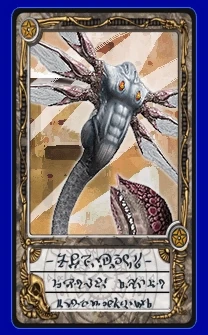
|
| 017 | Ronwei | 1 | Alcatraz (Boss), Pit Fight 4.1 | 
|
| 018 | Sirius | 2 | Roswell | 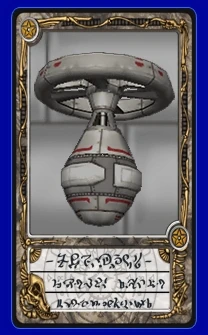
|
| 019 | Betelguise | 2 | Roswell, Pit Fight 1.1, 1.3 | 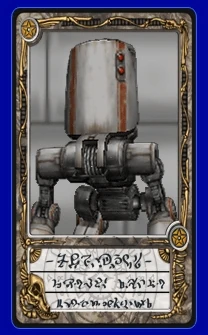
|
| 020 | Acteon | 2 | Roswell, Pit Fight 1.1, 1.3 | 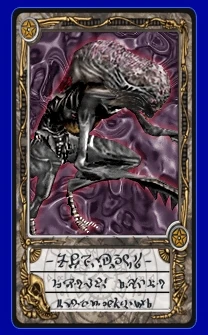
|
| 021 | Procyon | 1 | Roswell (Boss), Masatoshi Trade #3 | 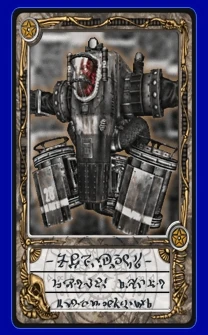
|
| 022 | Bablovia | 4 | Caribbean | 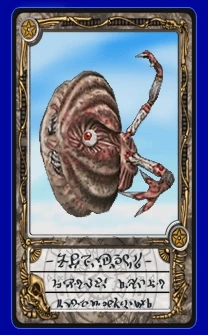
|
| 023 | Heinz | 6 | Caribbean | 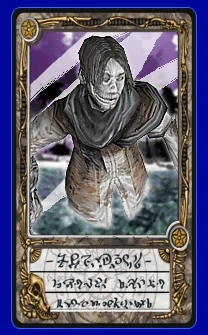
|
| 024 | Okeron | 3 | Caribbean, Pit Fight 2.1 | 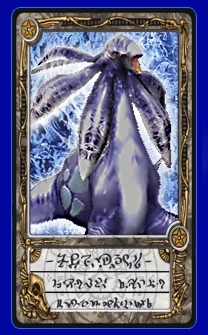
|
| 025 | La Sirene | 0 | Mary Trade #7 | 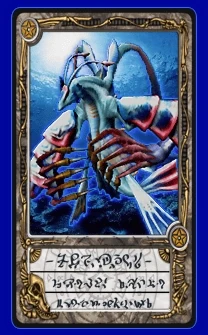
|
| 026 | Petty Gangster | 3 | Las Vegas (limited), Pit Fight 2.2 | 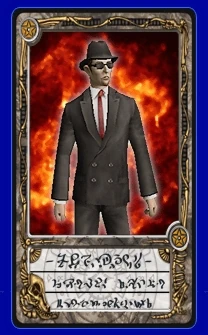
|
| 027 | Gangster Hoodlum | 2 | Las Vegas (limited), Pit Fight 2.2 | 
|
| 028 | Butcher | 1 | Las Vegas (limited), Pit Fight 2.2, 2.3 | 
|
| 029 | Ghoul | 1 | Las Vegas (limited), Pit Fight 2.2 | 
|
| 030 | Automaton | 1 | Las Vegas (limited), Pit Fight 2.3 | 
|
| 031 | Malice Edna | 1 | Las Vegas (Boss), Pit Fight 2.3 | 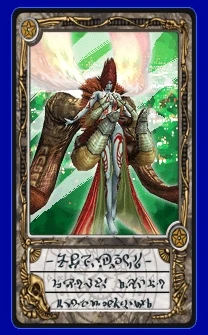
|
| 032 | Eliops | 4 | Chichen Itza, Pit Fight 2.1, 2.3 | 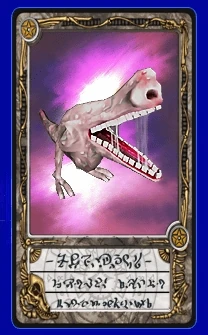
|
| 033 | Jig Ruta | 3 | Chichen Itza, Pit Fight 2.1, 2.3 | 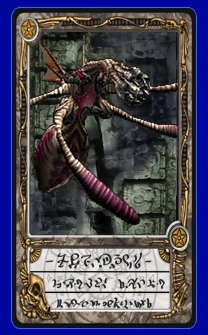
|
| 034 | Guanna | 3 | Chichen Itza, Pit Fight 2.1 | 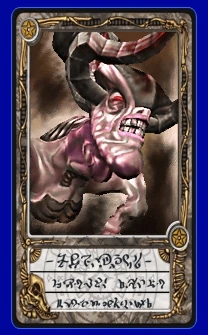
|
| 035 | Jeb Niglas | 1 | Chichen Itza (Boss), Samuel Trade #1 | 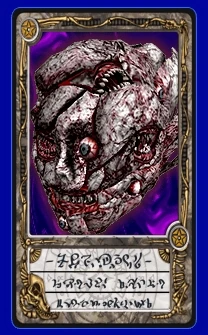
|
| 036 | Dicteo | 3 | Machu Picchu, Pit Fight 3.4 | 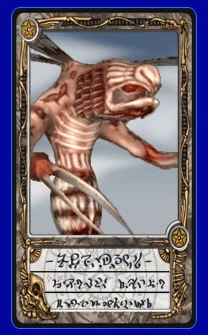
|
| 037 | Xi Dazun | 3 | Machu Picchu, Pit Fight 3.4 | 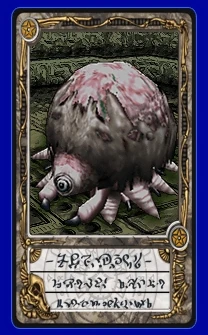
|
| 038 | Xantak | 3 | Machu Picchu | 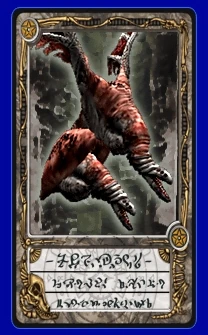
|
| 039 | Wariche | 3 | Machu Picchu, Pit Fight 3.4 | 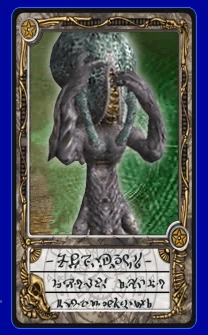
|
| 040 | Kerufe | 3 | Machu Picchu, Pit Fight 3.2, Pissarro Trade #1 | 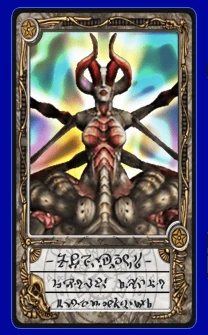
|
| 041 | Wormy Worm | 2 | Vilcabamba, Pit Fight 3.1, 3.4 | 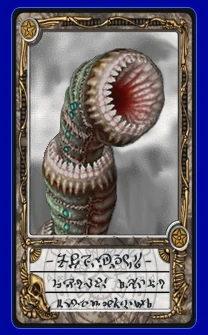
|
| 042 | Ghatanothoa | 2 | Vilcabamba, Pit Fight 3.1, 3.4 | 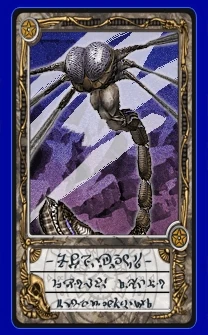
|
| 043 | Tindaros | 2 | Vilcabamba, Pit Fight 3.4 | 
|
| 044 | Woworito | 4 | Vilcabamba, Pit Fight 3.4 | 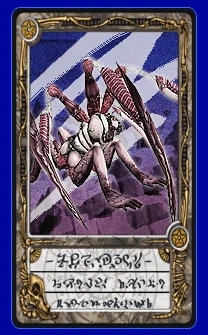
|
| 045 | Daoros | 1 | Vilcabamba (Boss) Mary Trade #1 | 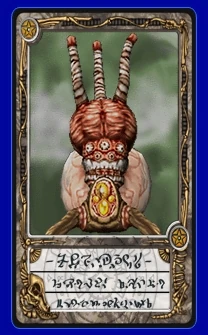
|
| 046 | Killer | 1 | Vilcabamba (Boss), Uyuni Salt Lake (Boss), Louie Trade #1 | 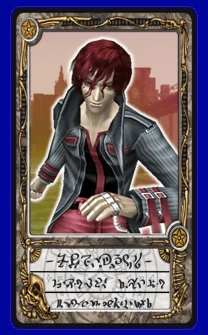
|
| 047 | Chakmol | 3 | Aito Cave | 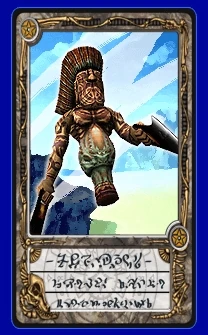
|
| 048 | Saskachilli | 3 | Aito Cave | 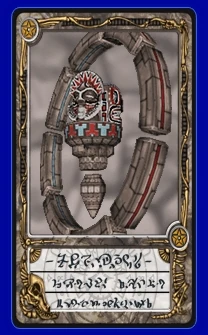
|
| 049 | Cabracan | 3 | Aito Cave, Pit Fight 4.1 | 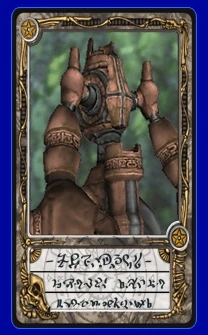
|
| 050 | Delget | 4 | Aito Cave (Boss), Pit Fight 3.3 | 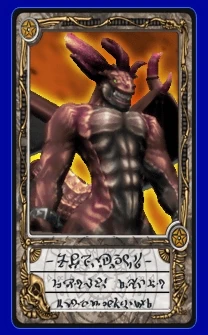
|
| 51 | Harukigenia | 6 | Uyuni Salt Lake, Pit Fight 4.2 | 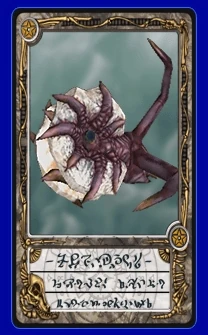
|
| 52 | Sulagi | 6 | Uyuni Salt Lake, Pit Fight 4.2 | 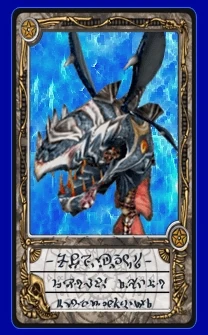
|
| 53 | Ludirus | 6 | Uyuni Salt Lake, Pit Fight 4.2 | 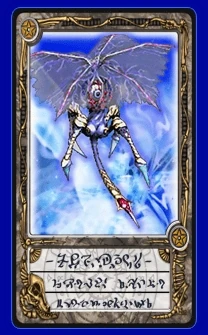
|
| 54 | Ikcheon | 4 | Uyuni Salt Lake, Pit Fight 4.2 | 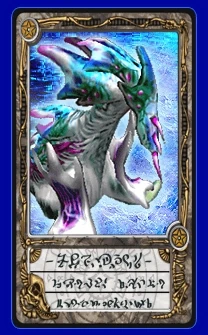
|
| 55 | Blupe | 2 | Garland Residence, Pit Fight 4.1, 4.2 | 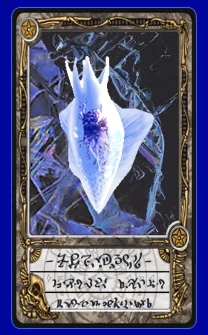
|
| 56 | Ledope | 2 | Garland Residence, Pit Fight 4.1, 4.2 | 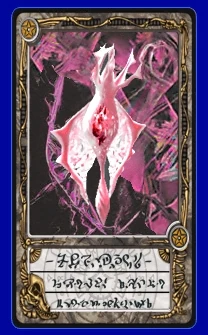
|
| 57 | Alyosh | 2 | Garland Residence, Pit Fight 4.1, 4.2 | 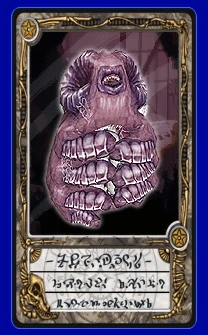
|
| 58 | Tamaris | 7 | Garland Residence (Boss), Pit Fight 5.2 | 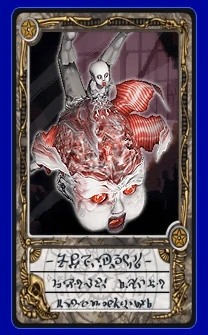
|
| 59 | Malice Killer | 1 | The Gate (limited) | 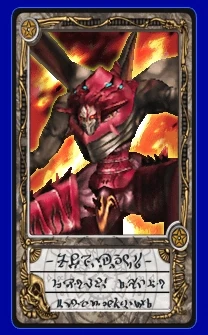
|
| 60 | Ispus | 3 | Beyond the Gate | 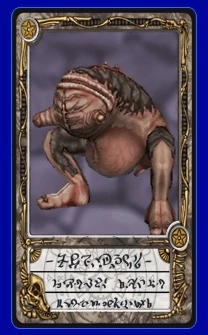
|
| 61 | Larilari | 3 | Beyond the Gate | 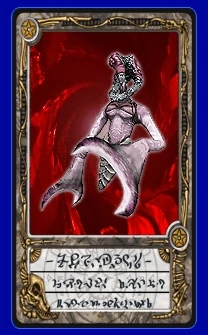
|
| 62 | Phobos | 5 | Beyond the Gate | 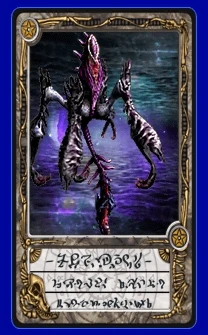
|
| 63 | Bokrug | 3 | Beyond the Gate | 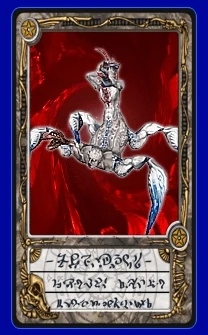
|
| 64 | Len | 4 | Beyond the Gate | 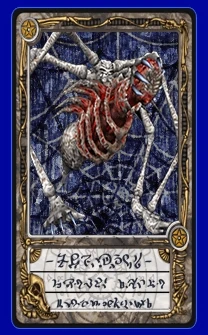
|
| 65 | Malice Soaker | 1 | Beyond the Gate (limited) | 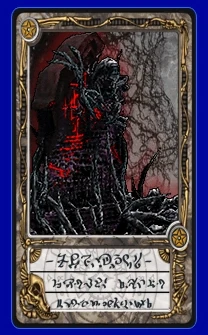
|
| 66 | Janus | 2 | Beyond the Gate | 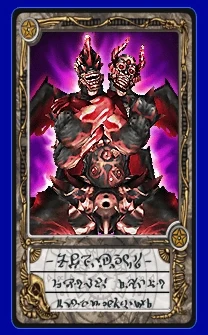
|
| 67 | Malice Gilbert | 1 | Beyond the Gate (Boss) | 
|
| 68 | Lady | 1 | Beyond the Gate (Final Boss) | 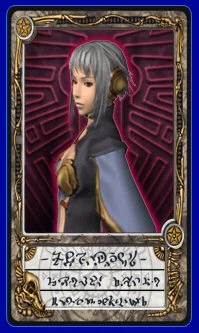
|
| 69 | Malice Unbral | 1 | Beyond the Gate (Final Boss) | 
|
| 70 | Sasquatch | 1 | Grand Canyon (UMA), Pissarro Trade #6 | 
|
| 71 | Tihozhodhi | 1 | Caribbean (UMA), Pissarro Trade #6 | 
|
| 72 | Chupakabra | 1 | Chichen Itza (UMA), Pissarro Trade #6 | 
|
| 73 | Rogotomhere | 1 | Aito Cave (UMA), Pissarro Trade #6 | 
|
| 74 | Sky Fish | 1 | Uyuni Salt Lake (UMA), Pissarro Trade #6 | 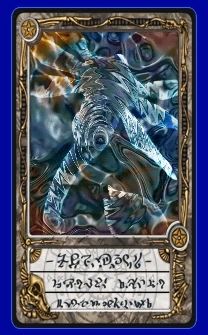
|
| 75 | Golden Tinny | 2 | Pit Fight 6.1 | 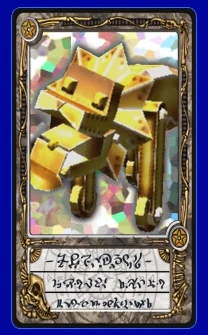
|
| 76 | Black Bat | 0 | Mary Trade #6 | 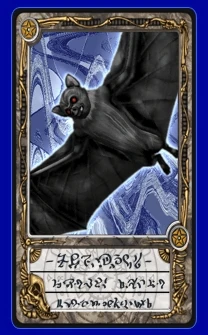
|
| 77 | Cucumber Roll | 2 | Sushi House, Pit Fight 6.1, Louie Trade #5 | 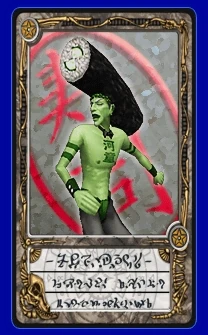
|
| 78 | Tekka Roll | 1 | Sushi House, Louie Trade #5 | 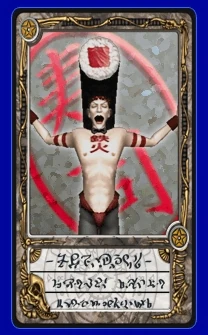
|
| 79 | Natto Roll | 1 | Sushi House, Pit Fight 5.2, Louie Trade #5 | 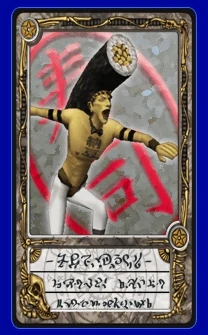
|
| 80 | Shrimp Sushi | 0 | Louie Trade #5 | 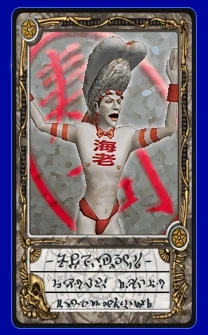
|
| 81 | Eel Sushi | 3 | Pit Fight 5.1, Louie Trade #5 | 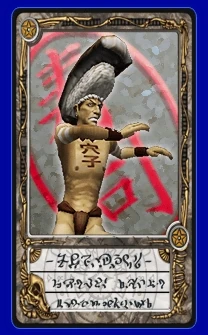
|
| 82 | Salmon Sushi | 0 | Louie Trade #5 | 
|
| 83 | Octopus Sushi | 2 | Pit Fight 5.1, Louie Trade #5 | 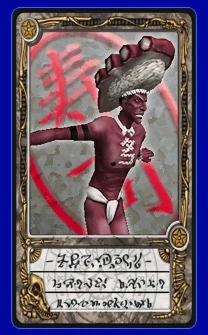
|
| 84 | Rice Ball | 0 | Louie Trade #5 | 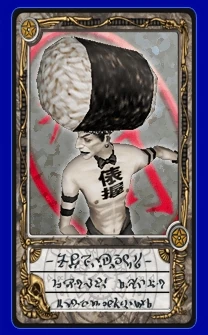
|
| 85 | Ginger Sushi | 0 | Louie Trade #5 | 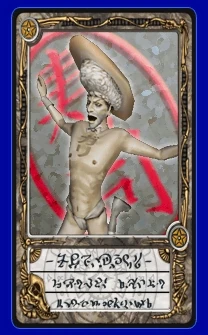
|
| 86 | Fatty Tuna Sushi | 2 | Pit Fight 6.1, Louie Trade #5 | 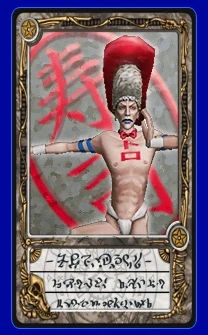
|
| 87 | Egg Roll | 2 | Sushi House, Pit Fight 5.2, Louie Trade #5 | 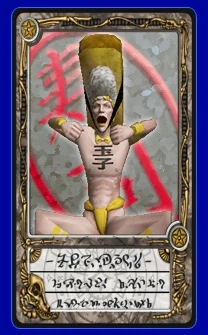
|
| 88 | Q the Great | 0 | Masatoshi Trade #7 | 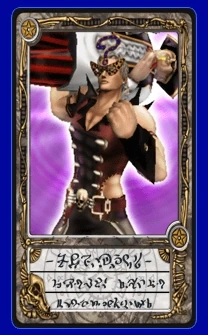
|
| 89 | Ninja | 1 | Ninja Hideaway (limited), Pit Fight 5.2, Louie Trade #6 | 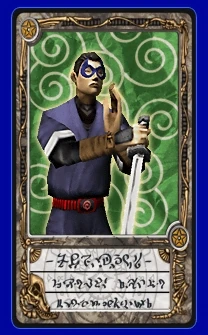
|
| 90 | The Jonin | 0 | Louie Trade #6 | 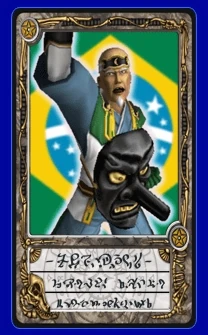
|
| 91 | Seymouria | 6 | Guiana Highlands | 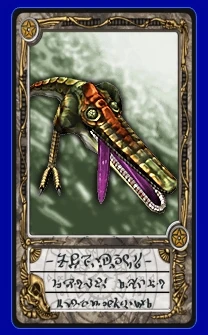
|
| 92 | Soldes | 2 | Guiana Highlands | 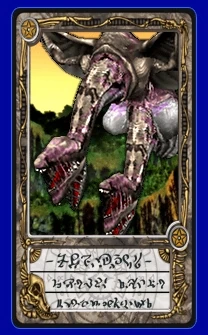
|
| 93 | Ananka | 2 | Guiana Highlands | 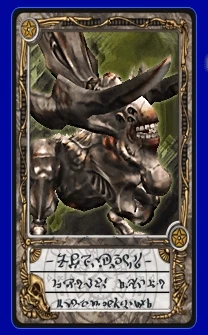
|
| 94 | Mudopkan | 1 | Guiana Highlands (UMA), Samuel Trade #6 | 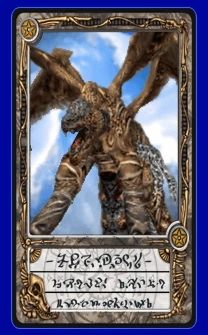
|
| 95 | Gregor | 12 | Doll House, Pit Fight 5.2 | 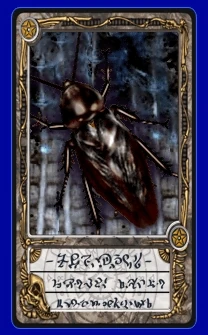
|
| 96 | Kareau | 6 | Doll House, Pit Fight 5.2 | 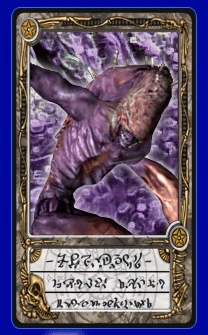
|
| 97 | Gresiru | 8 | Doll House, Pit Fight 5.2 | 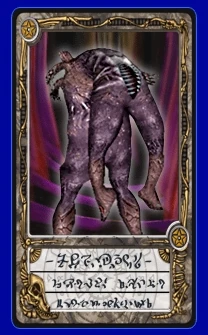
|
| 98 | Dana | 1 | Doll House (Boss), Pit Fight 5.2 | 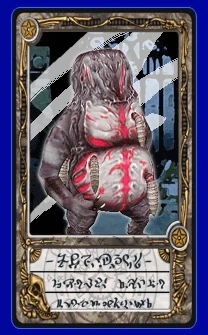
|
| 99 | Tsui Zooi | 6 | Garvoy Valley | 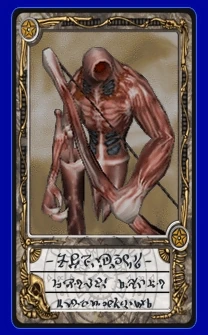
|
| 100 | Ignis | 6 | Garvoy Valley | 
|
| 101 | Xukrus | 6 | Garvoy Valley | 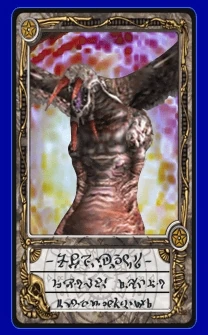
|
| 102 | Tirawa | 1 | Garvoy Valley (Boss), Mary Trade #7 | 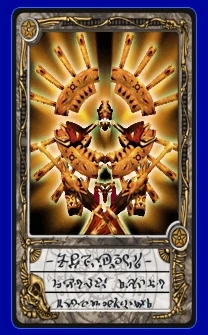
|
| 103 | Torment Gluttony | 1 | Purgatory: Green (limited) | 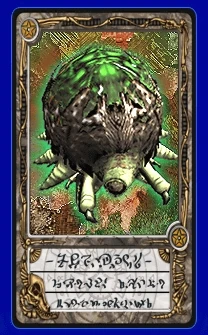
|
| 104 | Gnawing Gluttony | 1 | Purgatory: Green (limited) | 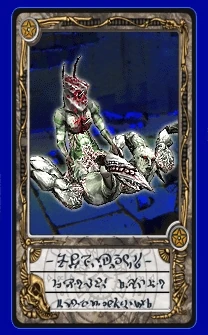
|
| 105 | Twisted Gluttony | 1 | Purgatory: Green (limited) | 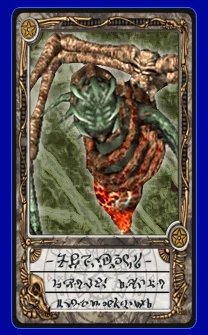
|
| 106 | Great Hunger | 1 | Purgatory: Green (Boss) | 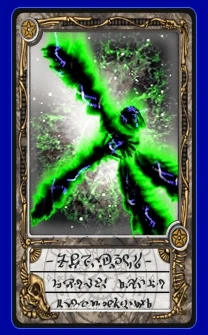
|
| 107 | Torment Greed | 1 | Purgatory: Blue (limited) | 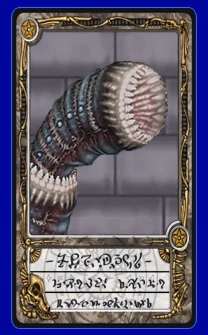
|
| 108 | Gnawing Greed | 1 | Purgatory: Blue (limited) | 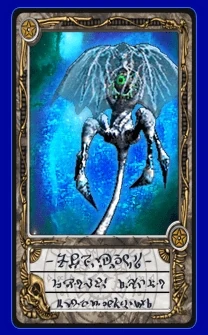
|
| 109 | Twisted Greed | 1 | Purgatory: Blue (limited) | 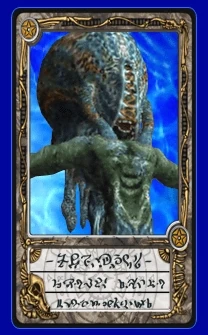
|
| 110 | Avarice | 1 | Purgatory: Blue (Boss) | 
|
| 111 | Torment Lust | 1 | Purgatory: Red (limited) | 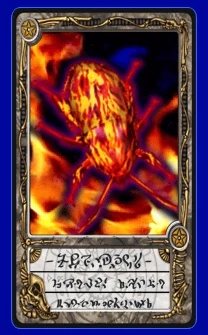
|
| 112 | Gnawing Lust | 1 | Purgatory: Red (limited) | 
|
| 113 | Twisted Lust | 1 | Purgatory: Red (limited) | 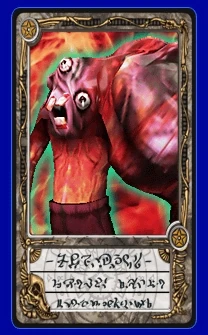
|
| 114 | Impure Thought | 1 | Purgatory: Red (Boss) | 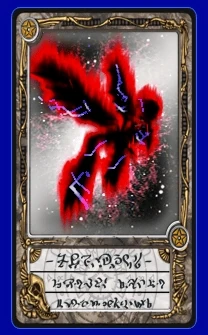
|
| 115 | Torment Sloth | 1 | Purgatory: Orange (limited) | 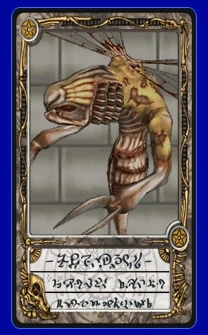
|
| 116 | Gnawing Sloth | 1 | Purgatory: Orange (limited) | 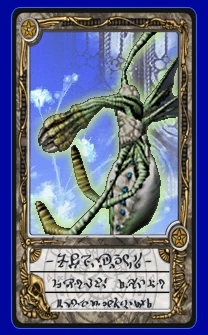
|
| 117 | Twisted Sloth | 1 | Purgatory: Orange (limited) | 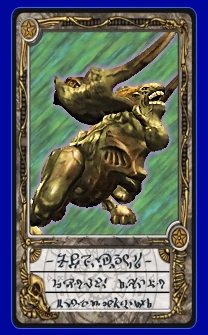
|
| 118 | Decadence | 1 | Purgatory: Orange (Boss) | 
|
| 119 | Torment Pride | 1 | Purgatory: Yellow (limited) | 
|
| 120 | Gnawing Pride | 1 | Purgatory: Yellow (limited) | 
|
| 121 | Twisted Pride | 1 | Purgatory: Yellow (limited) | 
|
| 122 | Arrogance | 1 | Purgatory: Yellow (Boss) | 
|
| 123 | Torment Anger | 1 | Purgatory: Purple (limited) | 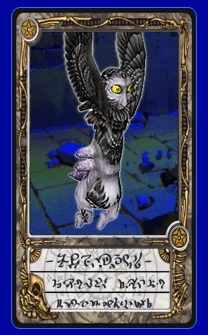
|
| 124 | Gnawing Anger | 1 | Purgatory: Purple (limited) | 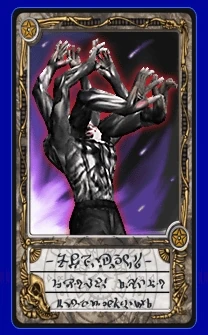
|
| 125 | Twisted Anger | 1 | Purgatory: Purple (limited) | 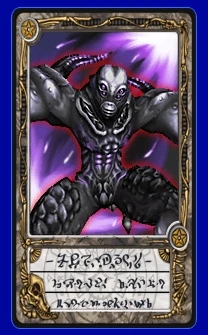
|
| 126 | Rage | 1 | Purgatory: Purple (Boss) | 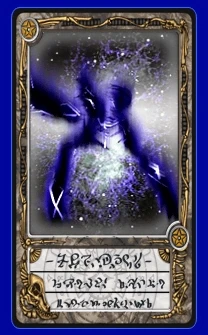
|
| 127 | Envious Jealousy | 1 | Purgatory (Boss) ♦ | 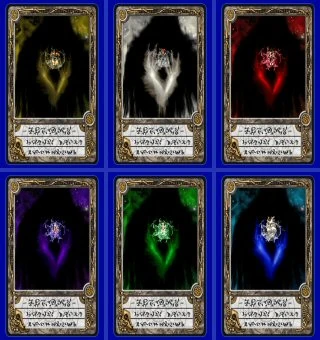
|
| 128 | The Meowmenator | 4 | Pit Fight 6.1 | 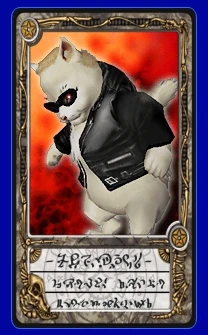
|
| 129 | Sammo Meow | 4 | Pit Fight 5.1 | 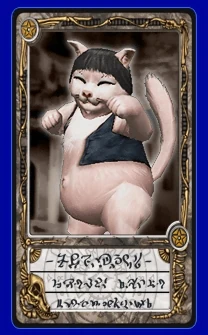
|
| 130 | Cat Morita | 4 | Pit Fight 5.1 | 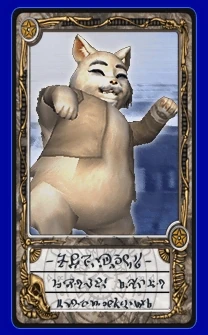
|
| 131 | Meowara | 8 | Pit Fight 6.1 | 
|
| 132 | Bruce Meow | 3 | Pit Fight 5.1 | 
|
| 133 | Pe Meowmeow | 0 | Pissarro Trade #5 | 
|
| 134 | Johnny | 0 | Masotoshi Trade #5 | 
|
| 135 | Shania | 0 | Louie Trade #7 | 
|
| 136 | Natan | 0 | Samuel Trade #5 | 
|
| 137 | Frank | 0 | Pissarro Trade #7 | 
|
| 138 | Mao | 0 | Pissarro Trade #5 | 
|
| 139 | Pink Bat | 0 | Louie Trade #4 | 
|
| 140 | Slim Hilda | 0 | Louie Trade #4 | 
|
| 141 | Curvy Hilda | 0 | Louie Trade #4 | 
|
| 142 | Ricardo | 0 | Mary Trade 6 | 
|
♦ NOTE: Due to the nature of the Envious Jealousy boss, there are six mutually exclusive variations, only one of which is obtainable at any given time.
Trades[]
Masatoshi[]

Masatoshi in Chicago
Masatoshi introduces you into the world of Snap Card trading.
His rewards in the game are invaluable, but towards the end of New Game+, his rewards become exceptional with a Seventh Key or an Eternal Key as prize.
| Masatoshi Trades | |||
| Trade # | Cards Wanted | Rewards | New Game+ Reward |
| First Trade 1 | 007 Tonakh x 3 | ||
| First Trade 2 |
|
||
| Request from Masatoshi 1 | 031 Prison Guard x1 | 021 Procyon | N/A |
| Request from Masatoshi 2 |
|
N/A | |
| High Level Trade 1 |
|
134 Johnny | N/A |
| High Level Trade 2 |
|
||
| Masatoshi's Final Request | 075 Golden Tinny | 088 Q the Great | |
Samuel[]


Samuel in the Caribbean
Samuel's requests offer some great trading cards as rewards.
He can be found in the Caribbean, standing near the kitchen.
| Samuel Trades | |||
| Trade # | Cards Wanted | Rewards | New Game+ Reward |
| Simple Request 1 |
|
035 Jeb Niglas | N/A |
| Simple Request 2 | 015 Womp x5 | ||
| Please Find This 1 |
|
N/A | |
| Please Find This 2 | 023 Heinz x5 | N/A | |
| Difficult Request 1 |
|
136 Natan | N/A |
| Difficult Request 2 | 058 Tamaris x03 | 094 Mudopkan | N/A |
| Very Difficult Request | 091 Seymouria x05 | 003 Deep One | N/A |
Pissarrio[]
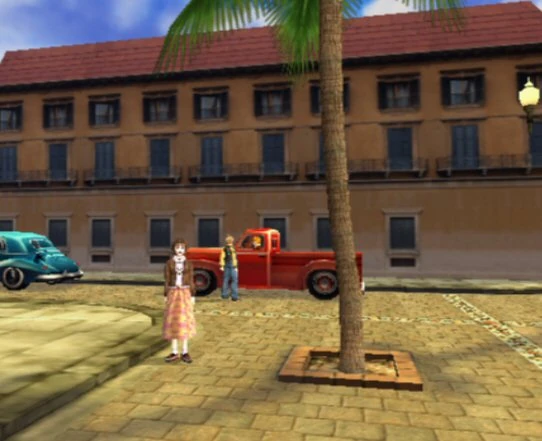
Pissarrio in Rio de Janiero
Pissarrio is probably one of the easiest traders to find if you're looking. This fellow is sitting in the big red truck in Rio de Janiero.
His rewards range from Accessories to more Snap Cards.
His "Special Request, Bro" Trade is unlocked after catching the first five UMAs.
| Pissarrio Trades | |||
| Trade # | Cards Wanted | Rewards | New Game+ Reward |
| No Greetings Necessary 1 | 022 Bablovia x03 | 040 Kerufe | N/A |
| No Greetings Necessary 2 | 032 Eliops x03 | N/A | |
| Please Find It! 1 |
|
N/A | |
| Please Find It! 2 |
|
|
|
| Trade Me a Strange Snap |
|
|
N/A |
| Special Request, Bro |
|
|
N/A |
| I'll Do Anything for These |
|
137 Frank | N/A |
Mary[]

Mary in Moana Village
Mary can be found in the first house in Moana Village. You can recognize her based on her resemblence to Loloma.
In New Game+, she offers keys as her rewards. Her final trade request appears after fighting Tirawa in Garvoy Valley
| Mary Trades | |||
| Trade # | Cards Wanted | Rewards | New Game+ Reward |
| Help Me, Mister 1 |
|
045 Daoros | N/A |
| Help Me, Mister 2 |
|
|
|
| I Want This 1 | 049 Cabracan x01 |
|
|
| I Want This 2 |
|
|
|
| Mary's Dream 1 |
|
076 Black Bat | N/A |
| Mary's Dream 2 |
|
142 Ricardo | N/A |
| A Secret Request | 066 Janus x01 |
|
N/A |
Louie[]
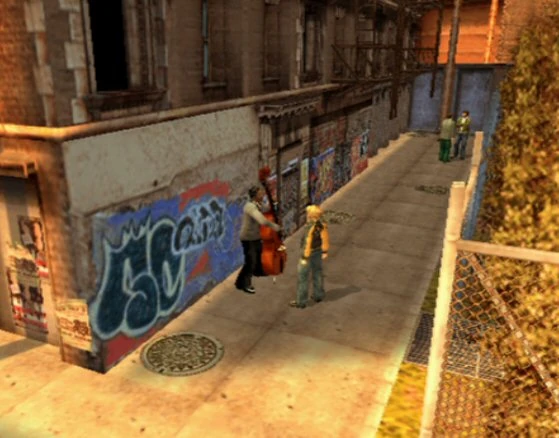

Louie in Harlem
Louie is unlocked after going to the Gate, and can be found in Harlem. He's easy to recognize since he's playing the cello.
Ricardo's Ultimate Weapon and an accessory for Mao can be obtained from him.
Trade #5 is unlocked after completing the Sushi House, and Trade #6 appears after the Ninja Master Test.
| Louie Trades | |||
| Trade # | Cards Wanted | Rewards | New Game+ Reward |
| Cool Snap Trade |
|
046 Killer | N/A |
| Superstar Snap | 131 Meowara x07 | N/A | |
| I Don't Really Want it, But... | 095 Gregor x10 | N/A | |
| Exotic Snap 1 |
|
|
N/A |
| Exotic Snap 2 | 077 Cucumber Roll x01 |
|
N/A |
| A Hot Request |
|
|
N/A |
| Something for My Baby |
|
135 Shania | N/A |