0001 (Message Wall | contribs) Tag: Source edit |
0001 (Message Wall | contribs) (→Shop) Tag: Source edit |
||
| Line 68: | Line 68: | ||
|colspan="4" style="text-align:center; color:white; background:DarkSlateGray; -moz-border-radius-topleft: 1em; -moz-border-radius-topright: 1em;"|<big>'''Wandering Merchant'''<big> </big></big> |
|colspan="4" style="text-align:center; color:white; background:DarkSlateGray; -moz-border-radius-topleft: 1em; -moz-border-radius-topright: 1em;"|<big>'''Wandering Merchant'''<big> </big></big> |
||
|- |
|- |
||
| − | |style="border:solid 2px black; style="text-align:center |
+ | |style="border:solid 2px black; style="color:black; style="text-align:center; background:DarkSlateGray"|<span style="color:white;">'''Item'''</span> |
| − | |style="border:solid 2px black; style="text-align:center |
+ | |style="border:solid 2px black; style="color:black; style="text-align:center; background:DarkSlateGray"|<span style="color:white;">'''Price'''</span> |
| − | |style="border:solid 2px black; style="text-align:center |
+ | |style="border:solid 2px black; style="color:black; style="text-align:center; background:DarkSlateGray"|<span style="color:white;">'''Item'''</span> |
| − | |style="border:solid 2px black; style="text-align:center |
+ | |style="border:solid 2px black; style="color:black; style="text-align:center; background:DarkSlateGray"|<span style="color:white;">'''Price'''</span> |
|- |
|- |
||
| − | |style="border:solid |
+ | |style="border:solid 2px black; style="color:black; style="text-align:center; background:SlateGray"|[[File:Sh1acessorylogo.png]] '''[[Bandana|<span style="color:white;">Bandana</span>]]''' |
| − | |style="color:black; style="text-align:center; background: |
+ | |style="border:solid 2px black; style="color:black; style="text-align:center; background:White"|320 |
| − | |style="border:solid |
+ | |style="border:solid 2px black; style="color:black; style="text-align:center; background:SlateGray"|[[File:Sh1itemlogo.png]] '''[[Talisman of Luck|<span style="color:white;">Talisman of Luck</span>]]''' |
| − | |style="color:black; style="text-align:center; background: |
+ | |style="border:solid 2px black; style="color:black; style="text-align:center; background:White"|480 |
|- |
|- |
||
| − | |style="border:solid |
+ | |style="border:solid 2px black; style="color:black; style="text-align:center; background:SlateGray"|[[File:Sh1acessorylogo.png]] '''[[Leather Belt|<span style="color:white;">Leather Belt</span>]]''' |
| − | |style="color:black; style="text-align:center; background: |
+ | |style="border:solid 2px black; style="color:black; style="text-align:center; background:White"|320 |
| − | |style="border:solid |
+ | |style="border:solid 2px black; style="color:black; style="text-align:center; background:SlateGray"|[[File:Sh1itemlogo.png]] '''[[Mermaid's Tear|<span style="color:white;">Mermaid's Tear</span>]]''' |
| − | |style="color:black; style="text-align:center; background: |
+ | |style="border:solid 2px black; style="color:black; style="text-align:center; background:White"|70 |
|- |
|- |
||
| − | |style="border:solid |
+ | |style="border:solid 2px black; style="color:black; style="text-align:center; background:SlateGray"|[[File:Sh1acessorylogo.png]] '''[[Shell Bracelet|<span style="color:white;">Shell Bracelet</span>]]''' |
| − | |style="color:black; style="text-align:center; background: |
+ | |style="border:solid 2px black; style="color:black; style="text-align:center; background:White"|2770 |
| − | |style="border:solid |
+ | |style="border:solid 2px black; style="color:black; style="text-align:center; background:SlateGray"|[[File:Sh1itemlogo.png]] '''[[Holy Mother Bust|<span style="color:white;">Holy Mother Bust</span>]]''' |
| − | |style="color:black; style="text-align:center; background: |
+ | |style="border:solid 2px black; style="color:black; style="text-align:center; background:White"|75 |
|- |
|- |
||
| − | |style="border:solid |
+ | |style="border:solid 2px black; style="color:black; style="text-align:center; background:SlateGray"|[[File:Sh1acessorylogo.png]] '''[[Bone Bracelet|<span style="color:white;">Bone Bracelet</span>]]''' |
| − | |style="color:black; style="text-align:center; background: |
+ | |style="border:solid 2px black; style="color:black; style="text-align:center; background:White"|2960 |
| − | |style="border:solid |
+ | |style="border:solid 2px black; style="color:black; style="text-align:center; background:SlateGray"|[[File:Sh1itemlogo.png]] '''[[Phoenix Tail|<span style="color:white;">Phoenix Tail</span>]]''' |
| − | |style="color:black; style="text-align:center; background: |
+ | |style="border:solid 2px black; style="color:black; style="text-align:center; background:White"|90 |
|- |
|- |
||
| − | |style="border:solid |
+ | |style="border:solid 2px black; style="color:black; style="text-align:center; background:SlateGray"|[[File:Sh1itemlogo.png]] '''[[Thera Leaf|<span style="color:white;">Thera Leaf</span>]]''' |
| − | |style="color:black; style="text-align:center; background: |
+ | |style="border:solid 2px black; style="color:black; style="text-align:center; background:White"|50 |
| − | |style="border:solid |
+ | |style="border:solid 2px black; style="color:black; style="text-align:center; background:SlateGray"|[[File:Sh1itemlogo.png]] '''[[Bronze Arrowhead|<span style="color:white;">Bronze Arrowhead</span>]]''' |
| − | |style="color:black; style="text-align:center; background: |
+ | |style="border:solid 2px black; style="color:black; style="text-align:center; background:White"|100 |
|- |
|- |
||
| − | |style="border:solid |
+ | |style="border:solid 2px black; style="color:black; style="text-align:center; background:SlateGray"|[[File:Sh1itemlogo.png]] '''[[Mana Leaf|<span style="color:white;">Mana Leaf</span>]]''' |
| − | |style="color:black; style="text-align:center; background: |
+ | |style="border:solid 2px black; style="color:black; style="text-align:center; background:White"|100 |
| − | |style="border:solid |
+ | |style="border:solid 2px black; style="color:black; style="text-align:center; background:SlateGray"|[[File:Sh1itemlogo.png]] '''[[Silver Hourglass|<span style="color:white;">Silver Hourglass</span>]]''' |
| − | |style="color:black; style="text-align:center; background: |
+ | |style="border:solid 2px black; style="color:black; style="text-align:center; background:White"|100 |
|- |
|- |
||
| − | |style="border:solid |
+ | |style="border:solid 2px black; style="color:black; style="text-align:center; background:SlateGray"|[[File:Sh1itemlogo.png]] '''[[Pure Leaf|<span style="color:white;">Pure Leaf</span>]]''' |
| − | |style="color:black; style="text-align:center; background: |
+ | |style="border:solid 2px black; style="color:black; style="text-align:center; background:White"|230 |
| − | |style="border:solid |
+ | |style="border:solid 2px black; style="color:black; style="text-align:center; background:SlateGray"|[[File:Sh1itemlogo.png]] '''[[Tent|<span style="color:white;">Tent</span>]]''' |
| − | |style="color:black; style="text-align:center; background: |
+ | |style="border:solid 2px black; style="color:black; style="text-align:center; background:White"|480 |
|} |
|} |
||
Revision as of 06:27, 13 September 2020

The shrine
Zhaoyang Village is a fictional Asian village and location in Shadow Hearts. The residents here are in some ways cannibalistic as they hold a human form and survive off of human flesh. The village is watched over by a Yamaraja, and once entered, you cannot leave. Zhaoyang Village is also where Zhuzhen joins the party for the first time.
Storyline
Zhaoyang Village was the village that held the Black Tortoise Votive Picture until Dehaui stole it.
To help him capture the Votive Picture, he used the spirits of domestic animals, who were then able to adopt a human form. Dehuai, hoping that no one would notice the Votive Picture missing, placed a seal on the village with the spirits trapped inside to make sure that no one would survive and tell the tale.
He then placed the god Yamaraja: Earth in the shrine to make sure the spirits would feel at ease being trapped.
Our heroes, exhausted from their escape from the Japanese army and Cardinal Albert Simon, see a village and hope it might offer some relief. But before they enter the Mysterious Voice warns Yuri of a village full of cannibals.
Alice also hears this. The pair promise that they will be careful entering the village. It is then they are greeted by two children who are curiously attracted to Alice, much to Yuri's annoyance. The two are encouraged to visit the Granny Mayor for a place to rest.
As they explore the village they find out via the shrine surrounded by human bones that the villagers are cannibals. They then visit Granny Mayor of the village who then sheds light of what's going on, and goes on to admit they are actually cannibals that can't wait to eat the two - especially Alice.
The two are left alone to rest, but they pretend to be asleep believing that the two kids standing guard would try to sneak a taste. The village turns into it's real form filled with demons, including the two children, who transform into Hell Cats.
When the player defeats the two Hell Cats, both Yuri and Alice runs to the shrine, where they are approached by the Granny Mayor. The Mayor tells the party that if they want to kill her they will have to catch her first, so, using a special teleporting magic, the party has to run around Zhaoyang.
As they look everywhere to confront her they come across Zhuzhen, A adept who is paid to exocrise demons and monsters.
It is then they return to her house with Zhuzhen explaining that they need to find a Metal Vessel and a Torch to light the house with the Anti Cat Powder to smoke out the cat. After the fight with Felinus she then tells then they won't know the pain of giving birth only to have them devoured, in her dying breath.
Since she is dead the fence protecting the shrine has crumbled and you can go on to fight Yamaraja: Earth.
After the battle Zhuzhen being wise and mysterious he mentions both the powers of Yuri and Alice, and believes that a single thread is pulling them together and walks off.
Enemies Encountered
| Enemies Encountered | |||
| Name | Notes | ||
| Zombie | - | ||
| Green Flyer | - | ||
| Canus | - | ||
| Bosses | |||
| Name | Notes | ||
| Hell Cat | Mini-boss | ||
| Felinus | - | ||
| Yamaraja: Earth | - | ||
Items
Shop
| Wandering Merchant | |||
| Item | Price | Item | Price |
| 320 | 480 | ||
| 320 | 70 | ||
| 2770 | 75 | ||
| 2960 | 90 | ||
| 50 | 100 | ||
| 100 | 100 | ||
| 230 | 480 | ||
Ground
 Angel's Feather - On the left side of the road near the gate
- Bronze Arrowhead - Off to the right of the main street
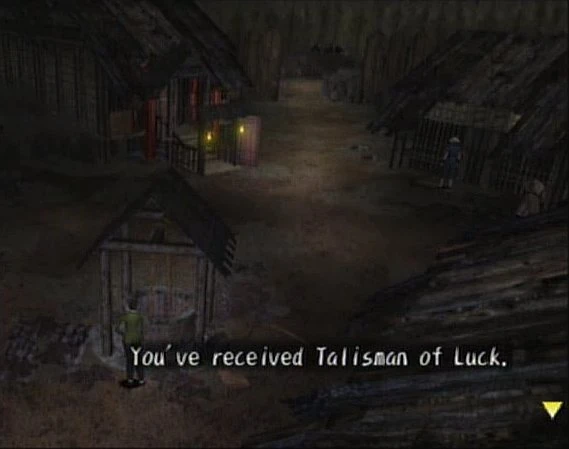
- Talisman of Luck - Far right side of the well area
- Tent - Right side of the well
- Phoenix Tail - Back corner of Granny Mayor's house
- Anti-Cat Powder - Obtained automatically in Granny Mayor's house with Zhuzhen in party
- Metal Bowl - Succeed on a Normal Ring at the middle stall in the main street area
- Torch - The pile of sticks to the right of Meiyuan.
NPC Interaction
- Snake Card - Talk to the Lost Peddler after defeating Yamaraja: Earth